Chapter 3: UEFI BIOS & Soware | 23
B650EGTQ
Chapter 3: UEFI BIOS & Soware
3.1 UEFI BIOS Setup
• The BIOS Setup program can be used to view and change the BIOS sengs for the
computer. The BIOS Setup program is accessed by pressing the <DEL> key aer the
Power-On Self-Test (POST) memory test begins and before the operang system boot
begins.
• For further informaon of seng up the UEFI BIOS, please refer to the UEFI BIOS Manual
on our website.
3.2 BIOS Update
The BIOS can be updated using either of the following ulies:
• BIOSTAR BIO-Flasher: Using this ulity, the BIOS can be updated from a le on a hard
disk, a USB drive (a ash drive or a USB hard drive), or a CD-ROM.
• BIOSTAR BIOS Update Ulity: It enables automated updang while in the Windows
environment. Using this ulity, the BIOS can be updated from a le on a hard disk, a USB
drive (a ash drive or a USB hard drive), or a CD-ROM, or from the le locaon on the
Web.
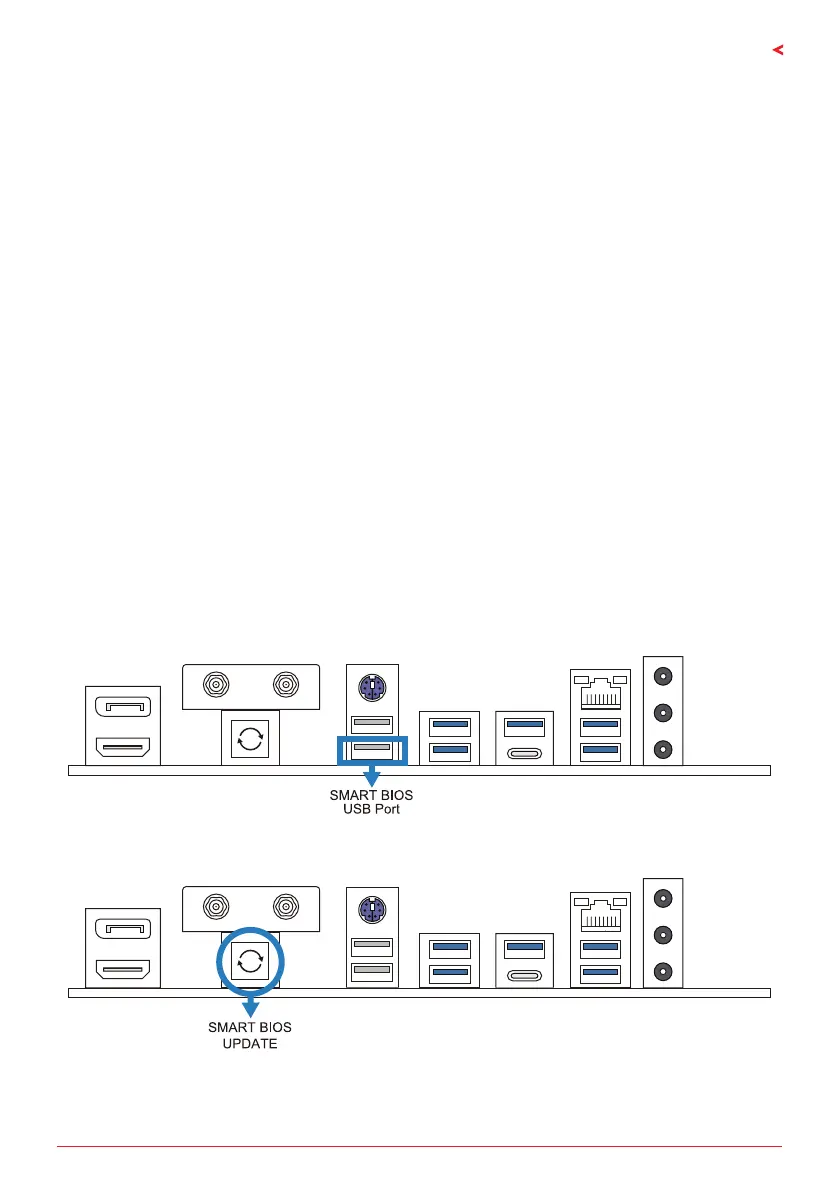
3.3 Motherboard BIOS Update
• Upload the newly update of BIOS into USB drive, change the le name to : CREATIVE.
ROM (type each leer as exactly). For example: B65AQ907.BST to CREATIVE.ROM
• Connect the power into ATX 24PIN at motherboard, turn on AC power (only turn on
Power supply unit, no need for power on)
• Insert USB Drive with the le name: CREATIVE.ROM into programmer(hardware)
• Press BIOS Update buon for 3~5 seconds, LED will start ickering, when LED light is o,
then the burning is completed.
 Loading...