EasyManuals Logo

Biostar G41D3C Setup Manual

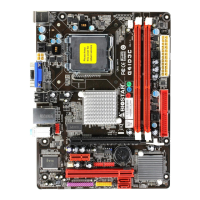
Biostar G41D3C
To Next Page IconTo Next Page
To Previous Page IconTo Previous Page
Page #13 background imageLoading...
Page #13 background image
G41D3C
11
ATXPWR1: ATX Power Source Connector
This connector allows user to connect 24-pin power connector on the ATX
power supply.
1
12
13
24
Pin Assignment Pin Assignment
13 +3.3V 1 +3.3V
14 -12V 2 +3.3V
15 Ground 3 Ground
16 PS_ON 4 +5V
17 Ground 5 Ground
18 Ground 6 +5V
19 Ground 7 Ground
20 NC 8 PW_OK
21 +5V 9 Standby Voltage+5V
22 +5V 10 +12V
23 +5V 11 +12V
24 Ground 12 +3.3V
ATXPWR2: ATX Power Source Connector
This connector provides +12V to CPU power circuit.
Pin
Assignment
1 +12V
2 +12V
3 Ground
1
23
4
4 Ground
Note:
Before power on the system, please make sure that both ATXPWR1 and ATXPWR2
connectors have been plugged-in.
Other manuals for Biostar G41D3C

Questions and Answers:

Question and Answer IconNeed help?

Do you have a question about the Biostar G41D3C and is the answer not in the manual?

Biostar G41D3C Specifications

General IconGeneral
Form FactorMicro ATX
ChipsetIntel G41
SocketLGA 775
Memory TypeDDR3
Memory Slots2
Maximum Memory8 GB
Integrated GraphicsIntel GMA X4500
Storage Interface4 x SATA 3Gb/s
Video Outputs1 x VGA
AudioRealtek ALC662 6-Channel HD Audio
IDE Ports1 x IDE
USB Ports8 x USB 2.0
LANRealtek RTL8111E
Expansion Slots1 x PCIe x16, 1 x PCIe x1, 2 x PCI

Related product manuals