EasyManua.ls Logo

Biostar P4M900 User Manual

Biostar P4M900
33 pages
To Next Page IconTo Next Page
Page #1 background imageLoading...
Page #1 background image
P4M900
Copyright
All rights are reserved. No part of this publication may be reproduced, transmitted, transcribed,
stored in a retrieval system or translated into any language or computer language, in any form
or by any means, electronic, mechanical, magnetic, optical, chemical, manual or otherwise,
without the prior written permission of the company. Brands and product names are
trademarks or registered trademarks of their respective companies.
The vendor makes no representations or warranties with respect to the contents herein and
especially disclaim any implied warranties of merchantability or fitness for any purpose.
Further the vendor reserves the right to revise this publication and to make changes to the
contents herein without obligation to notify any party beforehand. Duplication of this
publication, in part or in whole, is not allowed without first obtaining the vendor’s approval in
writing.
Trademark
All the trademarks or brands in this document are registered by their respective owner.
Disclaimer
We make no warranty of any kind with regard to the content of this user’s manual. The content
is subject to change without notice and we will not be responsible for any mistakes found in
this user’s manual. All the brand and product names are trademarks of their respective
companies.
FCC Compliance Statement
This equipment has been tested and found to comply with the limits of a Class B digital device,
pursuant to Part 15 of the FCC Rules. These limits are designed to provide reasonable
protection against harmful interference in a residential installation. This equipment generates,
uses and can radiate radio frequency energy and, if not installed and used in accordance with
the instructions, may cause harmful interference to radio communications. Operation of this
equipment in a residential area is likely to cause harmful interference in which case the user
will be required to correct the interference at his own expense. However, there is no guarantee
that interference will not occur in a particular installation.
CE Mark
The device is in accordance with 89/336 ECC-ENC Directive.
V
er: EG100
Question and Answer IconNeed help?

Do you have a question about the Biostar P4M900 and is the answer not in the manual?

Biostar P4M900 Specifications

General IconGeneral
BrandBiostar
ModelP4M900
CategoryMotherboard
LanguageEnglish

Summary

Chapter 1. Getting Started

Introduction

Overview of the P4M900 mainboard and its chipset.

Specifications

Detailed technical specifications of the P4M900 mainboard components.

Configuration Layout

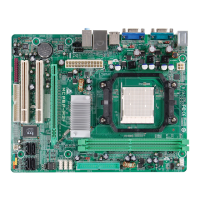
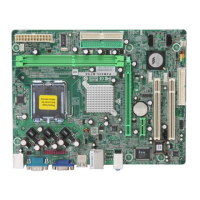
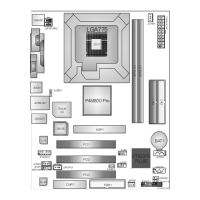
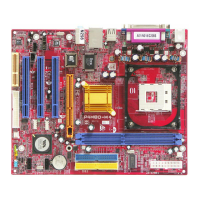
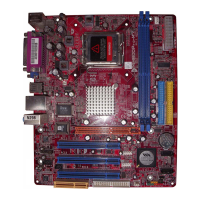
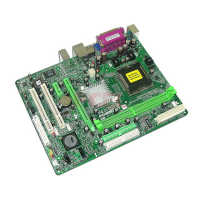
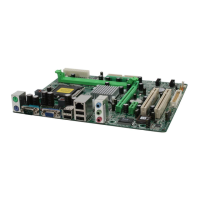
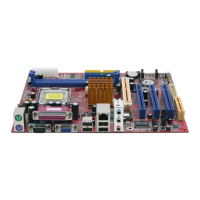
Visual layout and component identification on the P4M900 mainboard.

Hardware Installation

CPU Processor Installation

Procedure for installing the CPU into the Socket 775.

FAN Headers and Memory Installation

Connecting cooling fans and installing RAM modules into DIMM sockets.

Back Panel Ports

Description of rear I/O ports like PS/2, VGA, USB, and LAN.

Front Panel Headers

Explanation of front panel headers for power, LEDs, switches, and USB.

Internal Connectors

Information on FDD, IDE, and SATA drive connectors.

Jumpers and CMOS Reset

Configuration via jumpers and clearing CMOS settings.

Expansion Slots

Description of PCI Express and PCI slots for expansion cards.

Power Supply Connections

Guide to connecting ATX power supply to the mainboard.

Chapter 2. BIOS Setup

Introduction and Navigation

Overview of the BIOS setup program and key navigation controls.

Main Menu Options

Detailed descriptions of all categories available in the BIOS Main Menu.

Chapter 3: Software Setup

Software List and Installation

Guide to identifying and installing necessary drivers and software.

Chapter 4: Troubleshooting

Appendix I: Super 5.1 Channel Setup

Audio Channel Configuration

Steps to configure the 5.1 surround sound audio effect.

Appendix II: RAID 0/ 1 Setup

Introduction to RAID

Overview of RAID technology and its benefits for data management.

Disk Striping (RAID 0)

Details on RAID 0 configuration for performance enhancement.

Disk Mirroring (RAID 1)

Details on RAID 1 configuration for data redundancy and fault tolerance.

Related product manuals