12 | Chapter 2: Hardware Installaon
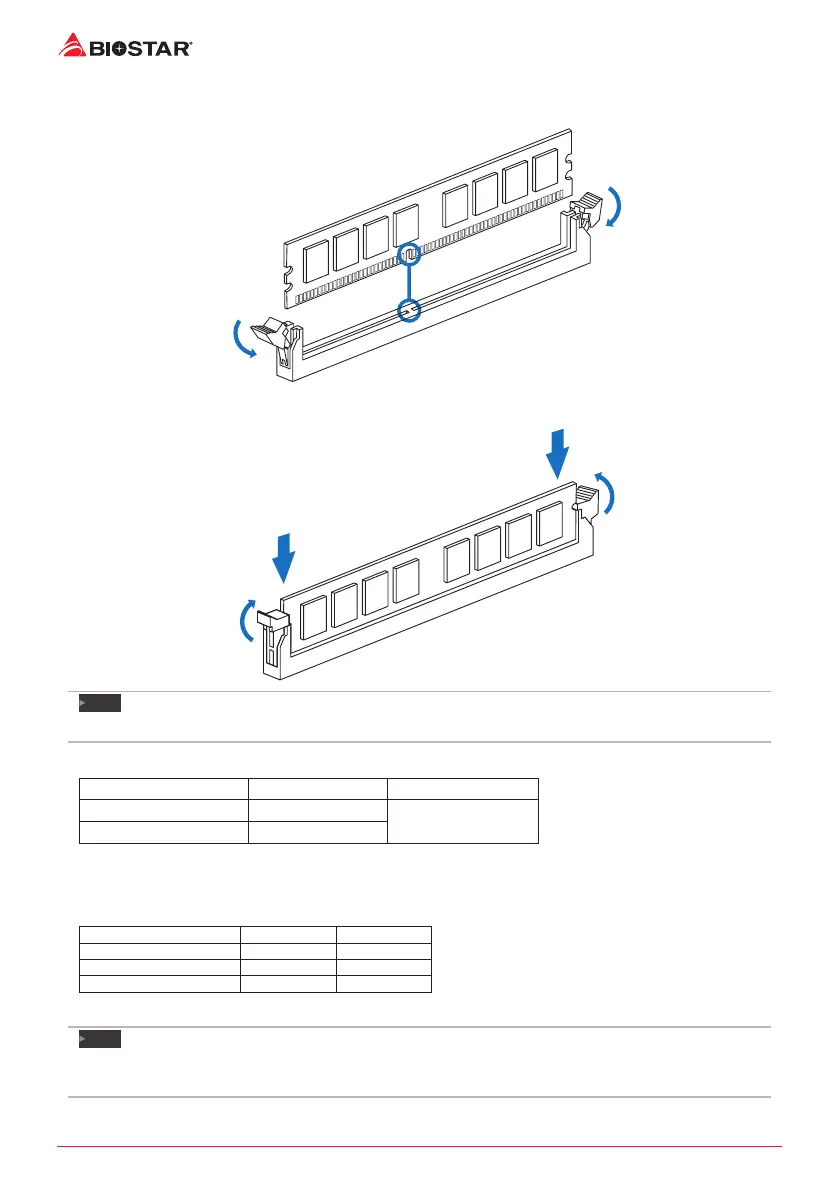
Step 1: Unlock a DIMM slot by pressing the retaining clips outward. Align a DIMM on the slot
such that the notch on the DIMM matches the break on the slot.
Step 2: Insert the DIMM vercally and rmly into the slot unl the retaining clips snap back in
place and the DIMM is properly seated.
Note
»
IftheDIMMdoesnotgoinsmoothly,donotforceit.Pullitallthewayoutandtryagain.
Memory Capacity
DIMM Socket Locaon DDR4 Module Total Memory Size
DIMMA1 4GB/8GB/16GB
Max is 32GB.
DIMMB1 4GB/8GB/16GB
Dual Channel Memory Installaon
Please refer to the following requirements to acvate Dual Channel funcon:
Install memory module of the same density in pairs, shown in the table.
Dual Channel Status DIMMA1 DIMMB1
Disabled O X
Disabled X O
Enabled O O
(O means memory installed, X means memory not installed.)
Note
»
Wheninstallingmorethanonememorymodule,werecommendtousethesamebrandand
capacitymemoryonthismotherboard.