14 | Chapter 2: Hardware Installaon
Install an Expansion Card
You can install your expansion card by following steps:
• Read the related expansion card’s instrucon document before install the expansion
card into the computer.
• Remove your computer’s chassis cover, screws and slot bracket from the computer.
• Place a card in the expansion slot and press down on the card unl it is completely
seated in the slot.
• Secure the card’s metal bracket to the chassis back panel with a screw.
• Replace your computer’s chassis cover.
• Power on the computer, if necessary, change BIOS sengs for the expansion card.
• Install related driver for the expansion card.
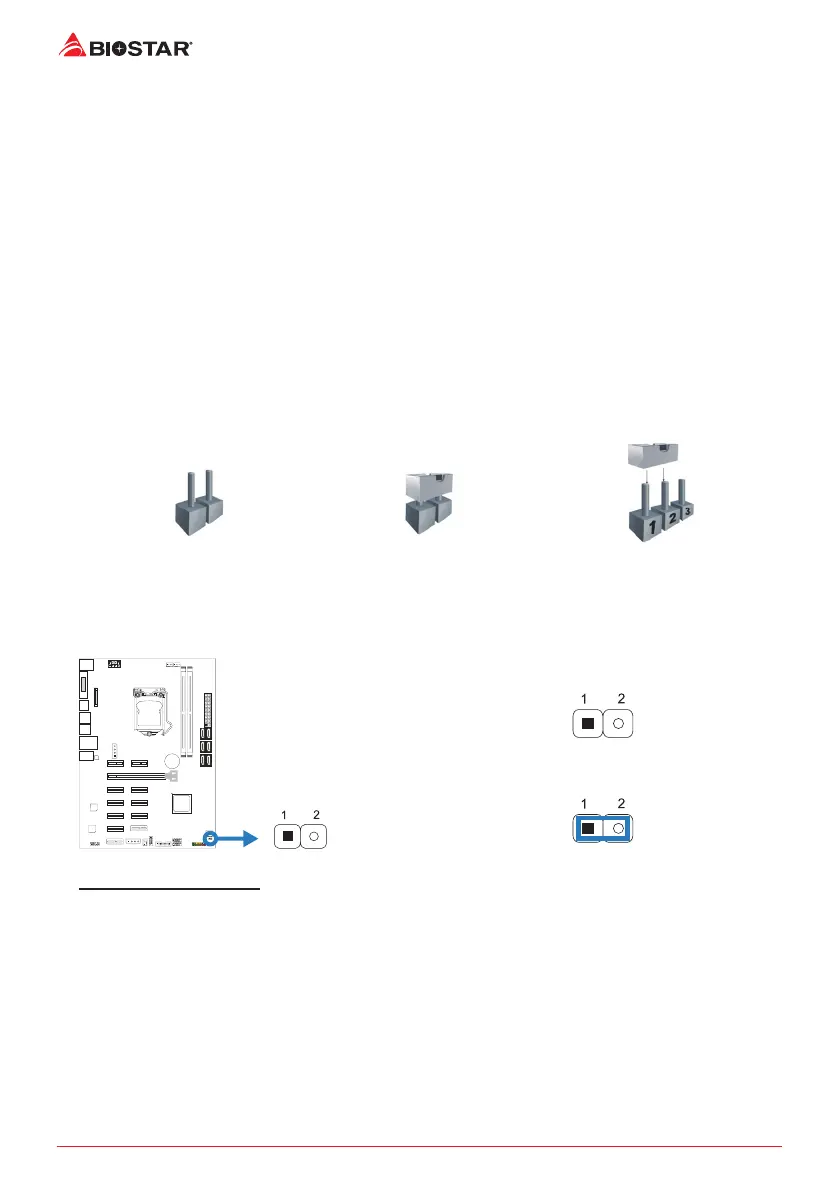
2.6 Jumper & Switch Setting
The illustraon shows how to set up jumpers. When the jumper cap is placed on pins, the
jumper is “close”, if not, that means the jumper is “open”.
Pin opened Pin closed Pin 1-2 closed
JCMOS1: Clear CMOS Jumper
The jumper allows users to restore the BIOS safe seng and the CMOS data. Please carefully
follow the procedures to avoid damaging the motherboard.
Pin 1-2 Open: Normal Operaon (Default)
Pin 1-2 Close: Clear CMOS data
Clear CMOS Procedures:
1. Remove AC power line.
2. Set the jumper to “Pin 1-2 close”, you can use a metal object like a screwdriver to touch
the two pins.
3. Wait for ve seconds.
4. Aer clearing the CMOS values, be sure the jumper is “Pin 1-2 open”.
5. Power on the AC.
6. Load Opmal Defaults and save sengs in CMOS.