BLACKSTONEPRODUCTS.COM
ENGLISH
| OWNER’S MANUALUSING YOUR BLACKSTONE
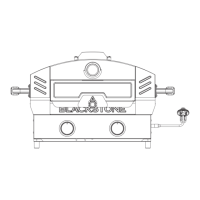
❸
❷
❶
❹
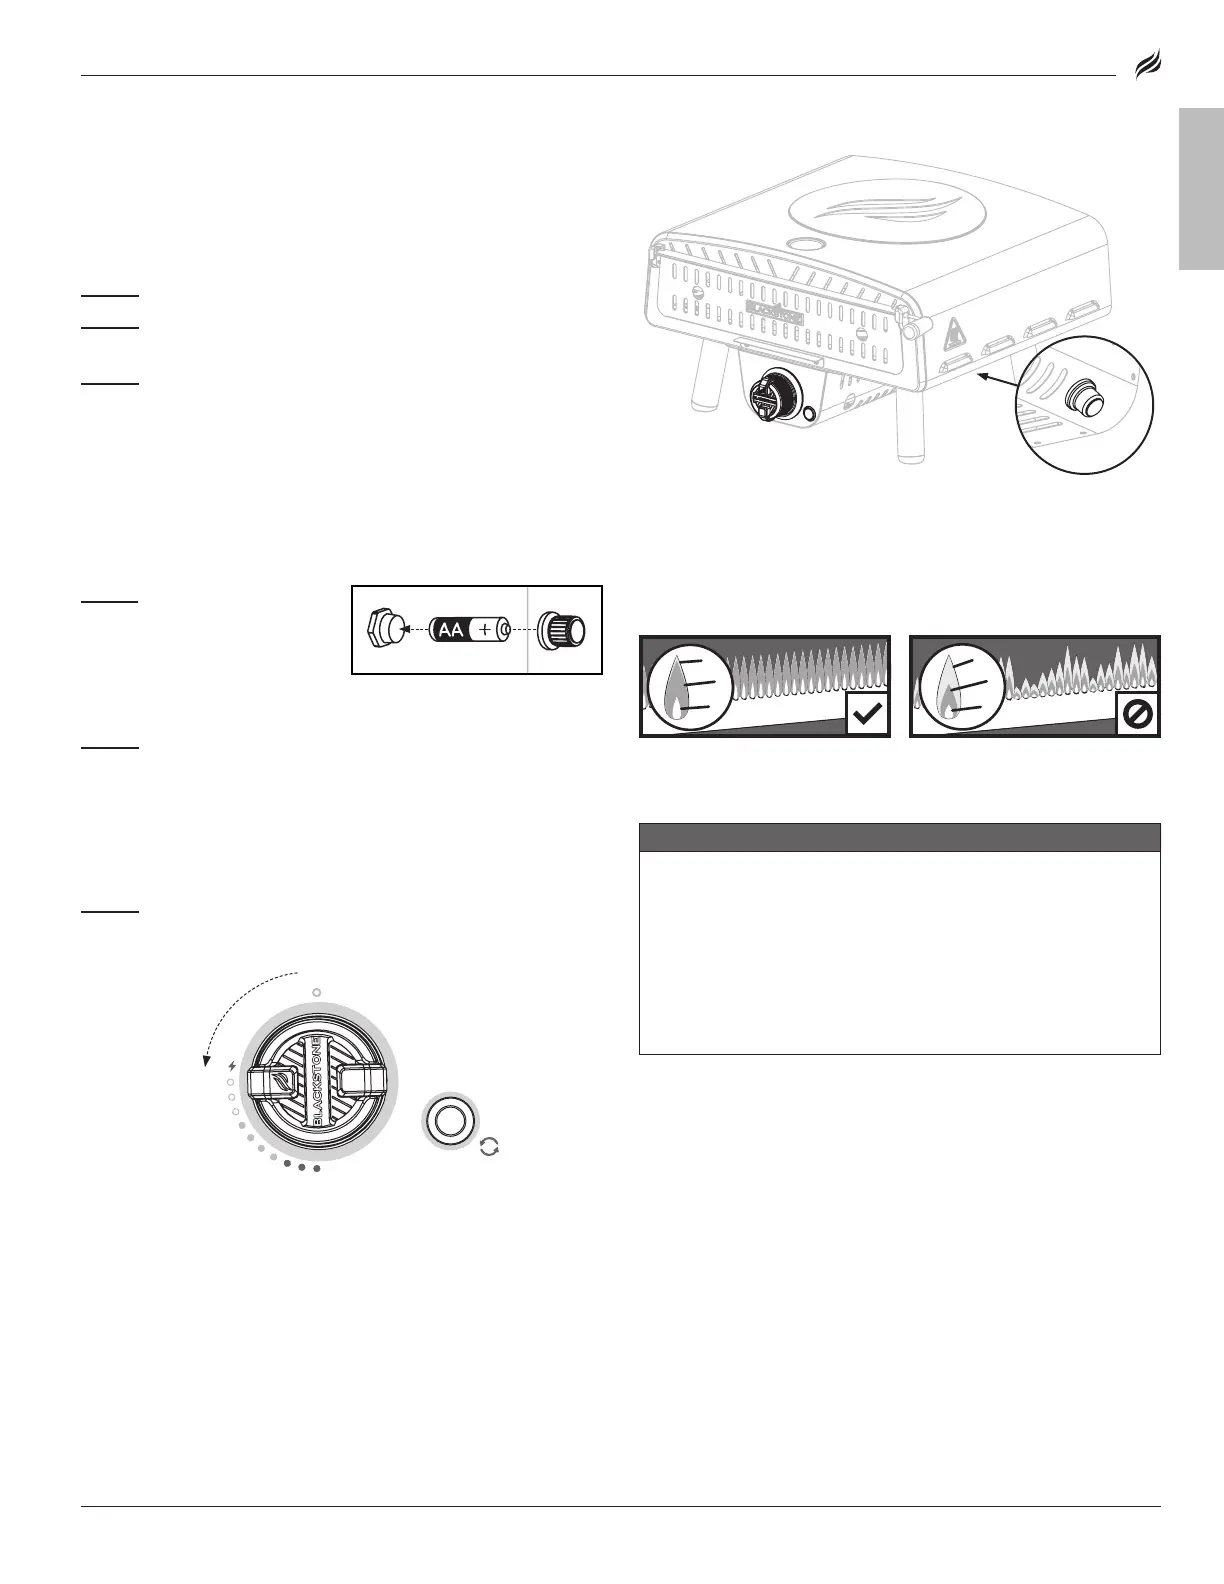
2. THERMOCOUPLE SURE-START IGNITION
⚠
Remove the oven door. DO NOT use the oven door at any time
while the oven is in use.
2. THERMOCOUPLE SURE-START IGNITION
⚠
Keep the oven door closed as much as possible to reach and
maintain temperature.
STEP 01
Insert one (1) AA
battery (not included) under the
battery cap.
Screw the cap into place over the
positive terminal.
STEP 02
❶
Turn the Pizza Oven control knob to OFF.
❷
Turn on the motor.
❸
Push in the control knob and turn counterclockwise a quarter
turn to LOW. Hold in for 10~20 seconds until thermocouple heats
up. You should hear the igniter clicking the entire time. (When you
release the knob, the oven should remain lit.)
STEP 03
Once the flame is consistent, adjust to desired
temperature
❹.
STEP 03
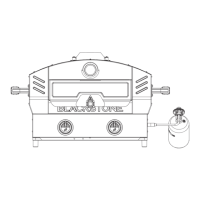
❶❶
Turn the Pizza Oven control knob to OFF.
❷❷
Turn on the
motor.
❸❸
Push in the control knob and turn counterclockwise a
quarter turn to LOW. Hold in for 10~20 seconds until thermocouple
heats up. You should hear the igniter clicking the entire time. (When
you release the knob, the oven should remain lit.) Once the flame is
consistent, adjust to desired temperature
❹.❹.
For precision control of your temperature, use the control knob and the red For precision control of your temperature, use the control knob and the red
knob on the adjustable regulator to control the temperature of your Pizza Oven. knob on the adjustable regulator to control the temperature of your Pizza Oven.
Before first use, run the oven for 15-20 minutes on HIGH to burn o manufac-
Before first use, run the oven for 15-20 minutes on HIGH to burn o manufac-
turing remnants.
STEP 01
Ensure there is one (1)
AA battery (not included) under
the battery cap.
Clean the battery and appliance
Clean the battery and appliance
contacts prior to battery installation.
contacts prior to battery installation.
Clean the battery and appliance Clean the battery and appliance
contacts prior to battery installation.contacts prior to battery installation.
STEP 02
Turn gas ON at the LPG
cylinder by slowly turning the
OPD hand wheel counterclock-
wise 1 to 3 turns.
Tighten the red knob on the
regulator clockwise to its HIGH
position, then loosen 1 and a
half turns.
tightentighten
1 to 3 turns1 to 3 turns
❶❶
Push the control knob in to
start gas flowing.
❷❷
Turn the control knob
counter-clockwise to activate
the starter.
❸❸
Adjust the temperature to
desired level.
2. PIEZO-ELECTRIC GRIDDLE IGNITION
IGNITION INSTRUCTIONS
1. CHECK VALVES
⚠
Ensure gas is o at the supply shut o valve before checking
appliance valves.
STEP 01
Turn all knobs to the
❶
OFF position.
STEP 02
Push in knob and release. Knob should spring back.
If knobs
DO NOT
spring back, replace valve assembly before using appliance.
spring back, replace valve assembly before using appliance.
STEP 03
Rotate knob to LOW then turn back to OFF. Knob should
turn smoothly.
HEALTHY FLAME PATTERN YELLOw OR IRREGULAR
3. ALwAYS CHECK BURNER FLAME BEFORE USE.
Light burners and look below the cooking surface to view burners.
When knob is at HIGH, flames should be larger than when knob
is at LOW.
3. ALwAYS CHECK BURNER FLAME BEFORE USE.
Light burner and look below the turntable to view burner. When knob
is at HIGH, flames should be larger than when knob is at LOW.
❶
❶
Flickers of yellow.
❷
Dark blue.
❸
Vibrant blue.
If flames are yellow or irregular,
If flames are yellow or irregular,
please reference the Troubleshooting
please reference the Troubleshooting
chapter.
HEALTHY FLAME PATTERN YELLOw OR IRREGULAR
❶❶
Flickers of yellow color. Flickers of yellow color.
❷❷
Dark blue color. Dark blue color.
❸❸
Vibrant blue. Vibrant blue.
If there is a sudden drop or low If there is a sudden drop or low
flame issue, please reference the flame issue, please reference the
Troubleshooting chapter. Troubleshooting chapter.
⚠ WARNING
If burner does not ignite with open gas supply valve, gas
will continue to flow out of burner and could accidentally/
inadvertently ignite with risk of injury.
If ignition does not occur in 5 seconds:
1. Turn the burner control knob OFF.
2. Wait 5 minutes.
3. Repeat the lighting procedure.
If burner does not ignite, please reference the Troubleshooting chapter.
If burner does not ignite, please reference the Troubleshooting chapter.
⚠ WARNING
If burner does not ignite with open gas supply valve, gas
will continue to flow out of burner and could accidentally/
inadvertently ignite with risk of injury.
If ignition does not occur in 5 seconds:
1. Turn the burner control knob OFF.
2. Wait 5 minutes.
3. Repeat the lighting procedure.
If burner does not ignite, please reference the Troubleshooting chapter. If burner does not ignite, please reference the Troubleshooting chapter.
MODEL: 2379