Using Camera Tally
input and a camera to the SDI source and do very professional live presentation shows for your
audience, simply by switching using the 1 and 2 buttons. You can also confirm the current input,
the video preview and audio levels on the LCD screen.
When switching a live broadcast using Blackmagic WebPresenter with a Teranex Mini Smart
Panel attached, press the 1 and2buttons to switch between the SDI and HDMI inputs
Using Camera Tally
Blackmagic Design studio cameras and ATEM switchers include a tally feature where the tally
information is sent from the switcher to the camera via the program return feed from the
switcher to the camera. Your Blackmagic Web Presenter also includes this tally feature so you
can see which camera is “on air” when you are using the switcher feature on the web presenter.
Using tally is quite simple and all you need to do is connect the SDI output of a Blackmagic
Design Studio Camera to your web presenter as an SDI video source and then connect the
program output of the web presenter back to the camera progam SDI input. Now when you
select the program button on the camera you can see the web presenter’s program video on the
camera. But what’s even more exciting is the tally information is now being sent to the camera.
The SDI video input is tally “camera 1” and the HDMI input is tagged as “camera 2”. So what this
means is that in your camera’s settings, you will need to set the camera number. In this case we
are using the SDI input for the camera, then the camera should be set to camera 1. Once this
has been set, and you press the 1 button on the front panel of the web presenter, you should
see the tally illuminate on the camera.
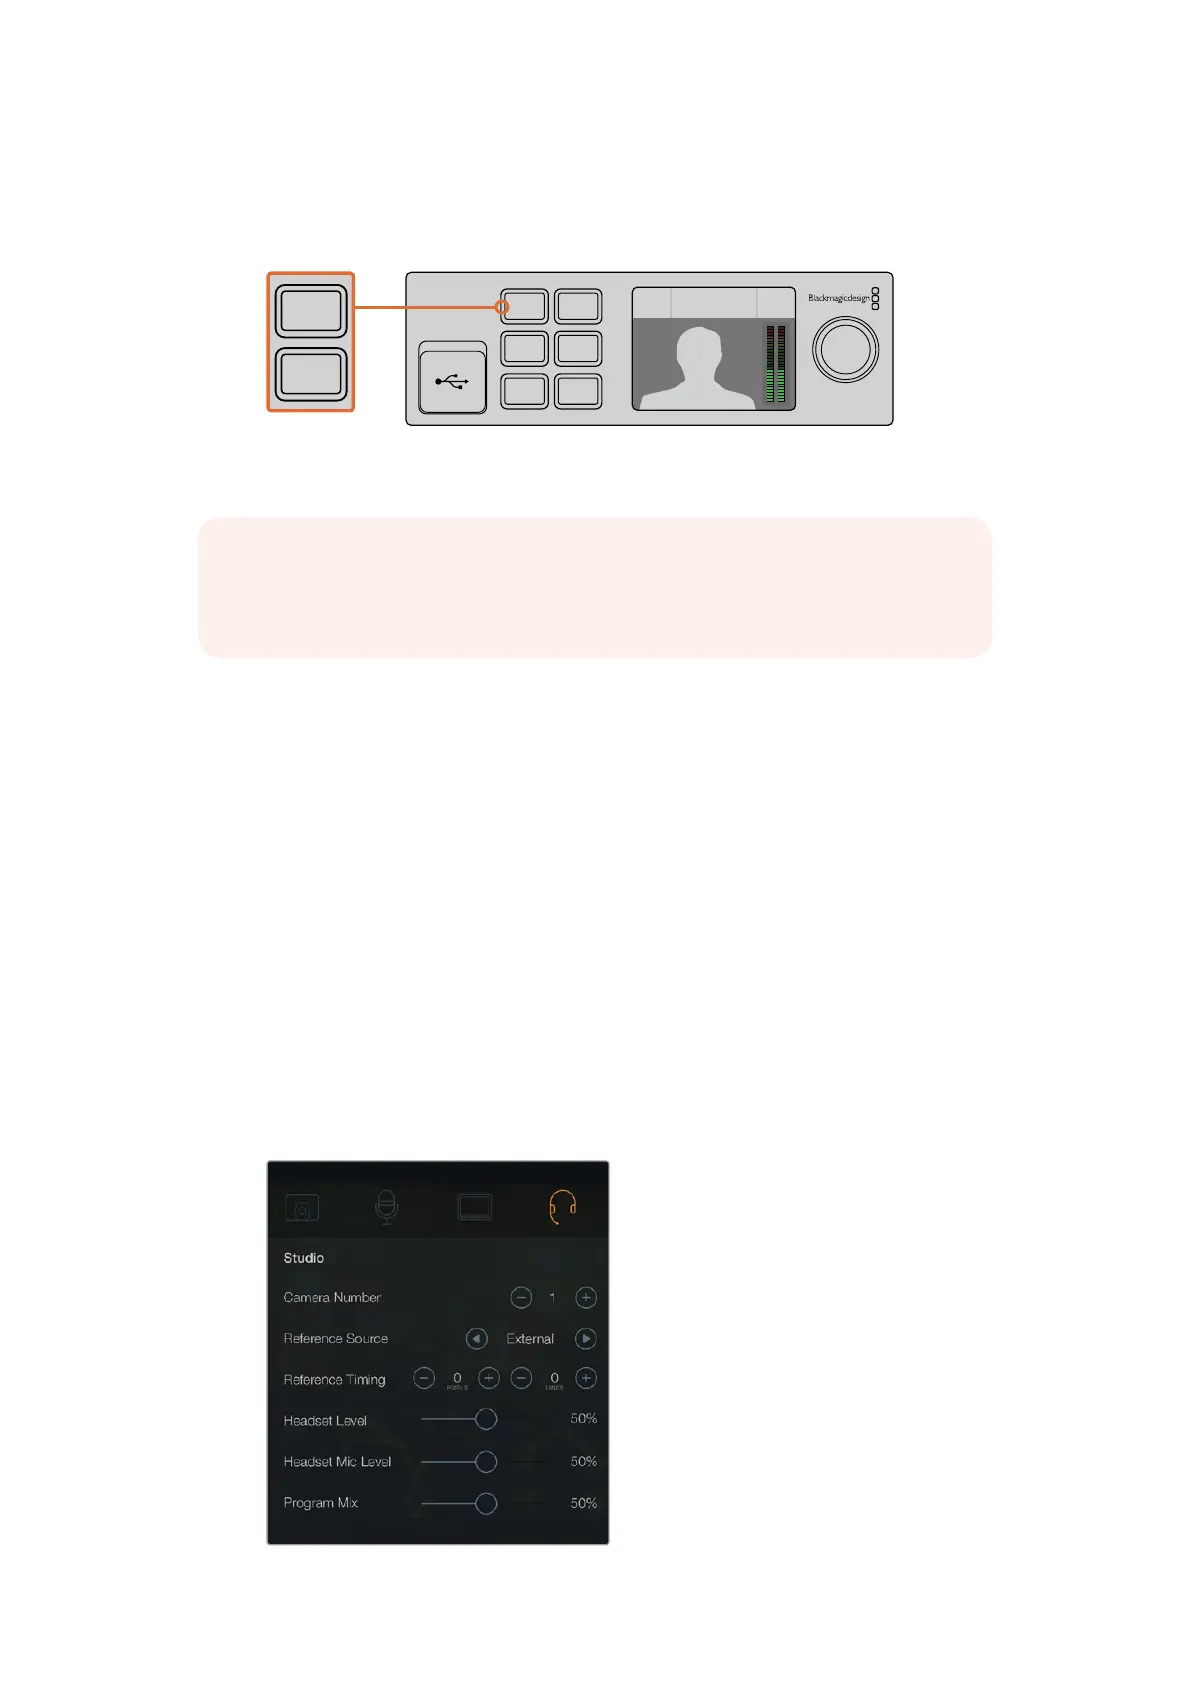
Set the camera number to ‘1’ for Blackmagic Studio Camera
connected via SDI in the ‘studio’ tab of the LCD menu
1 MENU
2 VIDEO
SET AUDIO
Video Format
525i59.94 NTSC
Source
HDMI
USB
30 fps
1 MENU
2 VIDEO
SET AUDIO
Video Format
525i59.94 NTSC
Source
HDMI
USB
30 fps
NOTE The default transition is a half second mix, however, if you have a Teranex Mini
Smart Panel attached, you can choose a different duration or transition type in the LCD
menu Transition settings. For more information, refer to the ‘Settings’ section in this manual.
19