CB9A-020 page 17
MAINTENANCE
VALVE REPLACEMENT continued
1. Remove the valve cap (or unloader assembly) and O-ring from each valve.
2. Remove the valve hold down screw with a spanner wrench (such as Blackmer PN 790535).
3. Valve Removal and Disassembly
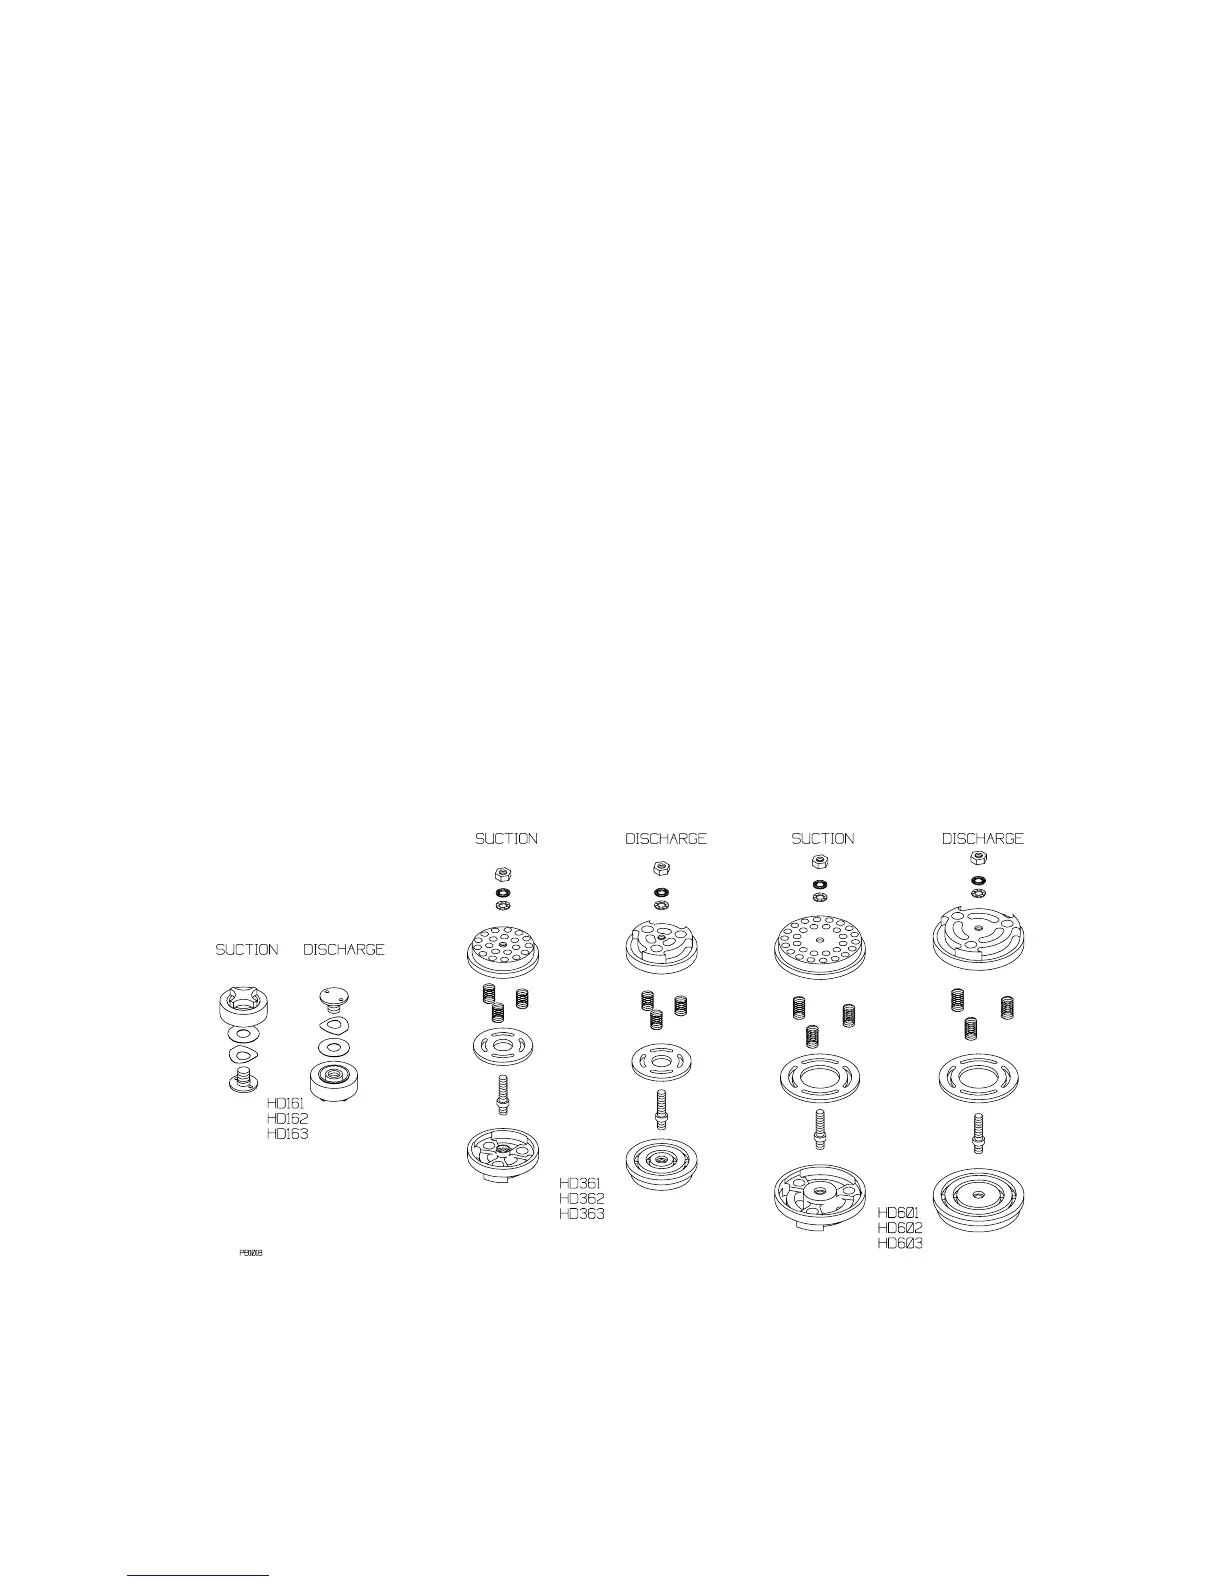
Models HD161, HD162 & HD163
a. Remove the valve cage (and unloader plunger, actuator, and spring).
b. Remove the valve assembly and the valve gasket.
c. Inspect the valve for wear or breakage.
d. Valve Repair
1 Unscrew the valve halves and remove the spring and plate.
2 Inspect and replace worn components.
3 Reassemble valves as shown below and tighten the valve halves together.
Models HD361, HD362, HD363, HD601, HD602 & HD603
a. Remove the valve cover plate capscrews then lift off the cover plate and O-ring.
b. Remove the valve cage (and unloader plunger).
c. Remove the valve assembly and the valve gasket.
d. Inspect the valve for wear or breakage.
e. Valve Repair
1 Remove hex nut from valve (after removing the unloader actuator retaining ring, the actuator, spring,
and post.)
2 Separate the valve halves and remove springs and plate.
3 Inspect and replace worn components.
4 Reassemble valves as shown in the drawing and tighten the valve assembly nut according to the
Bolt Torque Table.
5 (Reassemble the unloader post, spring, actuator and retainer ring.)
Typical Valve Assemblies
 Loading...