ENGLISH
7
INTENDED USE
This string trimmer is designed for residential trimming
applications. DO NOT use under wet conditions or in
presence of flammable liquids or gases.
This string trimmer is a residential appliance. DO NOT let
children come into contact with the tool. Supervision is
required when inexperienced operators use this appliance.
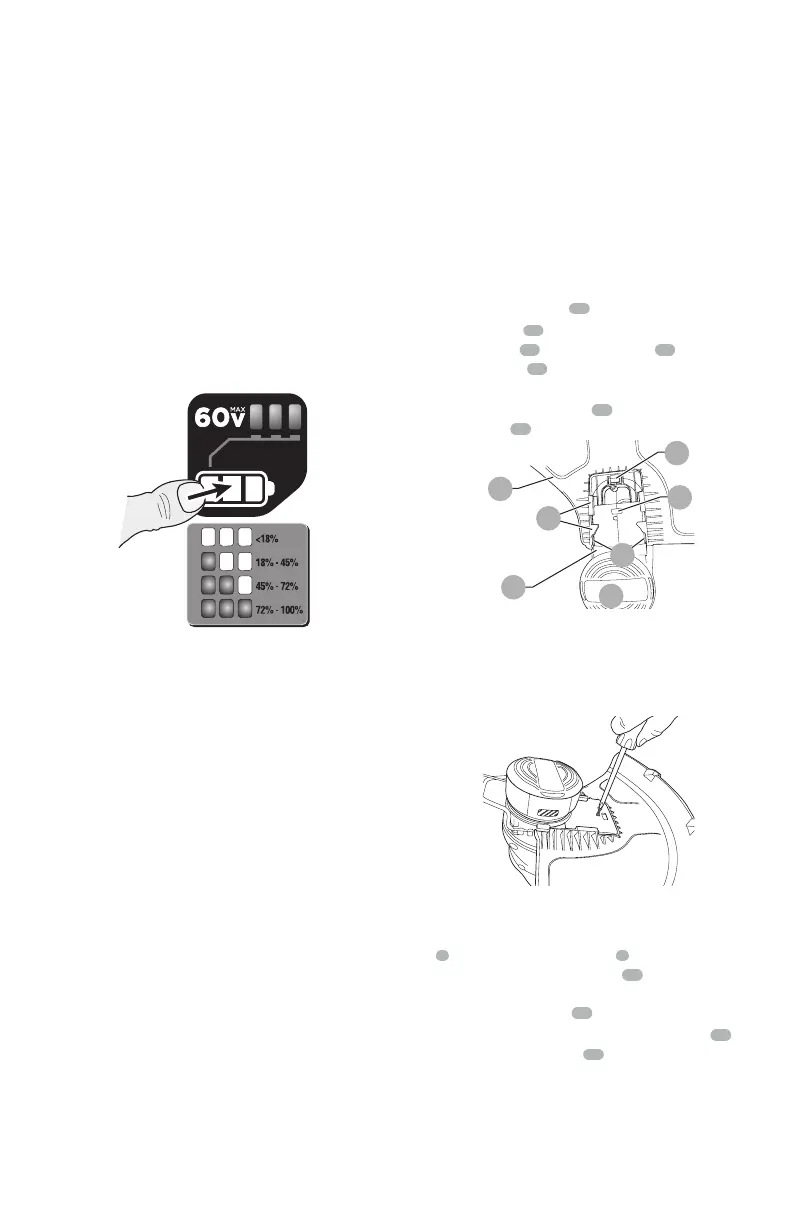
State of charge indicator
The battery is equipped with a state of charge indicator.
This can be used to display the current level of charge in the
battery during use and during charging. It does not indicate
tool functionality and is subject to variation based on product
components, temperature and end-user application.
Checking state of charge during use:
• Press the state of charge indicator button.
• The three LEDs will illuminate, indicating the percent of
charge in the battery. See chart in figure B.
• If LED light does not illuminate, charge battery.
Figure B
SAVE THESE INSTRUCTIONS FOR
FUTURE USE
COMPONENTS (FIG. A)
WARNING: Never modify the power
tool or any part of it. Damage or personal injury
couldresult.
Refer to Figure A at the beginning of this manual for a
complete list ofcomponents.
ASSEMBLY AND ADJUSTMENTS
WARNING: To reduce the risk of
serious personal injury, turn unit off and remove
the battery pack before making any adjustments
or removing/installing attachments or
accessories. An accidental start-up can causeinjury.
Assembly tools required
• Phillips Screwdriver (not supplied)
• Hex wrench (supplied)
Installing the guard
WARNING: NEVER OPERATE appliance
WITHOUT GUARD FIRMLY IN PLACE. The guard
must always be properly attached on the appliance to
protect the user.
1. Remove the screw from the guard.
2. Turn the trimmer upside down so that you are looking
down at the spool cap
16
.
3. Turn the guard
13
upside down and slide it fully onto the
trimmer head
11
. Make sure the tabs
17
on the guard
engage the ribs
18
on the trimmer head as shown.
4. Continue to slide the guard on until you hear it “snap”
into place. The locking tab
19
should snap into the
housing slot
20
(figure C).
Figure C
16
11
13
17
18
19
20
5. Using a phillips screwdriver, insert the guard screw and
tighten securely as shown in figure D to complete the
guard assembly.
6. Once the guard is installed, remove the covering from
the line cut-off blade, located on the edge of the guard
Figure D
Assembling the Pole
1. To assemble the pole, line up the upper trimmer pole
7
and the lower trimmer pole
8
as shown in figure E.
Press down the latching button
21
and slide the upper
pole into the lower pole. Ensure the latching button
engages the latch hole
22
.
2. Secure the poles by tightening the middle bolt
23
with
the supplied hex wrench
24
as shown in figure F.
switches to the pack charging mode. This feature ensures
maximum battery pack life.
A cold battery pack will charge at a slower rate than a warm
battery pack. The battery pack will charge at that slower rate
throughout the entire charging cycle and will not return to
maximum charge rate even if the battery pack warms.