Lit. No. B64118, Rev. 03 31 March 1, 2009
TESTING YOUR SNOWPLOW
1. Fill the hydraulic pump reservoir with BLIZZARD
®
Snowplow Rapid Action Hydraulic Fluid until it
is approximately 3/4" from the top of the tank.
Replace the cap on the reservoir. Remove the
weather caps from each of the snowplow and
vehicle harnesses and connect the plugs. Start
the vehicle and turn the power switch on the
control station in the cab to the "ON" position.
2. To raise the POWER HITCH arm on the
snowplow, turn the power switch on the control
station to the "UP" or "ON" position. Push and
hold the toggle switch on the A-frame upward
into the "CONNECT" position. Notice the action
of the fl uid in the reservoir. By activating the
initial hydraulic function, the fl uid begins to fi ll the
system. Push and hold the toggle switch in the
"DISCONNECT" position, the POWER HITCH
arm will lower. Refi ll the reservoir until the fl uid is
approximately 3/4" from the top of the tank.
WARNING
You can die or be seriously injured. Keep
hands and feet away from hitch mechanism
and snowplow blade when operating the
POWER HITCH™ arm. The action of the arm
moves the snowplow toward the vehicle and
into position for proper attachment.
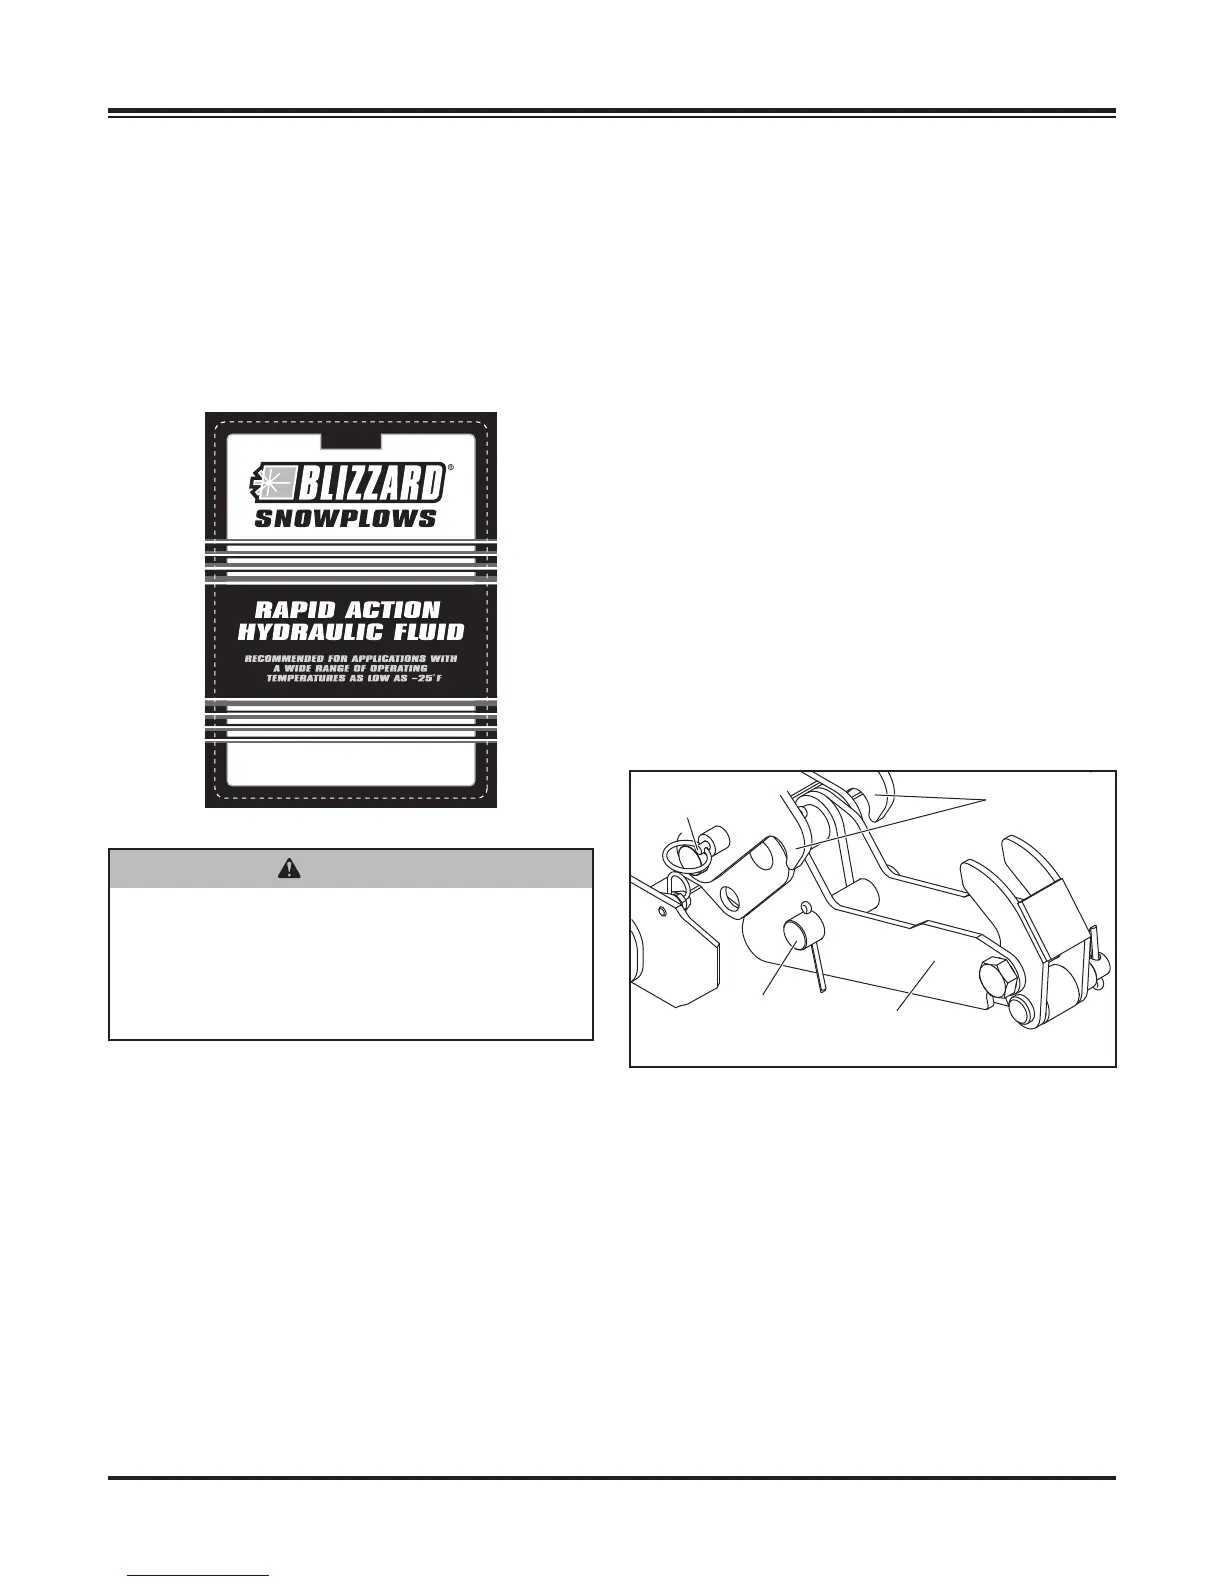
3. Align the POWER HITCH arm on the A-frame
below the pushbeam, with the receiver plates in
line with the receiver plates on the undercarriage.
Pull out the A-frame latch pin and rotate the
A-frame latch clockwise until the latch is resting
on the draw pin. Move the snowplow in position by
activating the POWER HITCH connect switch and
release.
The POWER HITCH arm will rise until it hits the
pushbeam and the draw latch fi ngers will pull the
snowplow into the vehicle. The receiver plates
on the snowplow and vehicle are now positively
aligned. Insert the two hitch pins through the
mounting holes on the A-frame and secure each
with one hair pin cotter.
After the two hitch pins are inserted through the
A-frame, lower the POWER HITCH arm using the
toggle switch on the A-frame. Rotate the A-frame
latch counterclockwise until the A-frame latch
lock pin can be reinserted. Fully reinserting the
A-frame latch lock pin will lock the A-frame latch in
place for transport or plowing snow. (See below.)
4. Return to the interior of the vehicle. Test the
remaining functions of the snowplow. The
system power on the control should be in the
"ON" position. Raise the snowplow to its maximum
height by pulling the joystick back (or down) or
pressing the U button on the touchpad. Angle the
snowplow to the left by moving the joystick toward
the "L" (left angle) on the label or pressing the L
button on the touchpad. If the snowplow function
(.946 LITERS) NET 32 FL. OUNCES
1 U.S. QUART
29544
PN B63070PN B63070
PN B63070PN B63070
PN B63070PN B63070
A-Frame
Latch Pin
Draw Latch
(in latched position)
Draw Pin
A-Frame
Latch