16
INSTALLING THE POOL WALL
• DO NOT ATTEMPT WALL INSTALLATION ON A WINDY DAY!
• CAUTION: It is advisable to wear protective gloves when handling the metal wall.
• CAUTION: Have 2 or 3 additional people for the installation of the pool wall into the bottom rail.
This is necessary to hold the pool wall upright until the wall ends are connected and the bolts have
been inserted in the bolt holes.
• HELPFUL HINT: Use tent stakes, string, and “S” hooks stretched out from several points around
the pool to hold up the wall until the liner installation is complete and the pool is partially lled
with water.
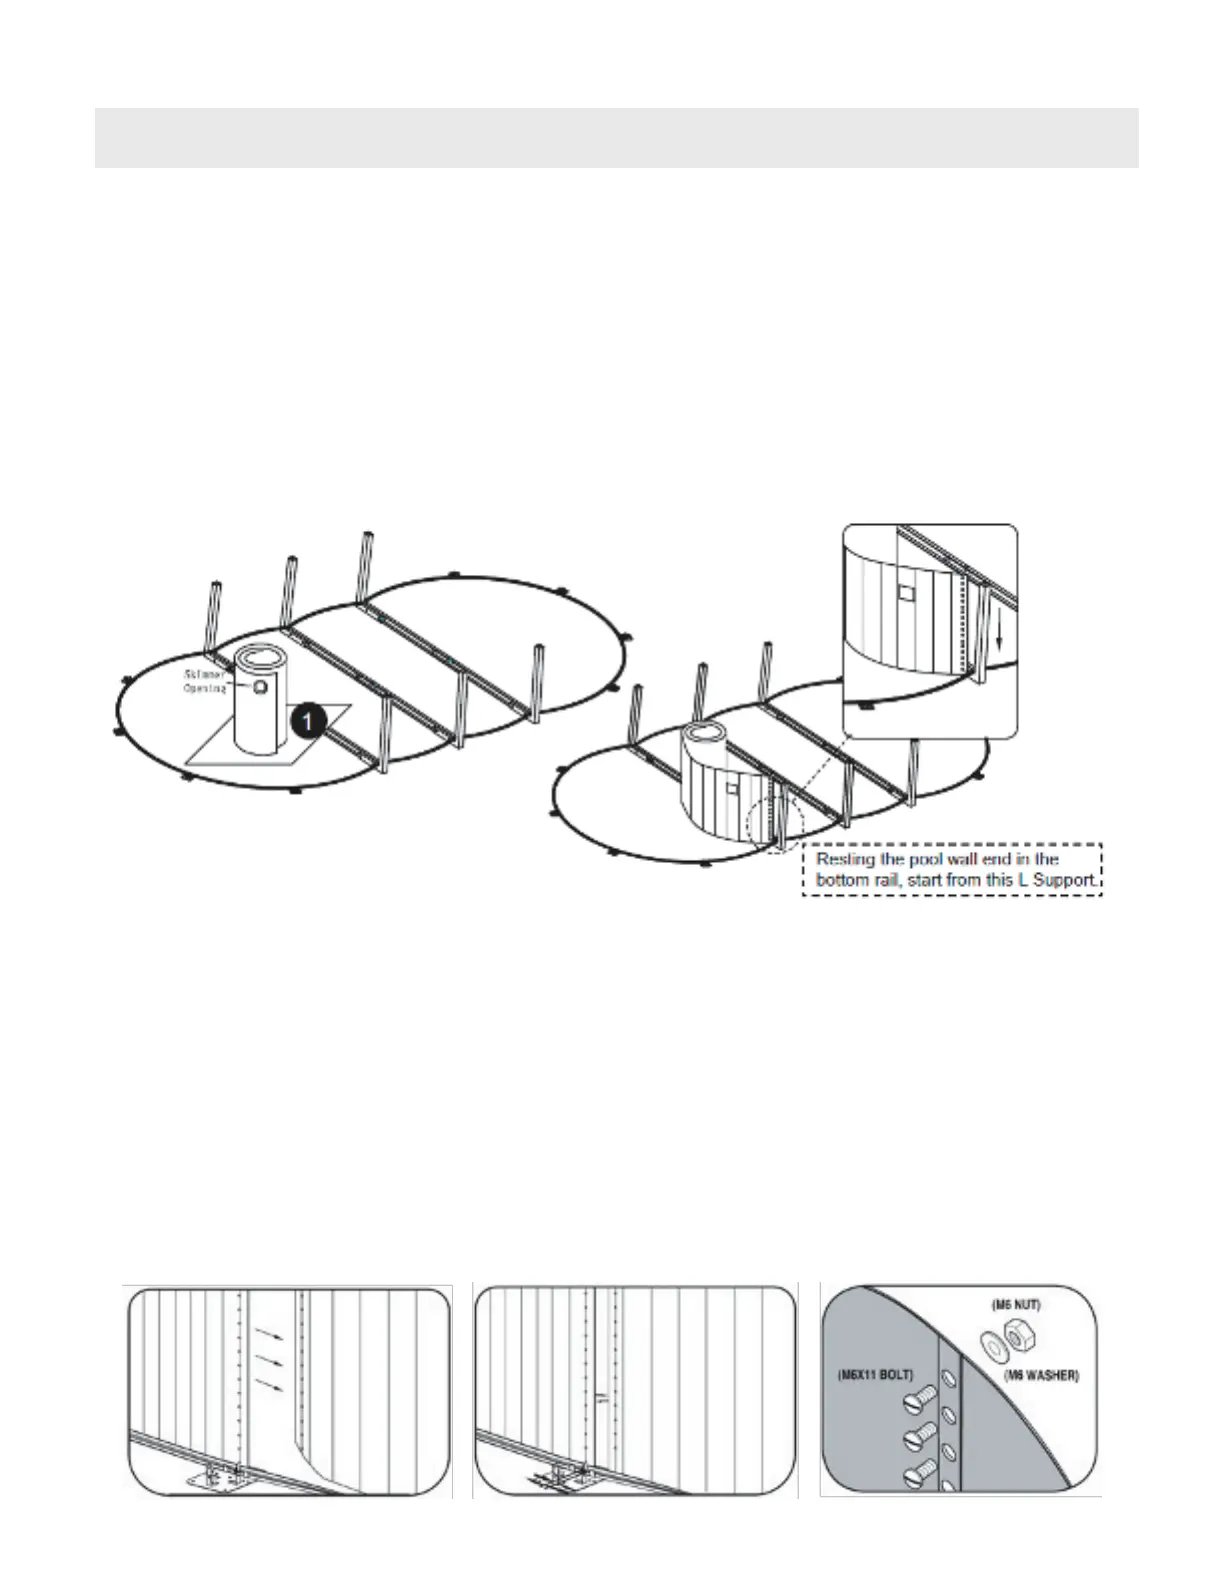
• Put the pool wall on a 4-ft x 4-ft plywood board (see diagram 13). This is to protect the leveled
ground while installation of the wall is taking place. Make sure the square window (skimmer
opening) is on the upward side.
• Before unrolling the wall into the bottom rail, decide where the skimmer and ltration system will
be placed (see special note in diagram 14). The opening end of the pool wall closest to the square
skimmer opening should be placed on the closest metal plate that has been for the electric supply
of the ltration system. The pool wall end should be resting in the center of the metal plate (see
diagram 14). Make sure that this location is not in a windward position. Skimmer opening must be at
the top of the wall.
• Carefully uncoil the pool wall into the round rail. Join the 2 ends of the pool wall together. Line up
the bolt holes and attach the bolts, washers and nuts but do not fully tighten. (see diagrams 15, 16
and 17).
• NOTE: Some larger size pools have a double row of wall bolts. See the parts list. Place the bolt
heads through the inside of the pool. Washers and nuts should be on the outside of the pool wall.
(see diagram 17). Only hand-tighten the bolts at this point.
(Diagram 13)
(Diagram 14)
(Diagram 17)(Diagram 16)(Diagram 15)