13
CONCRETE PADS AND ASSEMBLED FRAME
• IMPORTANT: The use of pre-cast concrete blocks or mixed cement at each end of the assembled
frame is critical as it distributes the load carried by the frames evenly into the soil. Not creating
concrete pads will result in the frame sinking into the ground or sliding out of alignment and
disturbing the level of your pool.
• DO NOT use house bricks or patio blocks for this step.
• NOTE: If you are using mixed cement instead of pre-cast concrete blocks, the cement mix is put in
place after the assembled frames have been positioned aligned and leveled.
• Position the assembled frames back in to the excavated areas (see diagram 10B).
• Using the existing string lines, ensure the L supports are perfectly aligned, if not, make the
necessary adjustments. Care must be taken to ensure the measurements between the center of
each L support. It is advisable to hold the posts into position using steel pegs. Install the frames
in such a way that no horizontal part of the L Support is situated higher than the surrounding
ground level.
• THE LEVELING OF THE ASSEMBLED FRAME IS AN IMPORTANT EXERCISE THAT MUST BE
DONE PRECISELY AND REPEATEDLY UNTIL CORRECT.
• When all the assembled frames have been positioned and leveled, recheck and ensure that the
back of the L supports are all in line and the diagonal measurements of the assembled frames are all
correct and equal.
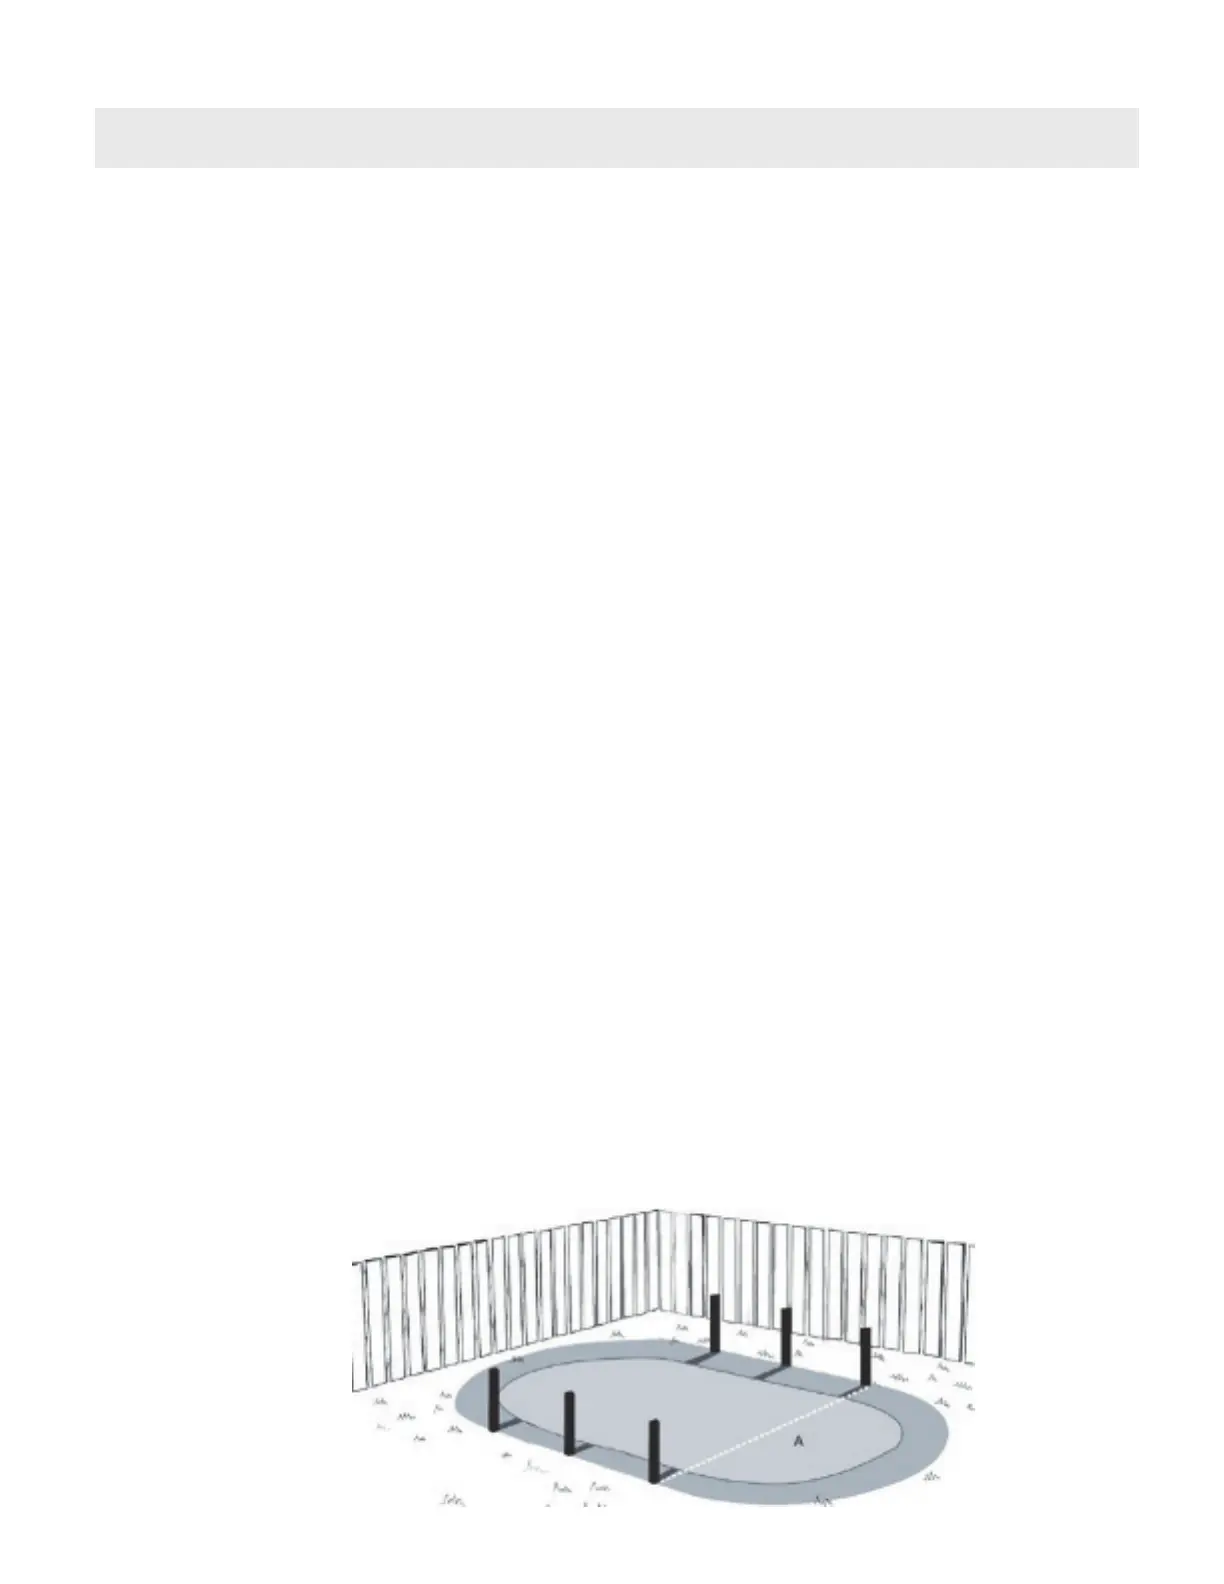
• Before proceeding, check the measurements for the width of the pool between the inside of the
assembled frames. They should be as per the table below. The width measurements A can have a
variance of + or – 0.25” (5mm) (see diagram 10A).
• If all of the measurements and levels are correct and you are using mixed cement for your concrete
pads, pour the mixed cement around the ends of the 6 L supports creating your concrete pad. Allow
the new concrete to harden before moving to the next assembly step.
• If you used pre-cast concrete blocks or your mixed cement concrete is hard you will now back ll
over all of the horizontal sections of the pool frame.
• You must take extra care to pack down the backll material (see diagram 10C).
• When positioning the L supports for your pool, it is important that the supports are maintain in a
perpendicular position while the excavation is being back lled and packed down.
• A simple and effective way to achieve this is to drive steel fence posts into the ground behind the
vertical of the L supports, then temporarily attach the L supports to the fence post with duct tape.
This will hold the post vertical while the cement and backll is put into place (see diagram 10C).
NOTE: The top of the horizontal leg of the L supports must be level with the ground.
(Diagram 10A)