17
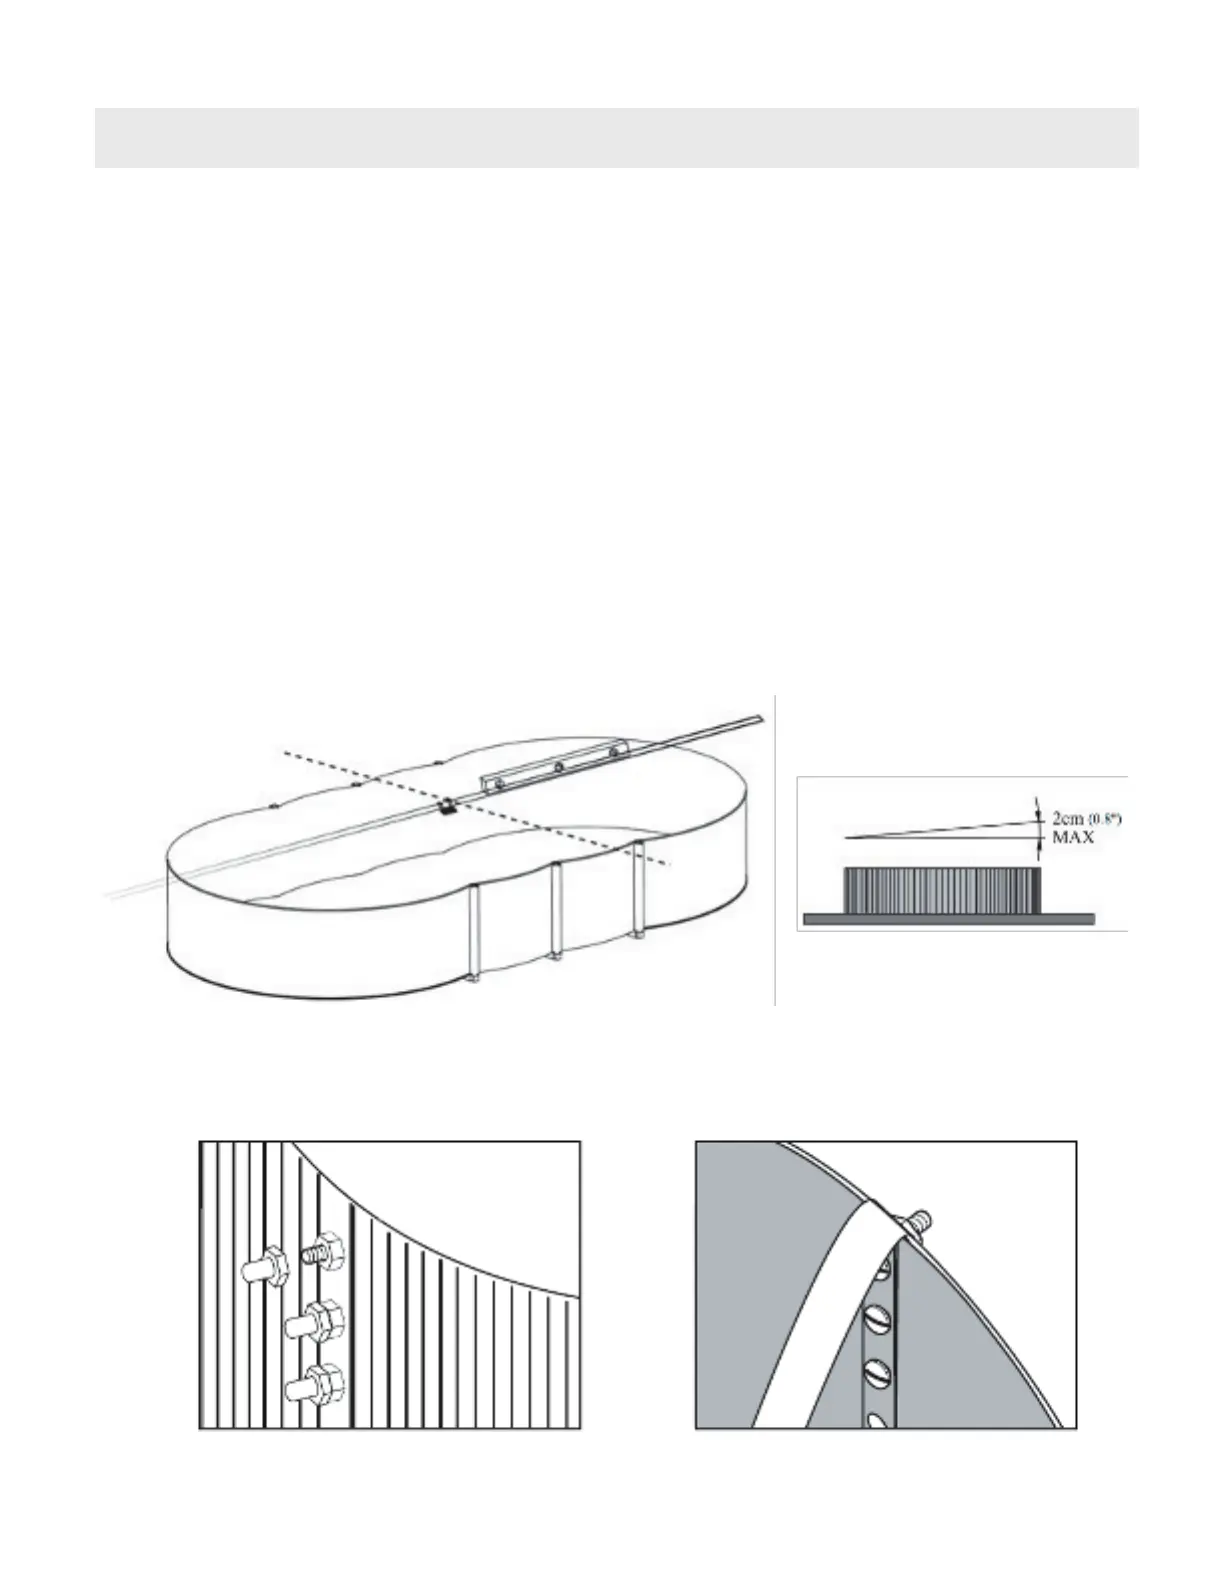
MEASURING THE LEVEL AND SHAPE OF THE POOL WALL
• WARNING: A pool that is not level is very dangerous and may collapse at any time.
• Check the pool wall level by placing a 2-in x 4-in board or similar across the diameter of the pool
wall and placing a level on the top of the board. A string level may also be used for this step (see
diagram 18). If the pool is not level then remove the pool wall, dismantle the pool frame, and re-
level the ground site. Also, check if the ends of the pool wall are properly curved. Measure across a
few spots to ensure that the distance, radius of each end, and width are all within 0.8-in (2-cm).
• CAUTION: Try not to damage any of the components if disassembling the pool wall to correct the
ground level.
• Once the measurements and levels are correct, and all nuts and bolts are tightened, cover the
exposed bolt heads with the self-adhesive tape (see diagram 19 and 20). This step is necessary to
prevent damage to the liner from the bolt heads.
• WARNING: Tighten the wall bolts using a screwdriver and wrench by hand to ensure a tight wall
joint connection. NEVER use a power screwdriver or power drill for this step. Loose wall bolts may
cause the pool to collapse and is not covered by the warranty.
(Diagram 20)(Diagram 19)
(Diagram 18)