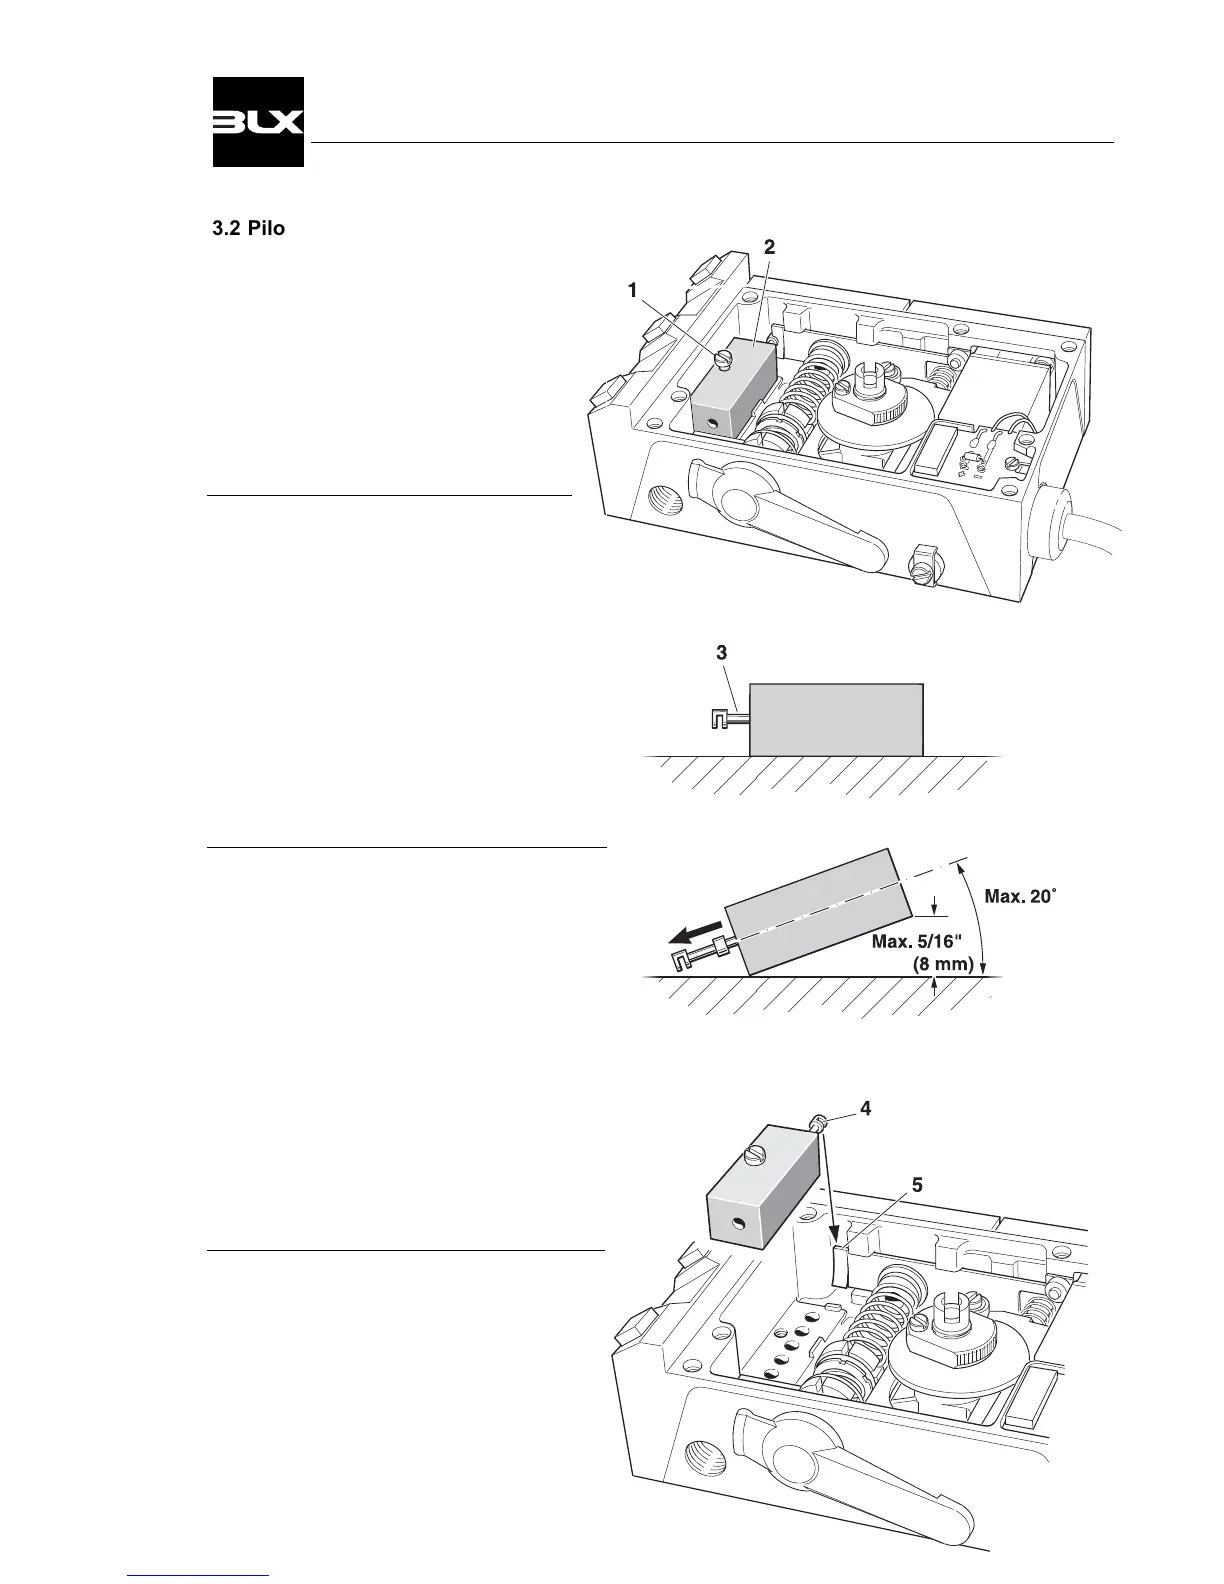
3.2 Pilot valve
Removal
Remove the front cover and indicator.
(see page 12)
Loosen the pilot retaining screw(1).
Lift the pilot valve(2) straight up.
Cleaning
Remove the spool(3) from the valve
housing.
Clean the parts with a soft cloth and
pipe cleaner using alcohol, acetone
or something similar.
Blow dry with clean, pressurized air.
Install the spool back in the valve
housing.
Check
Place the spool in its ”working position”.
(all four pistons inside the housing)
Slowly lift the pilot valve in one end.
The spool should start to glide before
the angle exceeds 20°.(see sketch)
If any of the parts show signs of wear,
we recommend replacing with a new
pilot valve assembly.
The pilot valve’s parts are matched
to attain the best possible perform-
ance. Mixing of parts can result in high
excessive bleed and/or poor function.
Install Pilot
Check the pilot valve’s O-rings.
Be sure that the spool’s ”gap”(4) fits over
the balance arm(5) and place the valve
straight down into place.
Tighten the retaining screw(1).
13
V100 Positioner