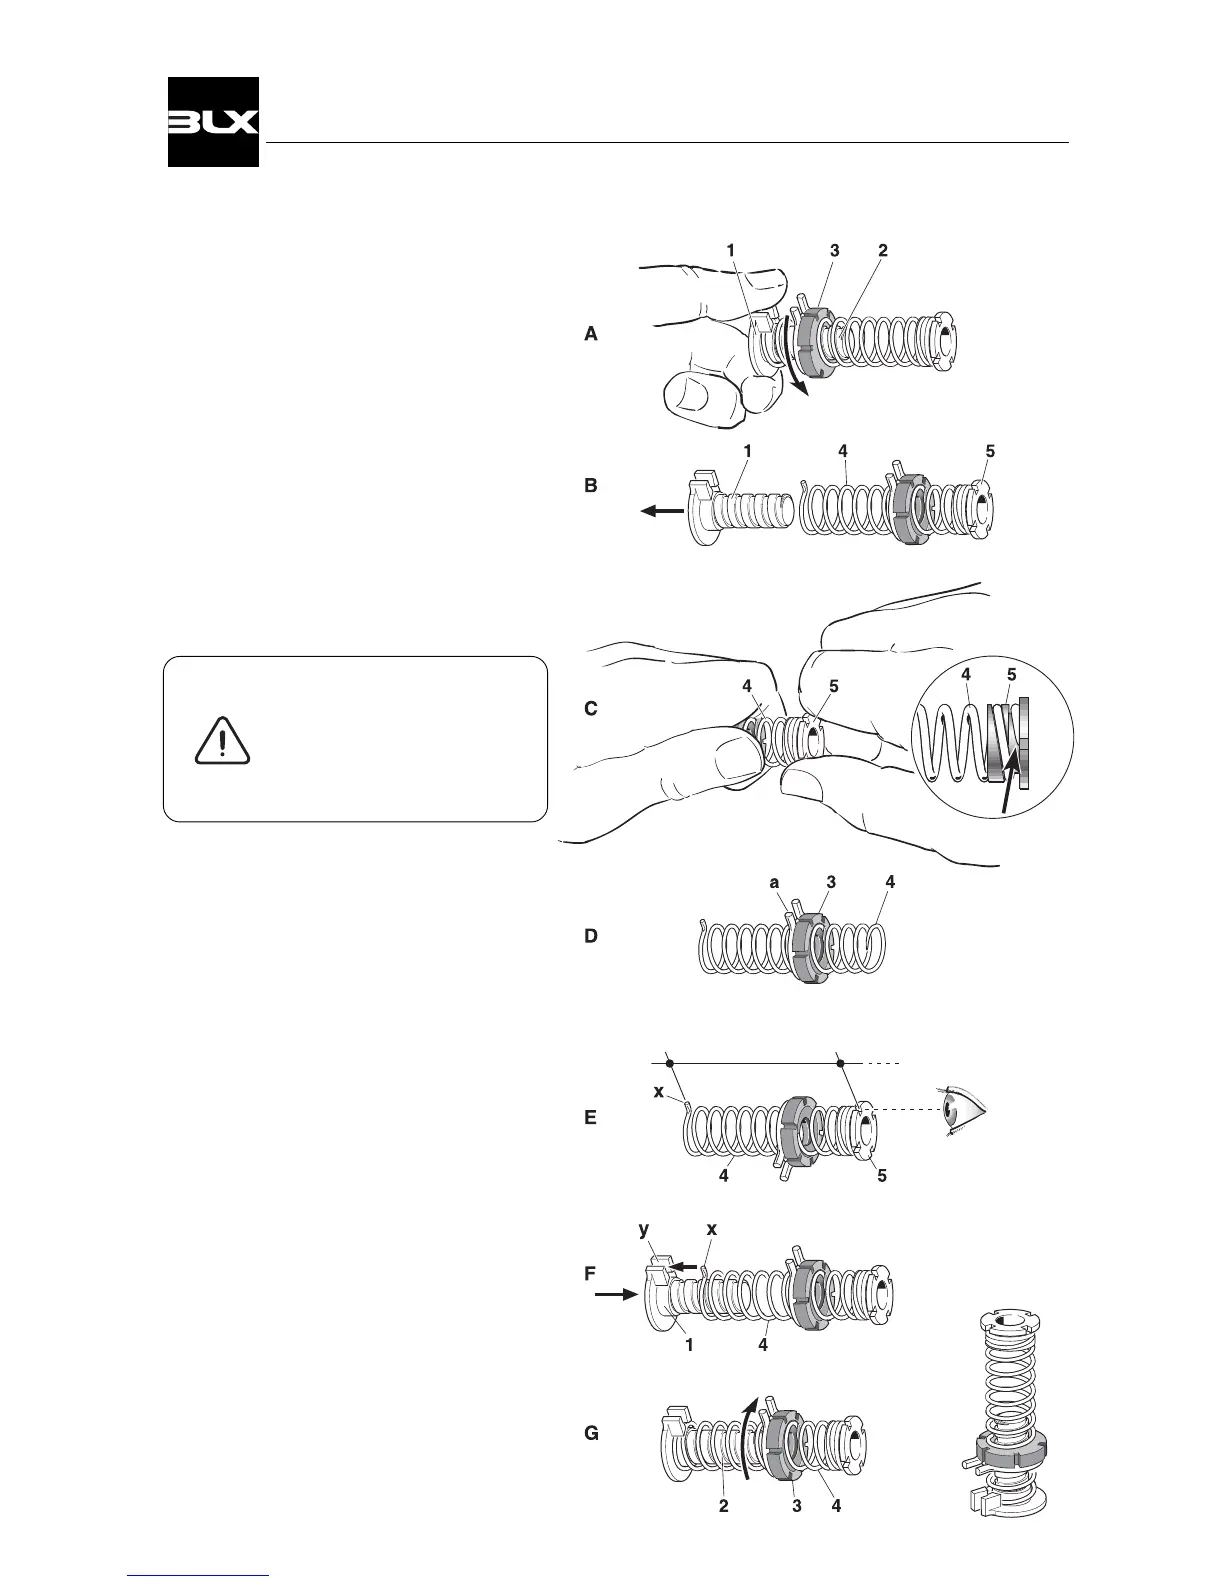
3.7 Feedback spring
Disassembling
A.Remove the spring support(1) from the
red range nut(3).
B.Disassemble the spring support(1) and
the spring(4).
C.Hold the spring socket(5) and try to
push the spring off the socket by
pressing a screwdriver or similar
against the end of the spring.
(see sketch).
Please Note!
The spring is self-locking
to the socket and may
be very secure.
Reassembling
D.Thread the range nut(3), with the friction
spring(a) side first, onto the spring(4).
E.Screw the upper spring socket(5) into
the spring(4). The spring is self-locking
on the socket and should sit very tight.
Turn the spring on to the socket as
much as possible.
Note! One of the four grooves in the
upper spring socket(5)must align
with the dowel pin(x) on the spring.
F. Install the spring dowel(x) into the
crotch(y) in the spring support(1).
G. Thread the range nut(3) onto the
screw(2). If this is difficult, it may help
to compress the spring(4) slightly.
18
V100 Positioner