T.O. BMS1F-16CM-1 BMS 4.34 Change 2.00
BMS 4.34 Dash 1
© Red Dog 2012-2019 Page: 155
But first let’s see how to initiate interrogation with a
specific example:
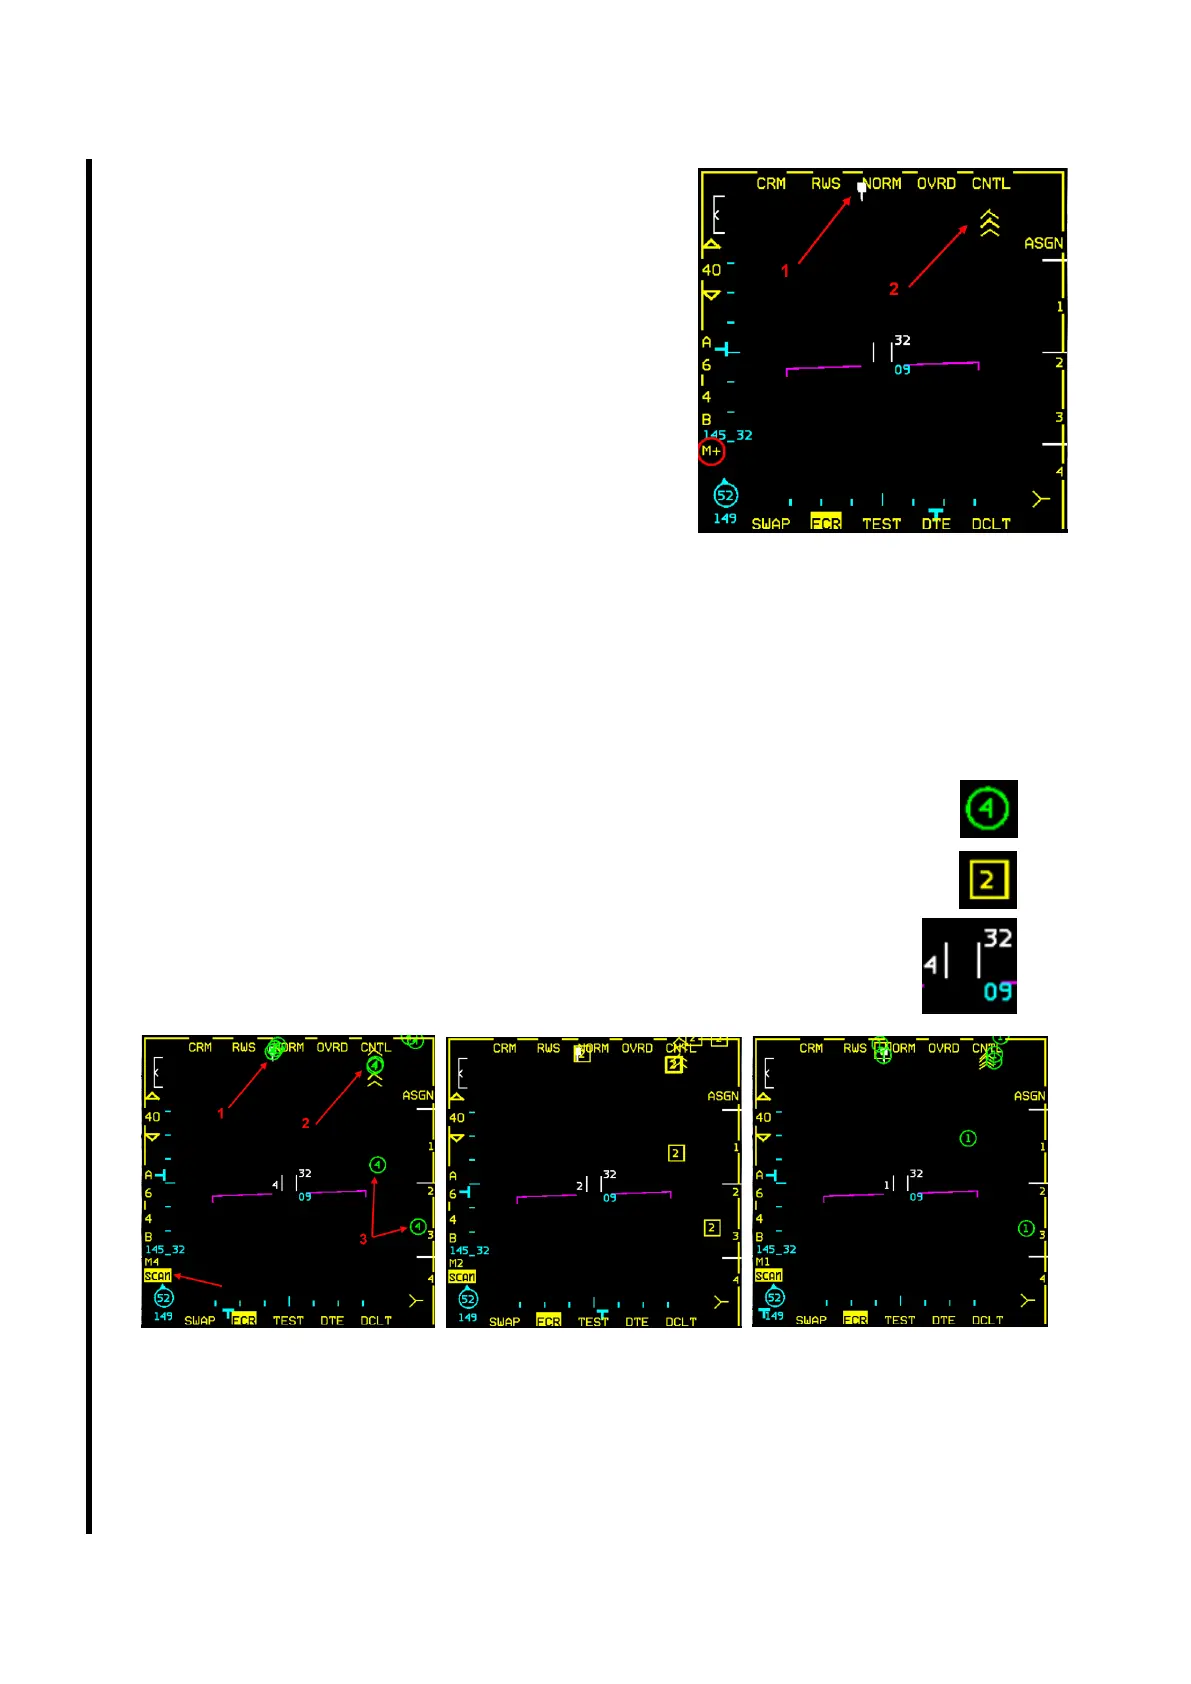
IFF Interrogation is usually initiated on the FCR page.
OSB #16 offers the possibility to interrogate in specific single
modes or all modes as set up in the Interrogation page.
Depressing OSB#16 will select either Mode 1 only, or Mode
2 only, or Mode 3 only, or Mode 4 only, or M+ (multi-mode)
where all the active modes on either the SCAN or LOS (as
applicable) interrogator UFC pages are interrogated.
In the FCR picture on the right, OSB #16 is set to M+.
There is one radar contact 40 Nm dead ahead and jamming
contacts on the right side. We will initiate IFF interrogation.
IFF interrogation is initiated with TMS left. There are two modes of interrogation:
• SCAN with a short TMS left (<1s).
• LOS with a long TMS left (>1s).
In SCAN mode the IFF scans a full cone 60° in elevation and 60° in azimuth.
With OSB #16 set to M+, the interrogation will be made with all the modes that are active in the SCAN
INTG UFC page, in this case M1, M2 and M4. Mode 4 takes a bit longer than Mode 2 and Mode 1.
The system first interrogates in Mode 4 and then works its way down to Mode 1.
• A green circle with the mode inside is a correct answer and therefore categorised
as friendly.
• A yellow square with the mode inside is an incomplete answer and therefore
categorised as unknown/bogey.
• During the interrogation the interrogation mode is displayed to the left of the
acquisition cursor (captain’s bars). M+ (OSB #16) is replaced by the actual
mode the IFF is currently interrogating. The type of interrogation (SCAN in
this case) is also displayed and highlighted below the mode mnemonic.
As you can see above, the SCAN reports responses from contacts even outside your radar scan area:
• The contact labelled 1 is in your radar scan and is reported friendly in Mode 4, bogey in Mode
2 and friendly in Mode 1.
• The contacts labelled as 2 are jamming and not detected by the radar (probably outside burn-
through range), but provide the same replies.
• The contacts labelled as 3 are outside your radar scan area (probably below it) and give the
correct Mode 4 response, the wrong Mode 2 reply and the correct Mode 1 answer.
 Loading...