11. REPLACING THE SENSOR
11.1 Dismantling the biometric sensor
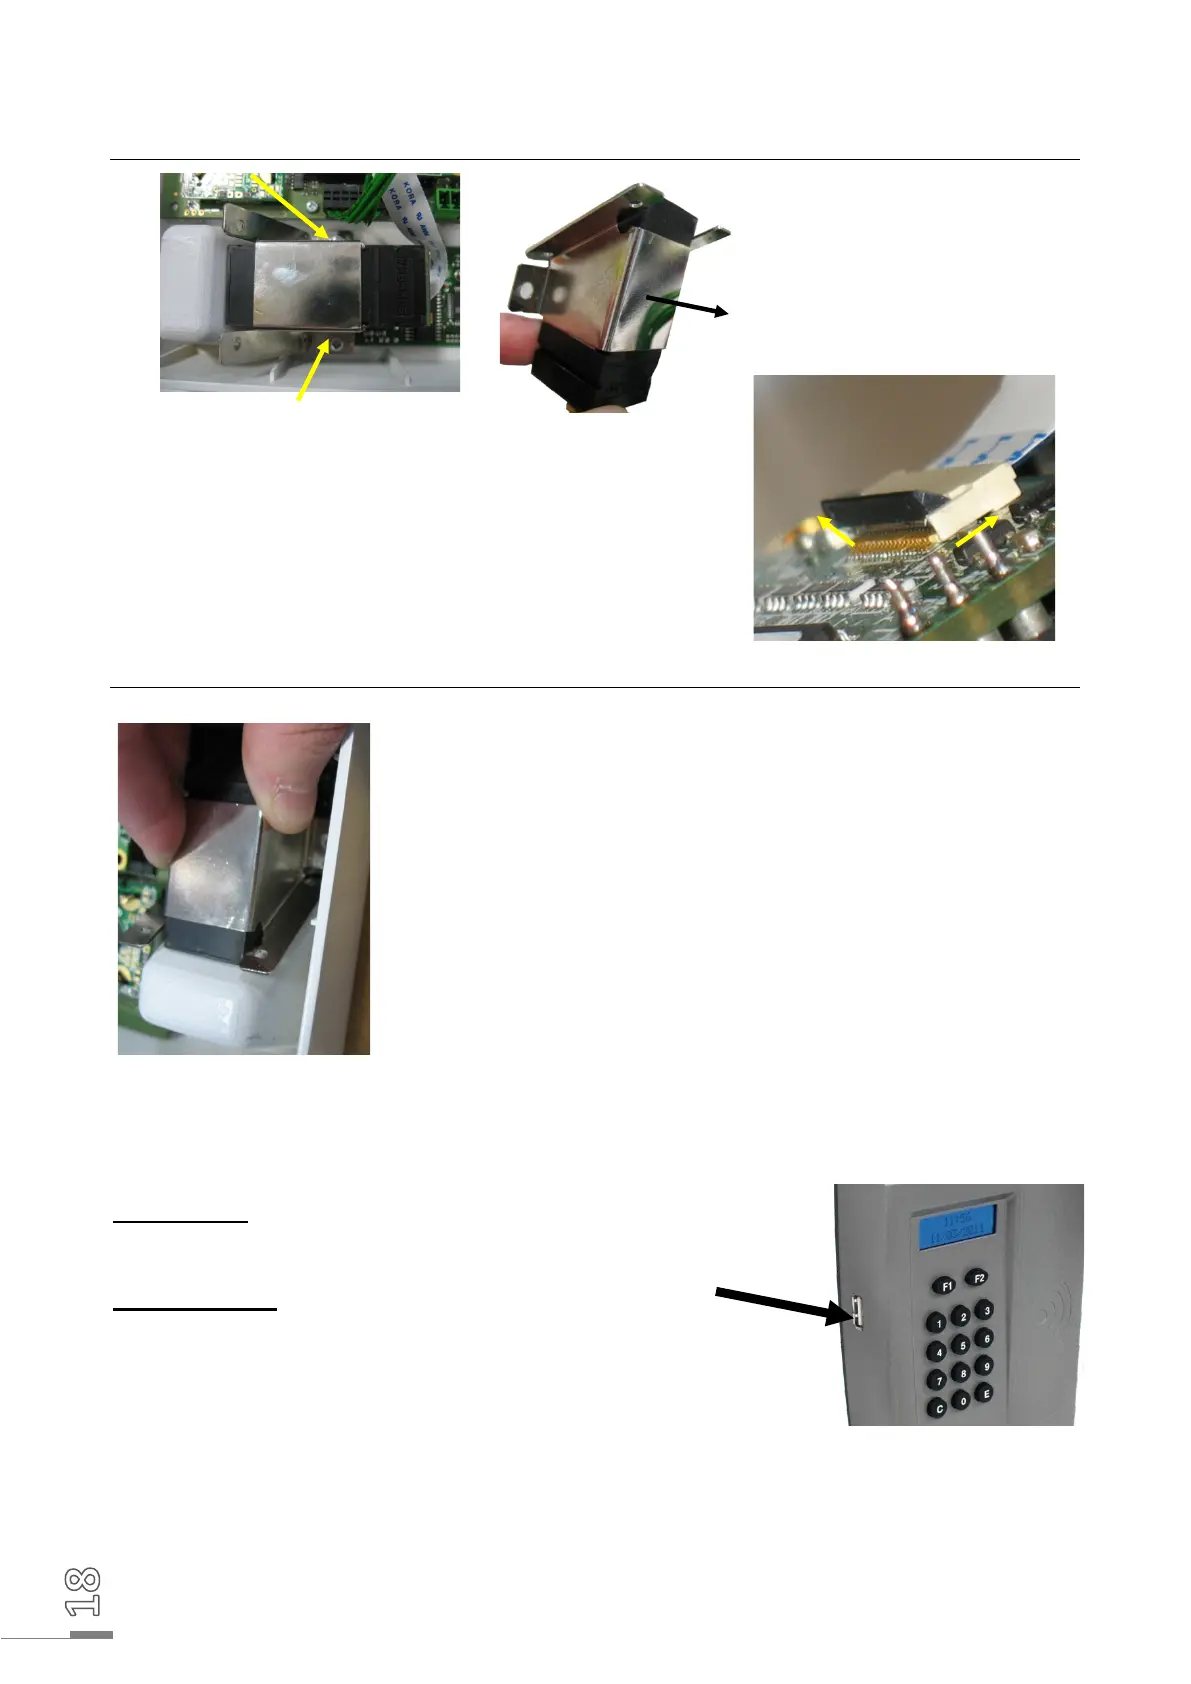
On the interior of the terminal
front panel, remove the two
screws holding the biometric
sensor in place. Then remove the
sensor and take off its metallic
fixing support, sliding it in the
direction of the arrow.
On the terminal’s electronic board, lift the black connector
locking tab as shown opposite. Then free the connector
ribbon.
11.2 Re-assembling the biometric sensor
Connect the new sensor by sliding the ribbon into the
connector, with the plastic insulating part on the board side,
then fold back the black locking tab.
Insert the sensor into its metallic support and hold it as shown
opposite. Put back the two retaining screws using a Philips
screwdriver.
12. USING BARCODE SCANNERS
The PRIO terminals that are compatible with the activity clocking operations have a label.
Wired reader
Connect the reader to the USB port on the activity PRIO.
Wireless reader
Connect the reader support to the USB port on the activity
P
RIO.
Follow the start-up instructions for the wireless reader provided
with it.
 Loading...