Section 09 BRAKES
Subsection 02 (HYDRAULIC BRAKES)
09-02-4
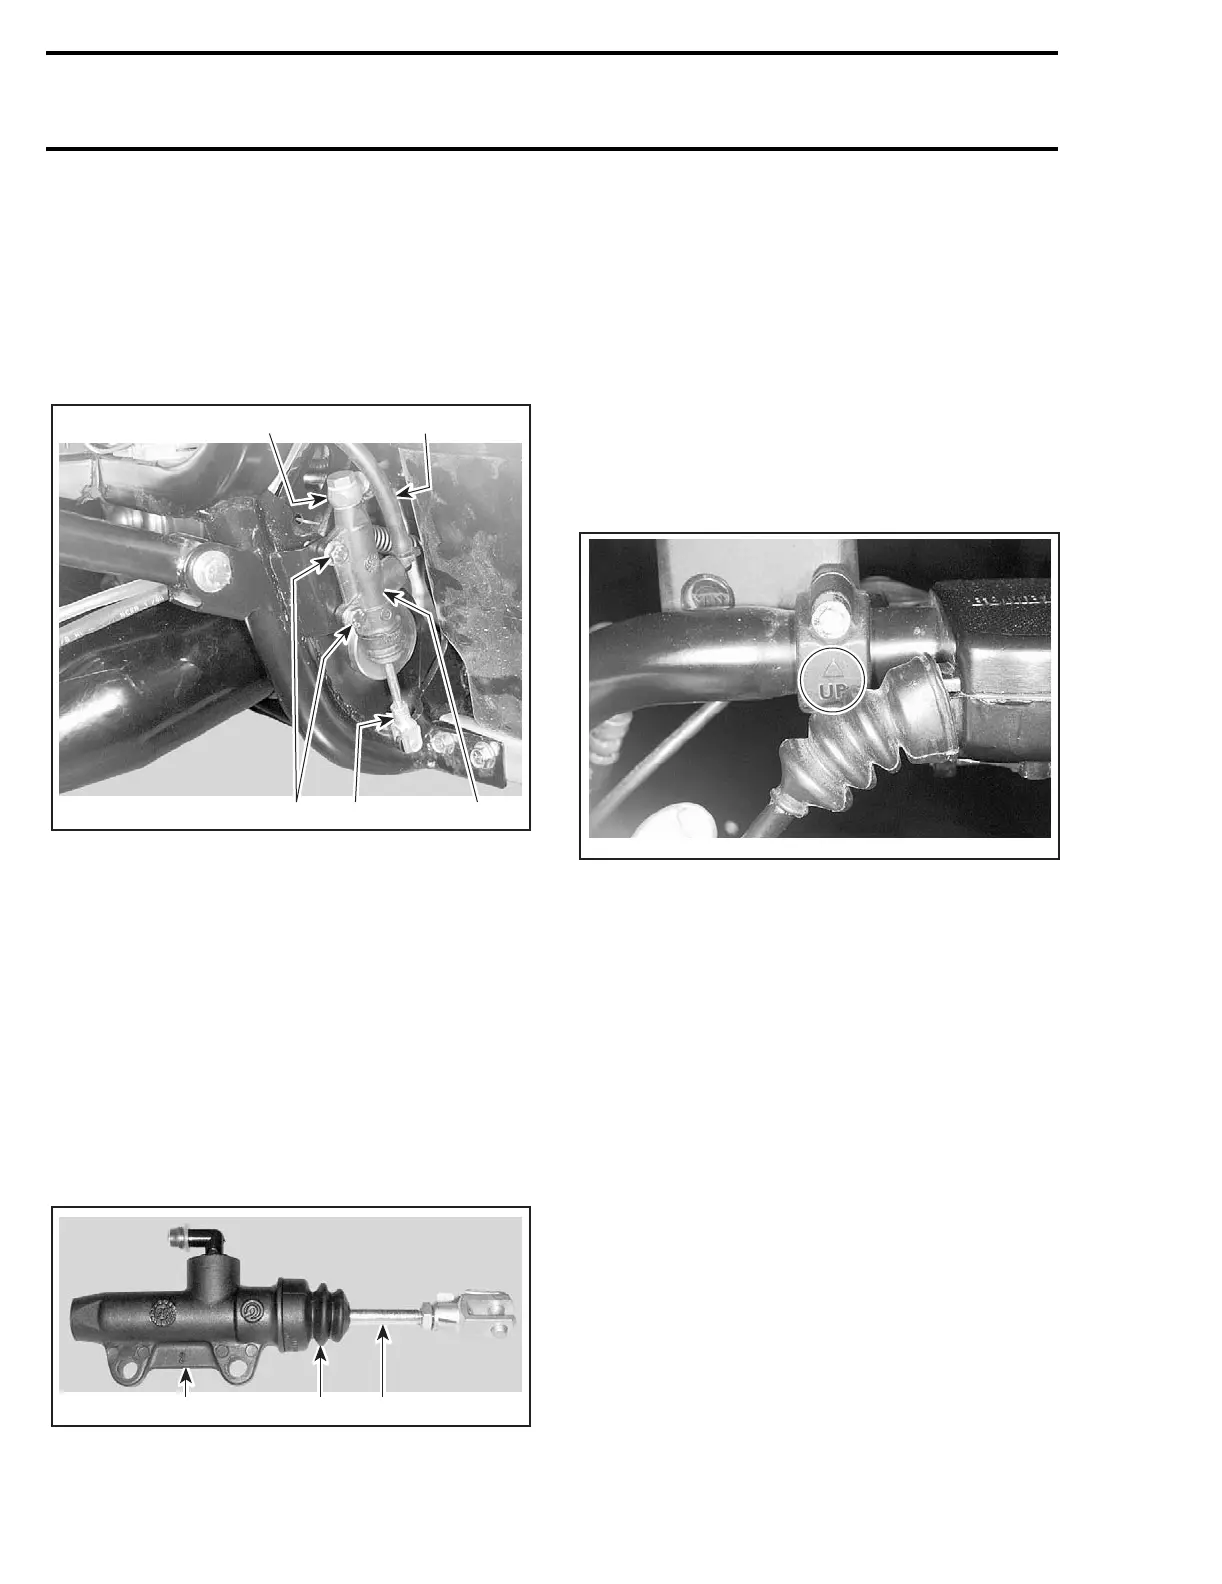
Remove bolt no. 12 and sealing washers no. 11
retaining brake hose no. 23 to master cylinder
no. 19.
Discard sealing washers.
Unhook push rod from brake pedal no. 20.
Remove bolt retaining master cylinder no. 19 to
frame.
1. Master cylinder
2. Flexible hose
3. Rear brake hose
4. Push rod
5. Remove bolts
Inspection and Lubrication
Discard any remaining fluid inside reservoir.
Clean reservoir thoroughly with clean brake fluid.
If master cylinder is damaged or leaking, replace
as an assembly.
Before rear master cylinder installation, remove
the pusher and boot. Apply grease (P/N 293 550
007), about 2 g, inside the boot then reinstall boot
and pusher. Wipe out any grease spillage on boot.
1. Rear master cylinder
2. Pusher
3. Boot
Installation
For the installation, reverse the removal proce-
dure, paying attention to the following details.
Front Brakes
Place the master cylinder no. 4 on the handlebar.
Position cylinder holding bracket with the UP mark
upward.
Install bolts and tighten loosely.
With the handlebar in straight ahead position, po-
sition cylinder reservoir parallel to the ground.
Tighten upper bolt in first.
Connect brake hose to master cylinder with bolt
and new sealing washers.
Rear Brake
Install master cylinder to frame.
Install rear brake hose to master cylinder using
new sealing washers.
Connect flexible hose from reservoir and secure
with new locking tie.
Fill up reservoir with clean brake fluid.
CAUTION: Do not mix different types of brake
fluid. Use only DOT 4 brake fluid.
Bleed both front and rear brake systems.
Check for leaks and make sure the brakes operate
normally before driving.
CALIPER
Removal
Loosen wheel nuts.
Raise vehicle and support it securely.
Remove wheels.
4
3
V01K0JA
2
15
1
V01K16A
32
V01K13A
 Loading...