6.7 Establishing the power connection
Observe all safety and warning information (see Safety
chapter).
Observe all national and regional laws and regulations
as well as the supplementary regulations of the local
utility companies.
INFO The power connection must only be imple-
mented by a certified engineer. He/she also
assumes responsibility for the proper installa-
tion and commissioning.
INFO Connection via plug-in contacts, e.g. plugs
with earthing contacts, are not allowed.
Switch off the main switch/automatic circuit breaker
before connecting the cooktop.
Protect the main switch/automatic circuit breaker
from being switched on without permission.
Make sure the device is not energised.
Only connect the cooktop using a permanent connec-
tion to a type H 05 VV-F power supply line with
appropriate minimum cross section (s. Tab. Fuse pro-
tection and minimum cross section).
Connection Fuse protec-
tion
Minimum
cross-sec-
tion
Three-phase-connection 3 x 16 A 2.5 mm
2
Two-phase-connection 2 x 16 A 2.5 mm
2
One-phase-connection 1 x 32 A 4 mm
2
Tab. 6.2: Fuse protection and minimum cross section
1
L1 L2 L3
2 3 4
N PE
220 - 240 V~
220 - 240 V~
220 - 240 V~
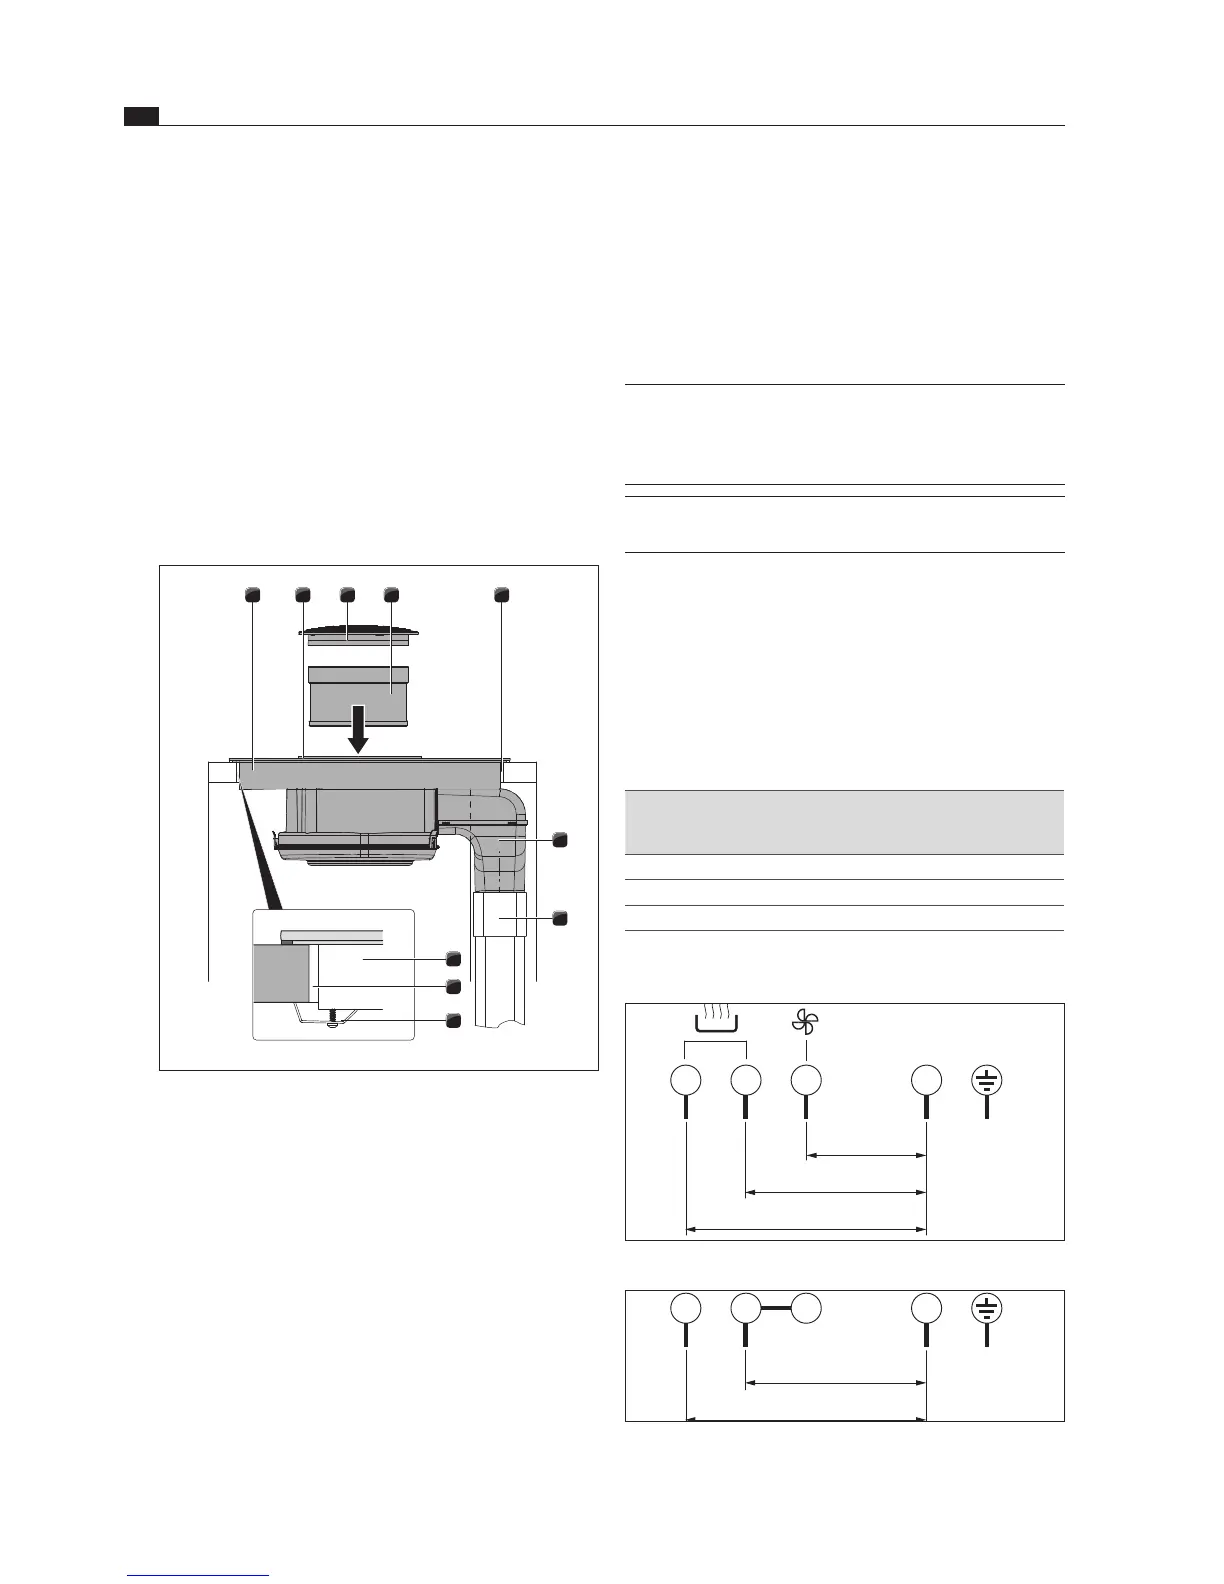
Fig. 6.36 Connection diagram 3-phase connection
1
L1 L2
2 3 4
N PE
220 - 240 V~
Fig. 6.37 Connection diagram 2-phase connection
Use the suction opening [2] as a handle during inser-
tion.
Reach into the suction opening [2].
Insert the cooktop centrally into the provided worktop
cut-out [5].
For surface installation
Make sure that the sealing tape is resting on the work-
top.
For flush installation
Make sure that the sealing tape of the cooktop is
sealed well all the way round.
You may need to place some height adjustment panels
underneath.
54321
6
5
8
7
1
Fig. 6.35 Connecting the exhaust air duct
[6] Mounting bracket
[7] Exhaust air arc
[8] Exhaust air duct
Connect the exhaust air duct [8] installed on-site to
the exhaust air arc [7].
Seal the duct connection so that it is airtight using
adhesive sealing tape UDB1.
Fasten the cooktop using the mounting brackets [6] at
the worktop.
Afterwards, insert the stainless steel grease filter [4]
and air inlet nozzle [3].
Seal the surrounding gap with a black heat-resistant
silicone sealing compound.
 Loading...


