-14-
Disconnect plug from power
source before performing any as-
sembly, adjustment or repair to avoid possible in-
jury.
742:8=6'867CJ
4E4;(C>?
1. Lower head assembly and engage head as-
sembly lock pin.
2. Slide head assembly completely to the back
and tighten the rail lock knob.
3. Rotate table to the 0° miter position.
4. Pull up bevel lock lever to unlock bevel.
5. Move bevel range selector knob to “0°-45°
Right” position. (See page 28)
6. Tilt the saw to the right until you feel the stop
in the 45° right position. This is where the saw
is currently set for the 45° right bevel cut.
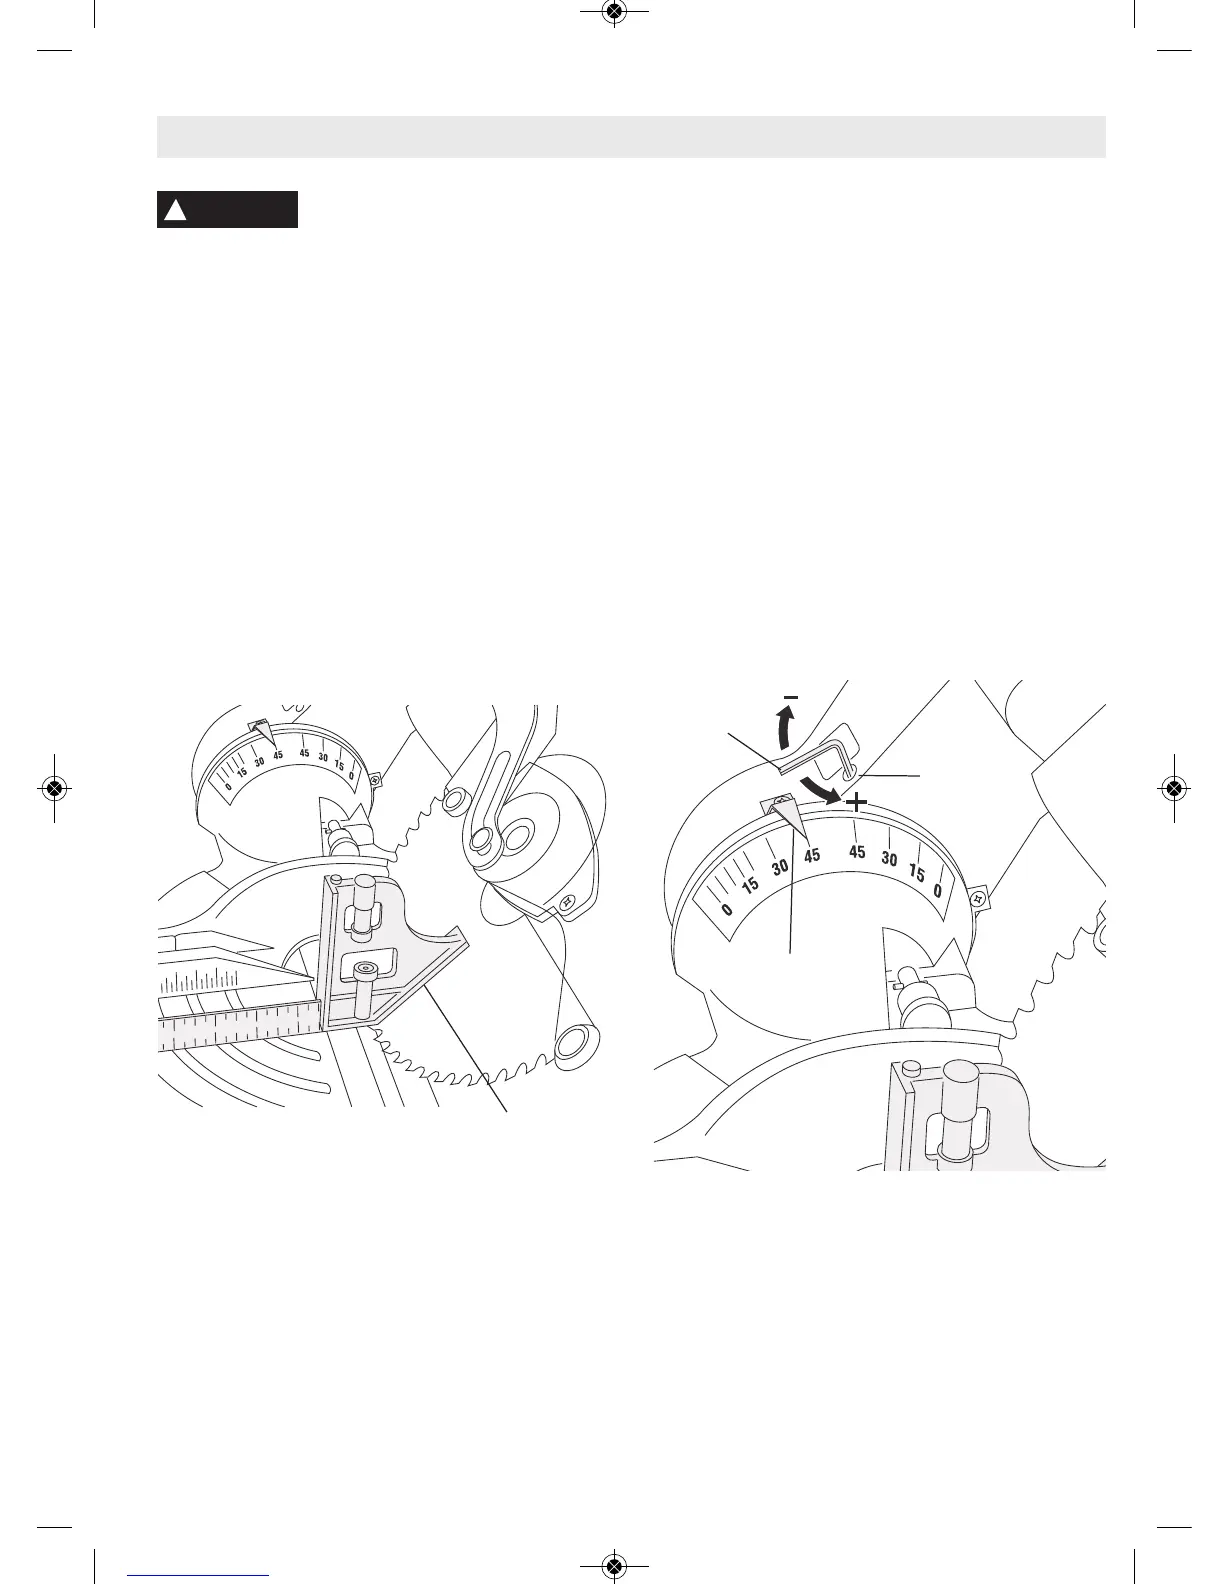
7. Use a combination square to check blade at
the 45° stop. Place the combination square
head on the table and press it’s 45° surface
against the blade. If the blade does not contact
the full length of the square, (figure 7), follow
the calibrating procedure.
0;81A0C8=6'867CJ
4E4;(C>?
1. Lift bevel lock lever to release bevel lock.
2. Tilt saw to 45° right bevel position.
3. Position combination square with 45° surface
against blade. (Figure 7)
4. Insert 3 mm “L” wrench into hole in vertical
support frame. (Figure 8)
5. Rotate “L” wrench while viewing blade against
combination square until it matches 45° sur-
face.
6. Adjust bevel pointer to 45° line on bevel scale.
39DBC<4=CB
!
WARNING
86DA4'867CJ4E4;(C>?
><18=0C8>=
(@D0A4
86DA4'867CJ4E4;39DBC<4=C
<<P!Q
,A4=27
39DBC8=6
224BB
>;4
4E4;
%>8=C4A