-8-
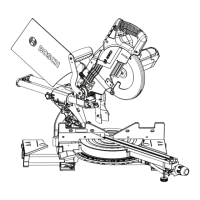
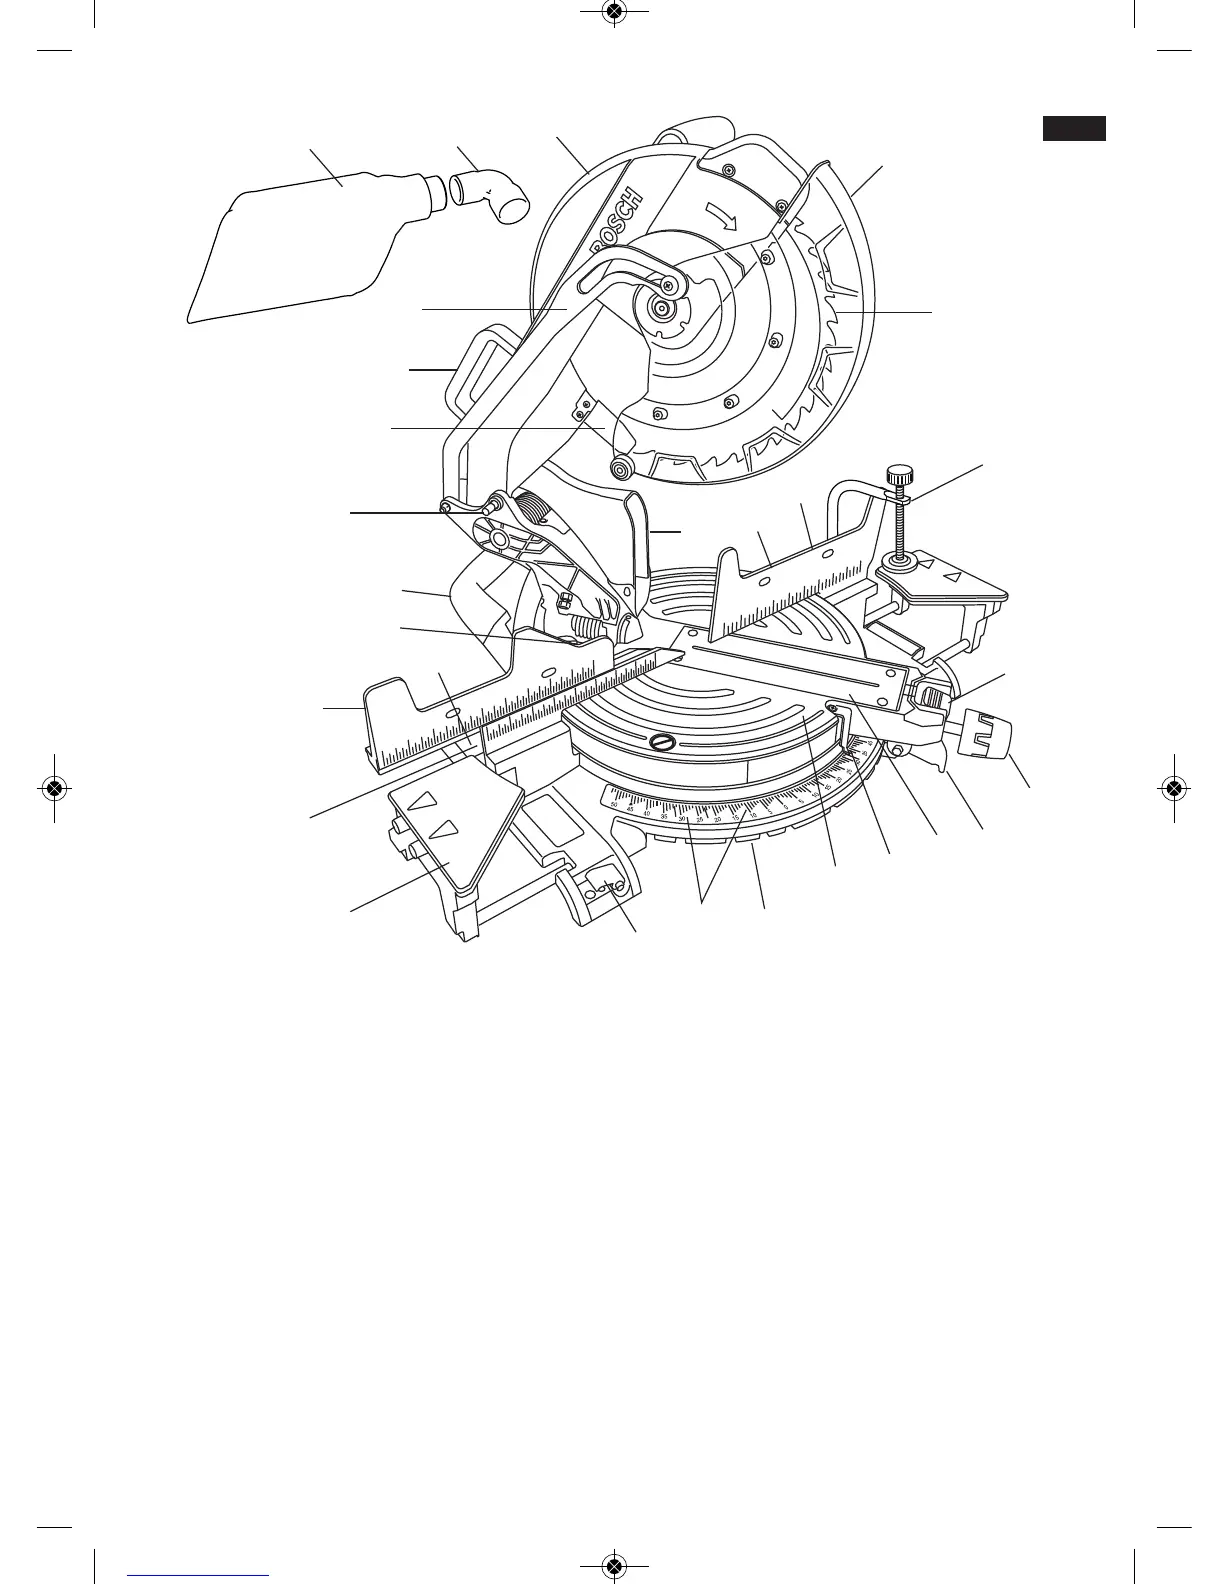
2?3;@2?A – Kerf inserts can be adjusted to dif-
ferent blade widths to minimize workpiece tear out.
!6A2?2A2;A#C2??612 – Allows detent action to
be locked out allowing for adjustments to any miter
angle.
!6A2? <08;</ – The miter lock knob locks
the miter saw table at any desired miter angle.
!6A2?2A2;A 2C2? – The lever releases the
table from the detent.
!6A2?&0.92!6A2?$<6;A2? – The pointer rotates
with the table and blade. It points to the miter scale
to indicate the angle setting before a cut is made.
!6A2?2A2;A@$9.A2 – There are ten (10) miter
detent slots for fast and accurate miter cuts of com-
mon angles. The position of the plate can be ad-
justed to set the accuracy of its detent locations.
!6A2?2A2;A$9.A2&0?2D@ – Four screws ac-
cessible through holes in the miter scale. The
screws are loosened when adjusting detent plate
position.
'./92 – Sits in base, provides workpiece sup-
port, rotates for desired miter cuts and rotates the
head assembly.
&9616;4.@2EA2;@6<;@ – Provides working
surface to support workpiece, expands to support
longer materials.
.@2EA2;@6<;9.:=6;4 2C2?@ – Lock the
base extensions at the desired positions.
'<<9!<B;A6;4$.1@ – The four corners of the
saw provide areas to clamp, bolt or nail/screw the
saw to a flat work surface.
B@A5BA2 – Directs sawdust up and through
elbow to the dust bag.
FIG. 1