1 689 975 140 2013-07-01| Robert Bosch GmbH
16 | EPS 807 / 815 | Repair worksen
6. Repair works
6.1 Change Flywheel
! Bosch does not operate the lifting and removal tool.
4
3
1
2
458741/5
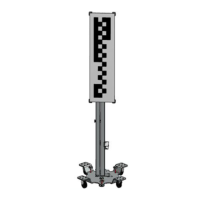
Fig. 24: Lifting and removal tool for the flywheel
1 Eye bolt DIN 580-M12
2 Hexagon nut M12
3 Hexagon screw M10 x 35-8.8
4 Hexagon screw M16 x 50-8.8
1
2
458741/4
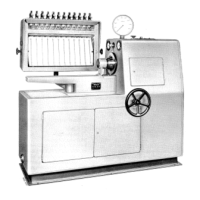
Fig. 25: Overview of flywheel with drive motor
1 Centering piece
2 Intermediate flange
Disassembly Flywheel:
1. Remove the inner hexagon screw from adapter (Fig.
25, Pos. 1).
2. Remove the adapter (Fig. 25, Pos. 1).
3. Remove the inner hexagon screw (7x) from interme-
diate flange (Fig. 25, Pos. 2).
4. Deactivate intermediate flange (Fig. 25, Pos. 2) or
unseat using two hexagon screws M10 or M12 from
flywheel.
5. Fix flywheel (weight 62 Kg) using the applicable lift-
ing gear (see Fig. 24).
6. Release flywheel from the cone by beating slightly
with a rubber hammer and lift it off.
Montage:
¶ The assembly is carried out in reciprocal succession
and comply with Instructions in Item 6.2.
6.2 Replacing the drive motor
458741-06_Pal
1
2
3
4
5
6
7
8
9
Fig. 26: Overview of drive motor
Disassembly:
1. Remove the flywheel (see section 6.1).
2. Remove storage sheets from oil tray.
3. Put the wooden strip under the clamping rail (for
support).
4. Remove inner hexagon screw (Fig. 26, Pos. 1) (4x)
between brackets (console) and engine flange.
2
1
3
458741-07_Pal
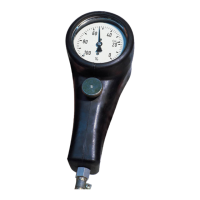
Fig. 27: Securing the clamping rail
5. Loosen hexagon screw (Fig. 27, Pos. 1) (2x) between
supporting frame and rubber-bonded metal.

 Loading...