Familiarising yourself with your appliance en
27
2. Pull the power cable out to the re-
quired length.
→"Cable length", Page29
Do not insert the mains plug.
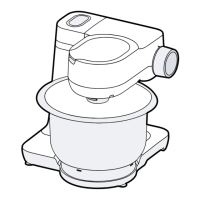
5 Familiarising yourself
with your appliance
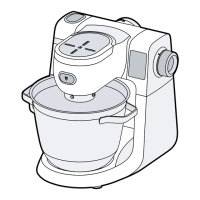
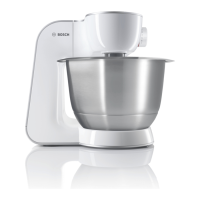
5.1 Appliance
You can find an overview of the parts
of your appliance here.
→Fig.
2
Mixing bowl
Lid with integrated filling shaft
Release button for swivel arm
Swivel arm
Rotary switch
Protective cover for drive 2
Drive 2
Protective cover for drive 3
Drive 3
Vent grille
Main drive
Cord store
Recess for bowl
5.2 Rotary switch
The rotary switch is used to start and
stop processing and select the
speed.
Symbol Function
Stop processing.
Symbol Function
Process ingredients at low
speed.
Process ingredients at
maximum speed.
Move the drive to the
parked position.
5.3 Swivel arm
The swivel arm can be adjusted and
fixed in different positions.
If the release button is pressed, the
swivel arm can be moved to the re-
quired position.
→"Moving the swivel arm", Page29
Swivel arm positions
You can find an overview of the posi-
tions of the swivel arm here.
Posi-
tion
Use
Posi-
tion1
Swivel arm is closed.
¡ Process ingredients with
tools.
¡ Use accessory on drive
2, e.g. Continuous-feed
shredder
Posi-
tion2
Swivel arm is open.
¡ Insert or remove bowl.
¡ Insert or remove tool.
¡ Add the ingredients to
the bowl.
Posi-
tion3
¡ Use accessory on main
drive, e.g. Meat mincer.
¡ Use accessory on drive
3, e.g. Blender attach-
ment.
5.4 Drives
Your appliance is equipped with dif-
ferent drives, which are specially de-
signed for its tools and accessories.
 Loading...