ctrlX AUTOMATION First Steps
4 Overview
The First Steps guides through the commissioning of a ctrlX DRIVEplus single-
axis device with an integrated ctrlX CORE control in a few steps. The steps can
generally also be applied to other ctrlX CORE device configurations.
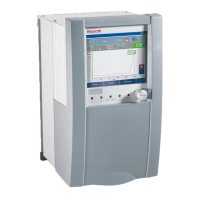
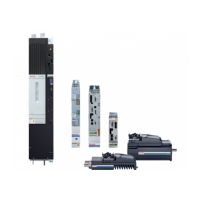
Hardware used
The following components are used in the First Steps, see
Chapter 8 “Com-
ponents used” on page 27
To traverse axes in the First Steps, commission the drive controller ctrlX DRIVE-
plus.
For more information, refer to the ctrlX DRIVE project planning manual:
DOK-XDRV**-X**********-PRRS
Part number: R911386579
This documentation supplements the “Quick Start Guide / R911403316” pro-
vided with each ctrlX DRIVEplus device as product insert.
Overview on steps
● Installation of the following software tools on the engineering PC:
– ctrlX WORKS
– ctrlX I/O Engineering
–
ctrlX PLC Engineering
●
Commissioning of the ctrlX CORE control
●
Connection of the engineering PC to the ctrlX CORE control
● Opening of the ctrlX CORE web interface and logging in
● Installation of apps on the control
● Configuration of the EtherCAT Master on the control
● Configuration of the ctrlX DRIVEplus device as EtherCAT device
●
Configuration and commissioning of an axis
●
Configuration and commissioning of a kinematics
Start...
●
Chapter 5.1 “Step 1 – Installing ctrlX WORKS on the engineering PC”
on page 11
●
Chapter 5.2 “Step 2 – Commissioning a ctrlX CORE ” on page 11
●
Chapter 5.3 “Step 3 – Connecting the ctrlX CORE to the engineering PC”
on page 12
●
Chapter 5.4 “Step 4 – Starting ctrlX WORKS ” on page 13
●
Chapter 5.5 “Step 5 – Starting the ctrlX CORE web interface” on page 13
●
Chapter 5.6 “Step 6 – Installing the ctrlX CORE app ” on page 14
●
Chapter 5.7 “Step 7 – Configuring the EtherCAT Master” on page 15
●
Chapter 5.8 “Step 8 – Configuring the EtherCAT Slave” on page 15
●
Chapter 5.9 “Step 9 – Configuring an axis ” on page 16
●
Chapter 5.10 “Step 10 – Commissioning an axis” on page 18
●
Chapter 5.11 “Step 11 – Configuring a kinematics” on page 19
●
Chapter 5.12 “Step 12 – Commissioning a kinematics” on page 20