Do you have a question about the Bosch Rexroth VT-VSPA1-1 and is the answer not in the manual?
Lists key capabilities and functionalities of the amplifier types.
Details how external voltage or potentiometer provides command value.
Explains using the internal potentiometer for command value.
Describes the differential input for voltage or current signals.
Covers adjustment of ramp times for up and down signals.
Specifies the voltage and current ranges for command value inputs.
Details solenoid current, biasing current, and clock frequency outputs.
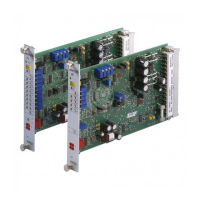
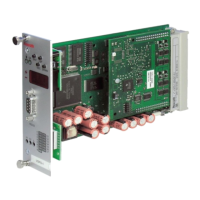
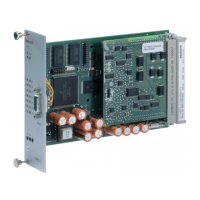
Describes connection methods, card, and front panel dimensions.
Illustrates the basic linear relationship between command value and output current.
Shows output characteristics with pre-set or adjusted curves.
Details the 'ready for operation' LED status indicator.
Details potentiometers for biasing current and max command value.
Describes DIL switch groups and their settings.
Covers potentiometers for setting ramp times.
Maps DIL switch settings to specific valve types and functions.
Details the operation of 'Zw' and 'Gw' potentiometers.
Details DIL switch configurations for various valve types and amplifier cards.
Explains settings for command value 2 and ramp time independent of valve type.
Covers parameter settings, installation, and measurement requirements.
Details isolation, cable shielding, and safety-relevant function notes.
Step-by-step guide for diagnosing and resolving amplifier operability issues.
Explains fault signals like LED 'H2' status for overloads or cable breaks.
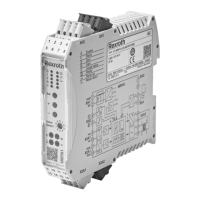
The VT-VSPA1-1 and VT-VSPA1K-1 are electrical amplifiers designed for controlling direct and pilot-operated proportional pressure control valves. These amplifiers are suitable for valves that do not have electrical position feedback and use a single solenoid as an actuator.
The amplifier processes command values to generate a controlled output for the valve's solenoid. It features a differential input that can be configured for either voltage or current input, offering flexibility in integration with various control systems. An additional command value input is available, accepting signals from 0 to +9 V.
A key feature is the integrated ramp generator, which smooths out stepped input signals into ramp-shaped output signals. The "up" and "down" ramp times can be adjusted independently, allowing for fine-tuning of valve response. For the VT-VSPA1-1, these ramp times can be set to a minimum of approximately 30 ms using external contacts. The VT-VSPA1K-1 allows collective adjustment of both ramp times to their minimum value via an external "ramp OFF" contact.
The command values are summed and then passed through an attenuator, which is accessible on the front panel and limits the maximum command value. The output signal from the ramp generator is fed as a current command value to a summing amplifier. This amplifier adds the output signals from characteristic curve generators to the command value, which can be selected via DIL switches depending on the specific valve being controlled. The current command value can also be filtered through a low-pass filter if needed.
A current regulator controls the current output stage. This regulator modulates the current command value with a clock-pulse encoder signal. The clocked actual current value acts on the valve's solenoid as a constant current with an overlaid dither signal. The VT-VSPA1-1 is equipped with measuring sockets for monitoring the internal command value and the actual value.
The amplifier includes several monitoring and protection features. It provides reverse polarity protection for the voltage supply, ensuring safe operation. Cable break detection is implemented for both the 4 to 20 mA current input and the solenoid cable, alerting the user to potential wiring issues. Additionally, the solenoid cable is protected against short circuits.
A "ready for operation" signal is output, and an LED indicator lamp (H2 on the front panel) illuminates when the solenoid cables are not short-circuited, the output stage is not overloaded, a command value is applied (indicating cable break detection for the input), and there is no cable break in the solenoid cable.
The amplifier is designed for ease of adjustment and monitoring. Potentiometers on the front panel allow for the adjustment of biasing current ("Zw" or R130) and the maximum command value ("Gw"). Turning the "Zw" potentiometer clockwise increases the biasing current, while turning it counter-clockwise reduces it. Similarly, turning the "Gw" potentiometer clockwise increases the maximum command value, and counter-clockwise reduces it.
DIL switches on the printed-circuit board enable configuration of various parameters, including the characteristic curve, command value filters, maximum output current, and clock frequency, to match different valve types and application requirements. These switches also allow for the configuration of the differential input (e.g., +10 V, 0 to 20 mA, or 4 to 20 mA) and the maximum ramp time (1 s or 5 s).
For the VT-VSPA1-1 (component series 10), specific DIL switch settings and potentiometer adjustments are required to ensure correct characteristic curve operation. For later component series (VT-VSPA1-1 from component series 11 and VT-VSPA1K-1), some of these settings are simplified or become ineffective.
Before commissioning, it is crucial to ensure that the DIL switches on the printed-circuit board are correctly set according to the specific application. The amplifier card should only be installed or removed when the power supply is disconnected.
To prevent damage, it is important not to use plugs with free-wheeling diodes or LED lamps for connecting the solenoids. Measurements on the card should only be taken with instruments that have an input resistance greater than 100 kΩ.
The measuring zero (M0) is raised by +9 V relative to 0 V operating voltage and is not electrically isolated from the -9 V regulated voltage or 0 V operating voltage. Therefore, the measuring zero (M0) should not be connected to 0 V operating voltage.
For reliable signal transmission, command value cables should always be shielded, with the shield connected to ground on the card side and left open at the other end. The card should be connected to ground at terminal 6 or 8. If no system ground is available, 0 V operating voltage should be connected. Solenoid cables should also be shielded. For solenoid cables up to 50 m in length, LiYCY 1.5 mm² cable type is recommended; for greater lengths, consultation is advised.
To avoid interference, maintain a distance of at least 1 m from aerial lines, radio sources, and radar equipment. Solenoid and signal cables should not be laid near power cables.
Due to the charging current of the smoothing capacitor on the card, fuses used should have slow-blowing characteristics. When using the differential input, both inputs must always be switched on or off simultaneously. Electrical signals, such as the "ready for operation" signal, brought out via control electronics should not be used for switching safety-relevant machine functions.
The amplifier includes a self-protection mechanism: the output stage shuts down in case of excessive temperatures (e.g., due to overloading), indicated by the LED "H2" going out. A cable break in the 4 to 20 mA input will also reset the "ready for operation" signal and cause LED "H2" to go out. From component series 11 onwards, a short-circuit or cable break of the solenoid cable will cause the "ready for operation" output to switch and LED "H2" to flash at a frequency of 0.5 to 2 Hz when the command value is greater than 2%.
Troubleshooting steps are provided to diagnose common issues, including checking the operating voltage, fuse status, internal operating voltages, potentiometer connections, and solenoid resistance.
| Command value | ±10 V |
|---|---|
| Ramp time | Adjustable |
| Enable input | 24 V DC |
| Protection Class | IP20 |
| Supply voltage | +24 V DC |
| Operating Temperature | 0 to +50 °C |
| Storage Temperature | -20°C to +70°C |