36
DISASSEMBLY PROCEDURES
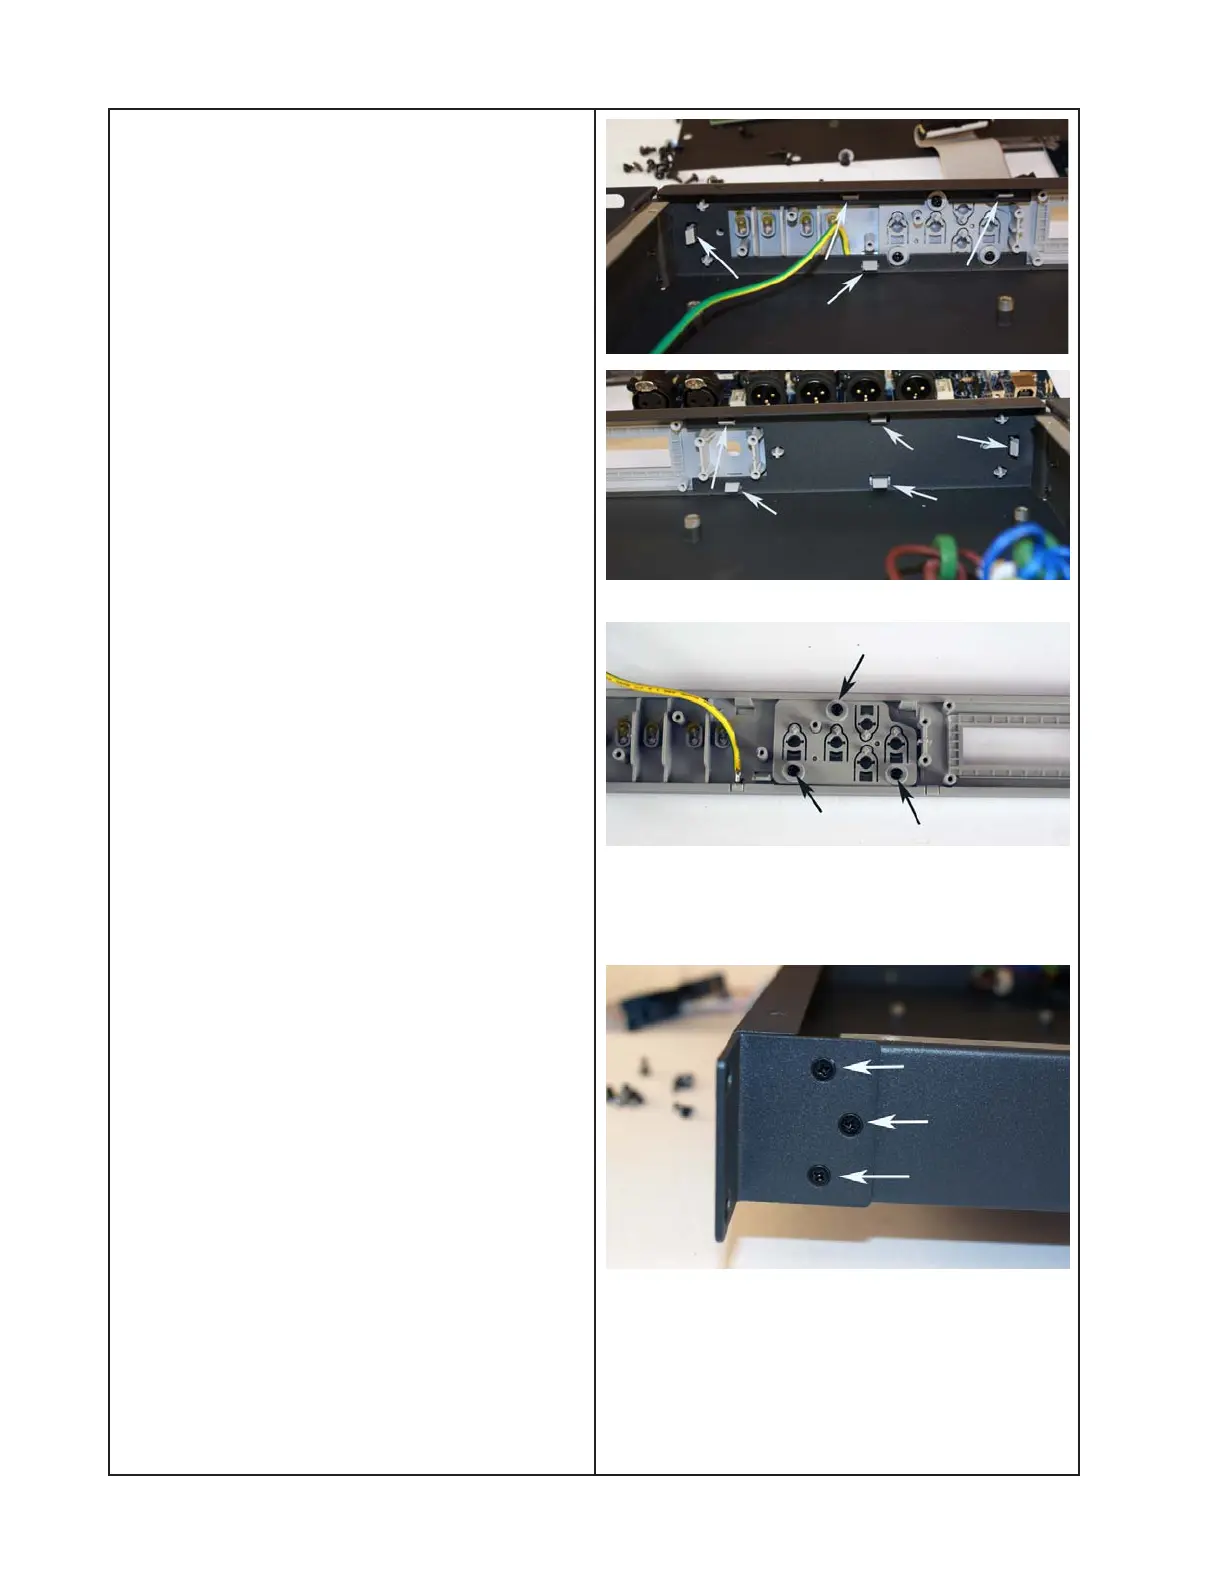
8.3 Disconnect the green/yellow ground wire
that is secured at the corner of the power
supply. That wire connects to the bottom
edge of the front panel metal wrap.
8.4 Using a small flat-tip screwdriver,
release the nine plastic tabs that secure
the front panel to the chassis. It is easiest
to start at one end of the chassis and work
your way across, gently pulling the front
panel away from the chassis as you go.
Refer to the photos at right.
9. Arrow and Select/Load Button
Removal
9.1 Perform procedure 1.
9.2 Remove the Button/LED PCB using
procedure 5.
9.3 Using a Phillips-head screwdriver,
remove the three screws that secure
the plastic arrow and select/load button
assembly to the front panel.
10. Rack Ear Removal
10.1 Remove the three screws that secure
the rack ear you wish to remove. Refer to the
photo at right.

 Loading...