16 of 36
5.0 System Setup
5.1 System setup introduction
This section provides instructions on adjusting system settings
for preferred operation. To make these settings, the system must
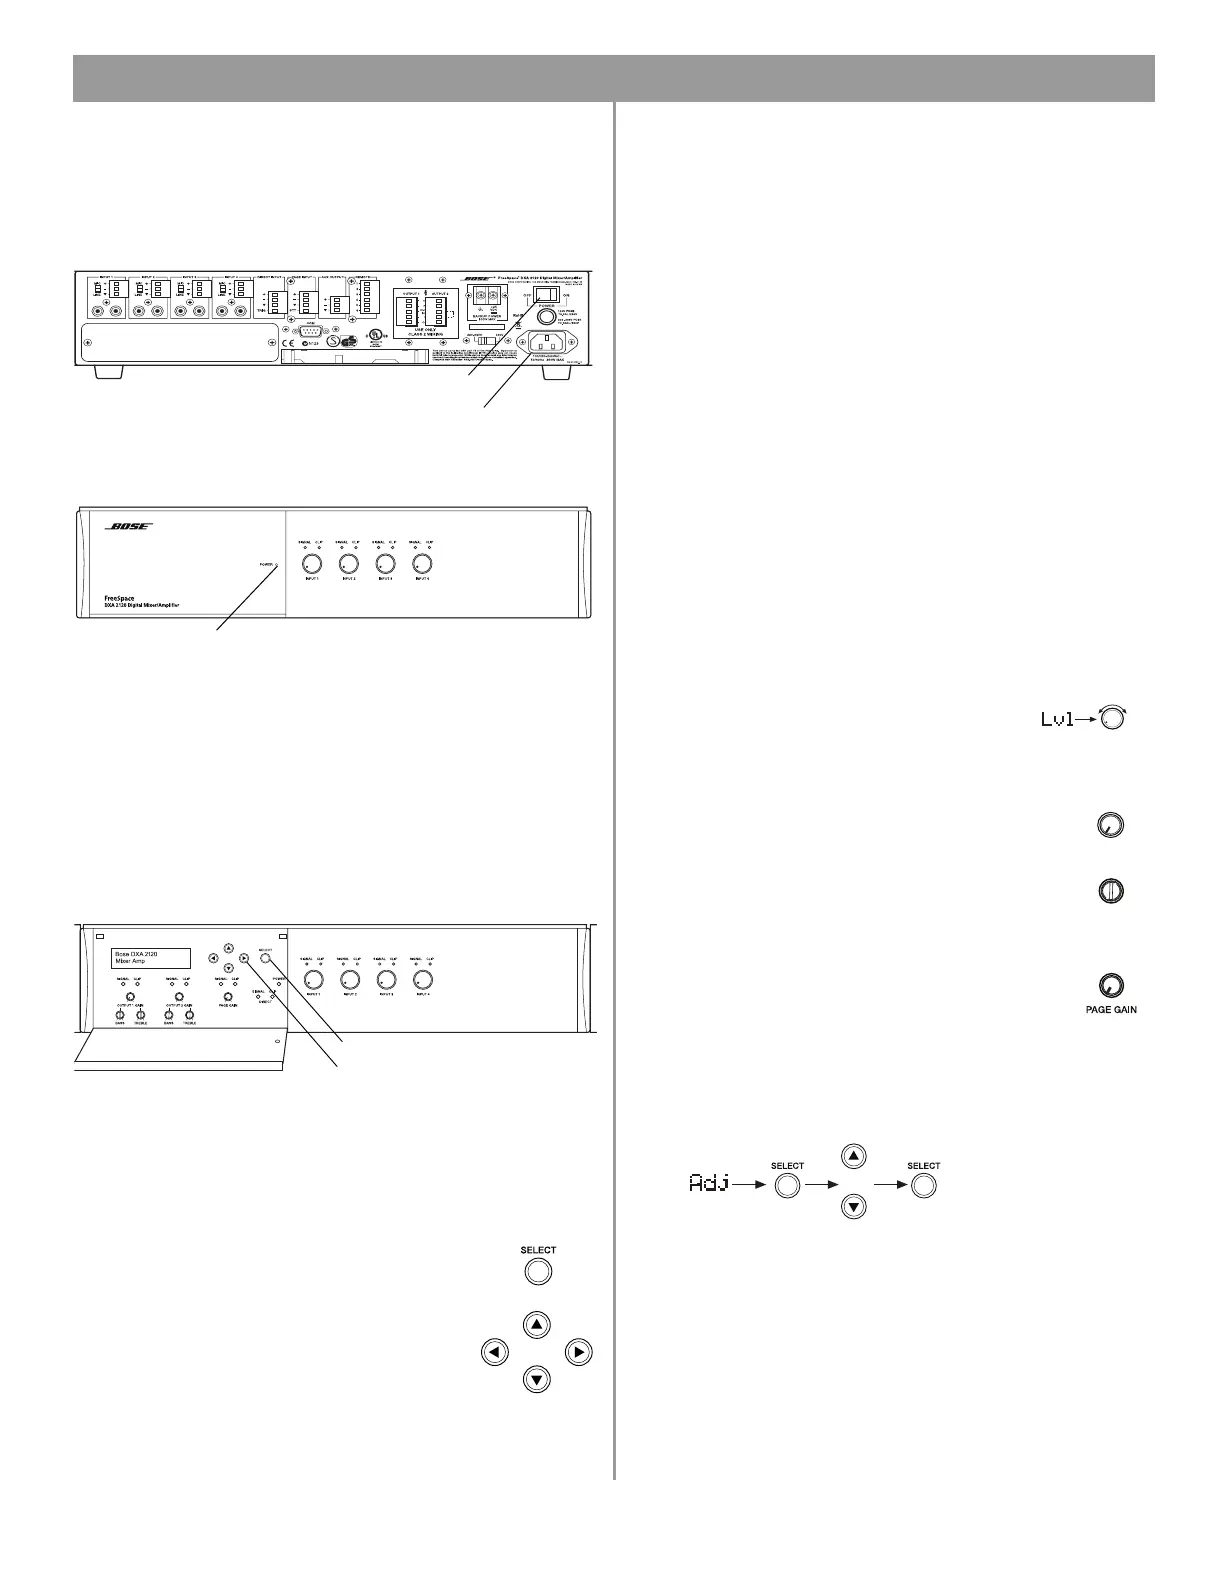
be connected to power and the POWER switch set to ON.
POWER switch
POWER
LED
Rear connection panel
AC power cord
jack
Front control panel
Note: When the system is unplugged, or if a power loss occurs,
these system settings are retained in flash memory. However,
continuous system operation during a power loss requires the use
of an optional backup power source.
5.2 System setup procedure
When the unit is on, the POWER LED lights. Opening the front
control compartment gives you access to the LCD and control
buttons. The LCD displays the product model name at startup.
Arrow buttons
SELECT button
Front control compartment
• If the system is locked, simultaneously press the left and right
arrow buttons and hold for five seconds. Lockout Off appears.
• When the system is unlocked, you can navigate to system
setup options.
• Use the
SELECT button to activate a menu
option and to confirm a new setti
ng.
• Use the arrow buttons to the right of the LCD
to move forward, back, up, and
down through
menus.
5.2.1 Selecting an operation mode
The setting menus available depend on the mode of operation
you choose. Use the right arrow button to enter the mode menu.
Then use the up or down arrows to select the mode you want.
Choose from:
• Mixer Mode: The system can mix up to four mic/line inpu
ts to
each of the two output channels for use in one or two zones.
• Stereo Select Mode: With up to two stereo sources
connected and using both output channels, the system
provides stereo sound to a single output zone.
• Dual Mono Select Mode: With two in
put sources connected
to each of the two output channels, the system provides audio
in two zones.
• Utility: Includes system lockout, an option to restore all
settings to the factory def
aults, and the ability to view firmware
and EQ versions.
To confirm your select
ion, press the SELECT button. An
asterisk (*) appears to the left of the selection made.
5.2.2 Setting the options for that mode
There are several ways to change settings and particular buttons
to use for each type of setting. Such as:
• To adjust Input Vol L
vl, use the knobs on the
mixer/amplifier front panel only.
The level that
is set appears in the menu field, but cannot be
changed in
the menu.
• For Output Vol Lv
l, adjust the gain knobs for
output, located in the front control compartment.
• For Output Bass Lvl and Output Treb
Lvl, turn the
gain screws for bass and treble, located in the front
control compartment.
• For Page Vol Lvl, use the PAGE GAIN knob, located
in the front control compartment.
• To change Adj menu
fields:
1. Activate the field by pr
essing SELECT.
2. Use the up or down arrow to adjust the value.
3. Press SELECT to confirm the setting and move on.
Note: After a 45 second pause (with no activity), the system
resets to the initial menu for the chosen mode.
5.0 Setup.fm Page 16 Monday, February 12, 2007 8:54 AM

 Loading...