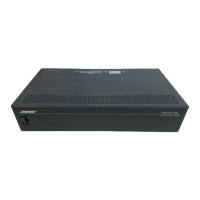
105
DISASSEMBLY PROCEDURES
4. DSP PCB Removal
(IZA 2120-HZ and IZA 2120-LZ units only)
4.1 Perform procedure 1.
4.2 Unplug the ribbon cables at J400, J401,
J405 and J406. Disconnect the wiring har-
nesses at J403 and J404.
4.3 Remove the four screws that secure the
PCB assembly to the chassis. Lift out the
PCB assembly.
5. LED PCB Removal
5.1 Perform procedures 1 and 2.
5.2 Remove the four screws that secure the
PCB assembly to the front panel. Remove
the one ground screw to the chassis. Lift out
the PCB assembly.
5.3 Unplug the wiring harness at J950.
6. Front Panel Removal
6.1 Perform procedure 1.
6.2 Make a note of the wiring configuration,
and disconnect the four Faston connectors
on the back of the AC switch.
6.3 Remove the four screws located on the
sides of the plastic front panel that secure it
to outside of the chassis.
Note: You may need to remove the front rack
ears to access these screws. If so, remove
the three rack ear screws and lift off the rack
ear.
6.4 Remove the LED PCB using
procedure 5.
6.5 Release the front panel retaining tabs
that are located inside the chassis. Slide off
the front panel.
7. Front Panel PCB Removal
(IZA 2120-HZ and IZA 2120-LZ units only)
7.1 Perform procedures 1, 2 and 4.
7.2 Unplug the ribbon cable at J902.
7.3 Remove the plastic front panel using
procedure 6.
7.4 Remove the front panel knob. Using a
10mm nut driver, remove the hex nut and
washer that secure the Master Level
potentiometer to the plastic front panel.
7.5 Remove the six screws that secure the
PCB assembly to the front panel. Remove
the one ground screw to the chassis. Lift off
the PCB assembly.
8A. Rear Panel PCB Assembly Removal
(IZA 2120-HZ and IZA 2120-LZ units only)
8.1A Perform procedure 1.
8.2A Unplug the ribbon cables at J716 and
J700. Disconnect the wiring harness at J3
on the amplifier PCB assembly.
8.3A Remove the eleven screws that secure
the rear panel jacks to the chassis. Lift out
the PCB assembly.
IMPORTANT NOTE: Do not remove the
screws located on the inside of the chassis
that are on the PCB assembly itself. These
screws are mounted to standoffs used to
keep the board at the proper spacing from
the chassis.
8B. Rear Panel PCB Assembly Removal
(ZA 2120-HZ and ZA 2120-LZ units only)
8.1B Perform procedure 1.
8.2B Disconnect the wiring harness at J201
on the SMPS PCB assembly. Disconnect
the wiring harnesses at J1, J3 and J5 on the
amplifier PCB assembly. Disconnect the
wiring harness at J950 on the LED PCB.

 Loading...