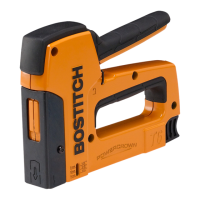
5
ENGLISH
OPERATION
WARNING: To reduce the risk of personal
injury, disconnect tool from air supply before
performing maintenance, when loading or
removing fasteners, clearing a jammed fastener,
leaving work area, moving tool to another
location or handing the tool to anotherperson.
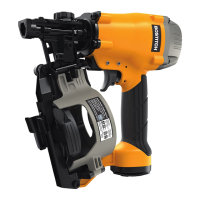
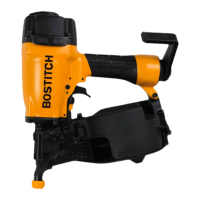
Proper Hand Position (Fig. B)
WARNING: To reduce the risk of serious personal injury,
ALWAYS use proper hand position asshown.
Proper hand position requires one hand on the main
handle
8
.
Fig. B
8
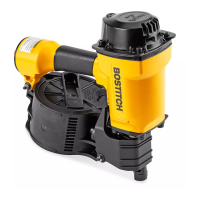
Loading the Tool (Fig. C–G)
WARNING: Keep the tool pointed away from yourself
and others. Serious personal injury mayresult.
WARNING: Never load nails with the contact trip or
trigger activated. Personal injury mayresult.
NOTICE: Use only BOSTITCH-, PORTER-CABLE-,
or
-approved fasteners. Refer to
FastenerSpecifications.
1. Disconnect the air supply to thetool.
2. Lift the canister door latch
3
to open the nail guide
door
6
.
3. Rotate the canister door
16
open.
Fig. C
3
16
6
4. Adjust the nail platform
9
(Fig. D) to properly
accommodate the nail length being used. Pull the nail
platform up or down for desirednail.
Fig. D
9
Platform Position Nail Length
lowest position 1–1/2" (38 mm) - 1-3/4" (44.5 mm)
center position 1–1/4" (32 mm)
upper position 3/4" (19 mm) - 1" (25 mm)
5. Place the coil on the nail platform
9
.
NOTE: Observe fastener icon
10
.. Insert fasteners
11
with pointsdown.
Fig. E
10
11
6. Uncoil enough nails [approximately 3" (76mm)] to
reach the nose of thetool.
7. Insert the first nail into the nose and the second nail
12
between the two rails of the feed pawl as shown in
FigureF.
Fig. F
12
\
NOTE: Be careful not to deform the coil of nails during the
loading process. Otherwise, the nail guide door will not
close and the nails might not feedconsistently.
8. Close the canister door
16
completely.
9. Close the nail guide door
6
making sure the door latch
3
is completely engaged as shown in FigureG.