84
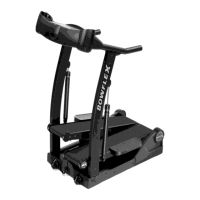
21. Using a 9/16” or 14mm socket and wrench, remove the nut from the Right
Crank Assembly.
22.AdjusttheCrankPulleruntiltheendoftheBoltisushwiththeNut(as
shown).
23. Carefully thread the Crank Puller into the Right Crank Arm. Be sure the
Crank Puller has at least three rounds of threads inserted.
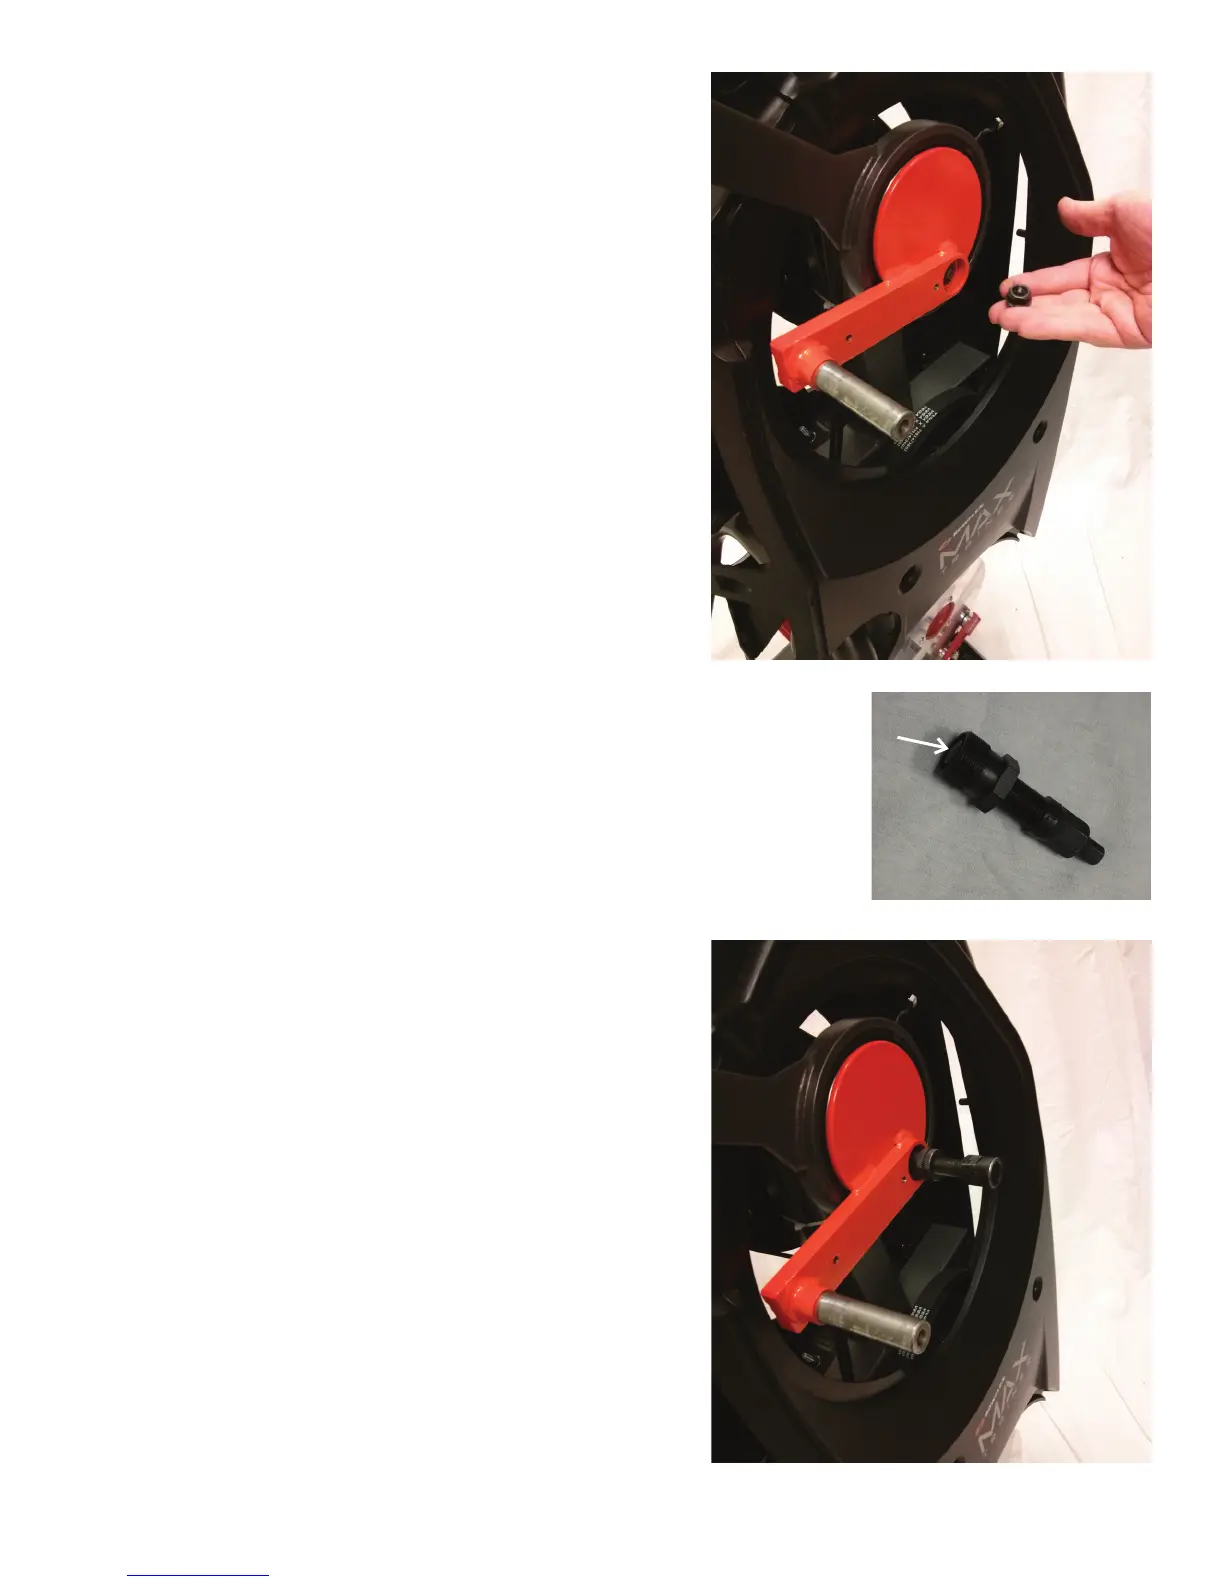
24. Using a 16mm wrench, turn the inner portion (the Bolt) of the Crank Puller
clockwise. The Right Crank Arm will slide off as it is tightened.
Note: Be aware that the Right Crank Arm will be loose and will need to be
supported.
25. Remove the Crank Puller from the Right Crank Arm.