4
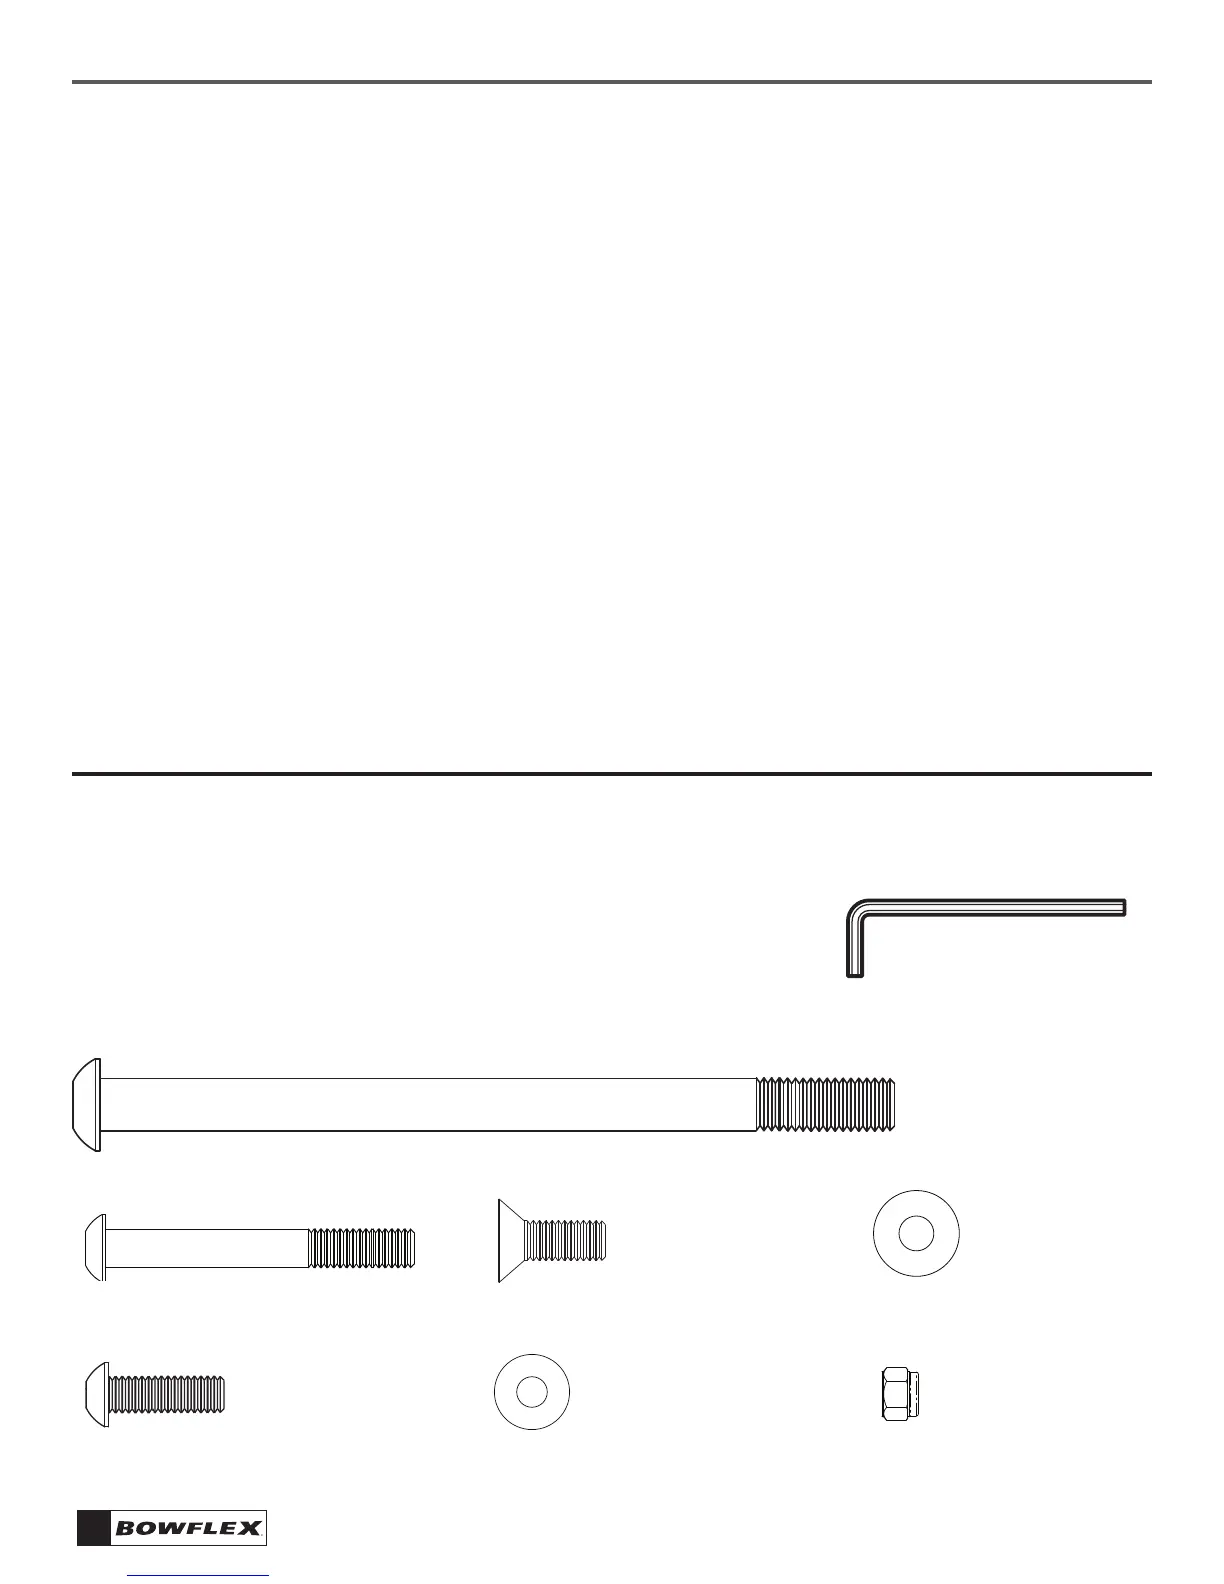
Hardware and Tool Guide
Tools Required:
• 9/16” Wrench or socket wrench
• 1/2” Wrench (for older Xtreme
®
2 model only)
• 7/32” Allen Wrench (provided)
• 3/16” Allen Wrench (provided)
Before You Assemble
Before You Assemble
Please take the time to read all assembly instructions
before attempting to assemble your Bowflex
®
Preacher Curl accessory.
Please note that the procedure for installing the
Preacher Curl attachment is slightly different for
a Bowflex Xtreme
®
, Bowflex Xtreme
®
2, Bowflex
Xtreme
®
SE or Bowflex Xceed
™
home gym. Most of
these models will require the seat to be stabilized
with the Seat Locking Pin in the Preacher Curl kit.
However, some Bowflex
®
home gym models are
already equipped with a Seat Locking Pin.
Basic Assembly Principles
Here are a few basic tips that will make your assembly of the
Bowflex
®
Preacher Curl attachment quick and easy. By using
these principles, you can simplify each process and save
yourself extra time and effort.
1. To make the assembly process go faster, gather the pieces
you need for each step and thoroughly read the assembly
instructions for that step prior to starting assembly for the
step.
2. When tightening a locknut on a bolt, use a combination
wrench to grip the locknut and ensure that it is fastened
securely.
3. When attaching two pieces, gently lift and look through the
bolt holes to help guide the bolt through the holes.
4. As a general rule, and for all bolts and nuts on your Bowflex
®
Preacher Curl attachment, turn bolts or nuts toward the right
(clockwise) to tighten and left (counterclockwise) to loosen.
Or you can remember the mnemonic: “Righty tighty, lefty
loosey.”
Descr: Allen Bolt - 3/8” x 2-3/4”
Qty: 2
Descr: Lock Nut 3/8”
Qty: 1
Descr: Flat Washer 3/8”
Qty: 4
Hardware:
NOTE: Illustrations not to scale.
Descr: Flat Washer 5/16”
Qty: 4
Descr: Allen Bolt - 5/16” x 1”
Qty: 4
Descr: Flathead Bolt - 3/8” x 1”
Qty: 4
Descr: Allen Bolt - 3/8” x 5-3/4”
Qty: 1