6
Assembly Instructions
STEP 1: Secure the Seat Assembly
Parts:
• Seat Assembly on home gym
• (1) Support Bracket - Item 8
• (1) Seat Locking Pin - Item 9
Hardware:
• (4) Bolts under Seat at mounting bracket
• (1) 3/8” X 5-3/4 Allen Bolt - Item 10
• (2) 3/8” Washers - Item 14
• (1) 3/8” Nut - Item 16
Tools:
• 7/32” Hex Wrench
• 3/16” Hex Wrench (for seat bolts)
• 1/2” Hex Wrench (for seat bolts on older
Bowex Xtreme
®
2 model)
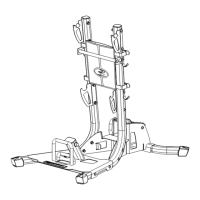
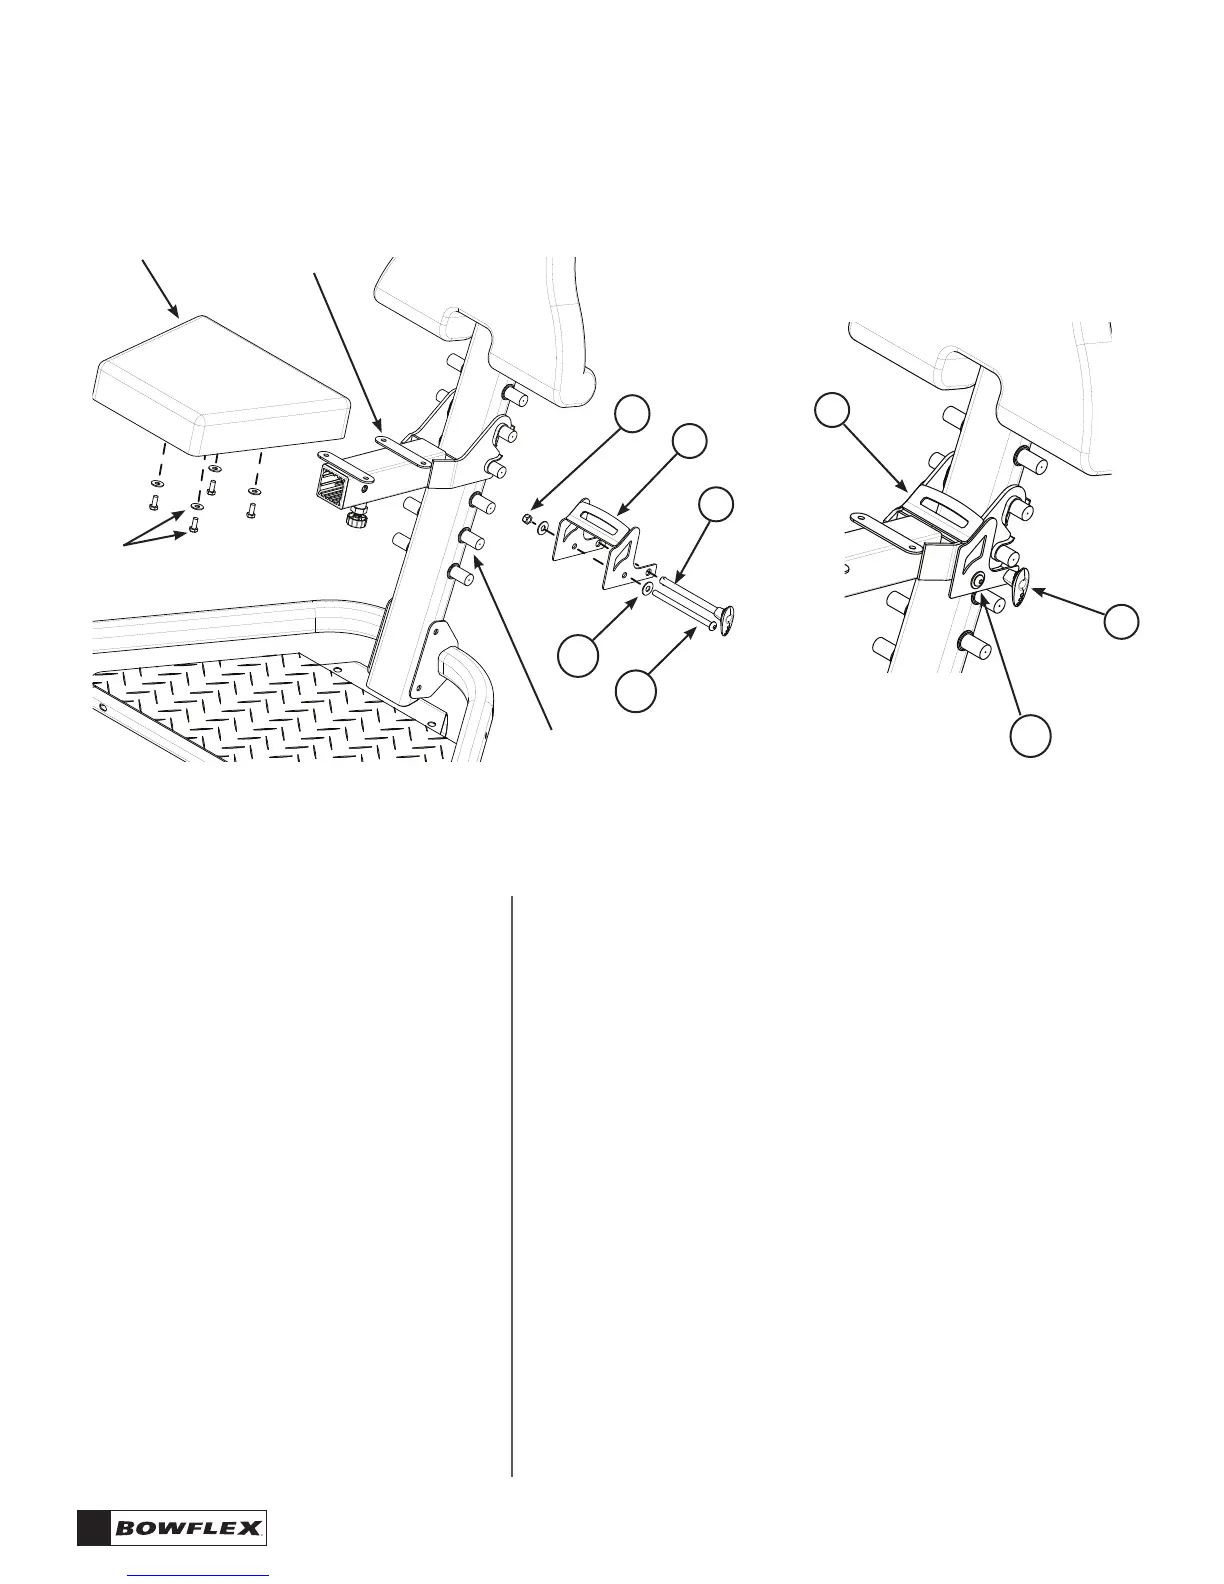
Figure 1a - Remove seat pad to install
support bracket
Figure 1b - Installed support bracket
(seat pad not shown for clarity)
Assembly Steps:
1-1 If your home gym is equipped with a Leg Extension
attachment, make sure that the Leg Extension is not
installed under the seat.
1-2 If your home gym seat is equipped with a Seat Locking Pin
(9), secure the Seat Assembly on the Seat Support Rail with
the Seat Locking Pin. Go to Step 2.
If your home gym is not equipped with a Seat Locking
Pin, detach the Seat Pad from the Seat Backbone by
unscrewing the 4 seat bolts in the seat mounting bracket.
1-3 Slip the Support Bracket (8) onto the Seat Backbone and
secure with the Allen Bolt (10), Washers (14) and Nut (16).
See Figure 1a and 1b. Reattach the Seat Pad to the Seat
Backbone with the 4 seat bolts and washers.
1-4 Secure the Seat Assembly and Support Bracket on the Seat
Support Rail with the Seat Locking Pin. See Figure 1b.
Seat Pad
Seat backbone
Seat support
rail
8
10
9
Seat
bolt &
washer
9
8
14
16
10