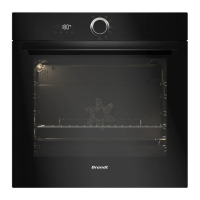
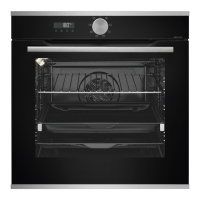
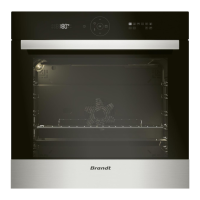
This document describes the Brandt Oven, a versatile appliance designed for domestic and similar applications, including kitchen areas in shops, offices, farms, hotels, motels, and bed and breakfast environments.
Function Description
The Brandt Oven offers a range of cooking modes, including microwave, grill, pulse grill, and revolving heat (convection), as well as automatic defrosting and a culinary guide.
Microwave Cooking Modes:
- 1000W: Ideal for rapid heating of beverages, water, and dishes with high liquid content, such as soups, sauces, and tomatoes.
- 900W: Suitable for cooking fresh or frozen vegetables.
- 700W: Designed for cooking fish and shellfish, dried vegetables on low heat, and reheating or cooking delicate egg-based foods.
- 500W: Perfect for slow cooking dairy products and jams.
- 200W: Used for defrosting pastries containing cream.
Traditional Cooking Modes:
- Grill Pulse: Provides a crispy finish for roasts and poultry, and cooks legs and ribs without preheating. The cooking process alternates between the upper heating element and the air circulation propeller. The temperature can be adjusted from 50°C to 200°C.
- Grill: Allows for cooking and browning foods like gratins and meats. It can be used before or after cooking, with 4 levels of grilling intensity (1 to 4, from low to very high).
- Revolving Heat (Convection): Cooks and browns food like a conventional oven, using a heating element at the bottom and an air circulation propeller. The temperature can be adjusted from 50°C to 220°C.
Automatic Functions:
- Culinary Guide: Selects appropriate cooking parameters based on the food type and weight. Pre-programmed options include various vegetables (fresh, fibrous, frozen), poultry, beef, fish, fresh and frozen pizza, prepared fresh and frozen dishes, savoury pies, and quiches.
- Automatic Defrosting: Defrosts frozen food by weight, saving time. Pre-programmed options include meat, poultry, ready meals, fish, and bread.
Important Technical Specifications
- Power Supply: 220-240 Volts~, 16 Amps.
- Electrical Connection: Requires a 3-conductor, 1.5 mm² cable (1 phase + 1 neutral + earth) connected via an omnipole switch. The protective wire (green-yellow) must be connected to the appliance's earth terminal and the installation's earth.
- Installation Height: Must be installed at least 850 mm from the ground.
- Cabinet Clearance: A minimum distance of 10 mm between the appliance and the surrounding unit is required. The cabinet material must be heat-resistant.
- Cabinet Rear Clearance (if open): If the back of the cabinet is open, the space between the wall and the surface on which the oven rests must not exceed 70 mm.
- Microwave Frequency: 2450 MHz.
- Microwave Penetration Depth: Approximately 2.5 cm.
Usage Features
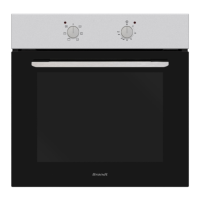
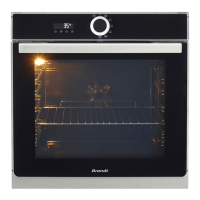
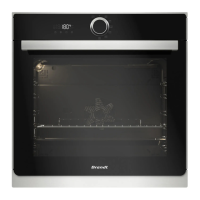
Display and Control Buttons:
The oven features a digital display showing:
- Cooking time
- End of cooking time
- Keypad lock indicator
- Minute minder
- Weight indicator (g)
- Temperature indicator (°C)
Control buttons include:
- Time & Duration Setting/Menu button (1): For adjusting time and accessing settings.
- Minus button (2): For decreasing values.
- Plus button (3): For increasing values.
- Start/Cancel button (4): For starting or cancelling operations.
Settings:
- Time Setting: Flashes 12:00 on power-up. Can be adjusted with +/- buttons and confirmed with the Time & Duration Setting/Menu button.
- Changing the Time: With the function selector in position 0, press the Time & Duration Setting/Menu button twice to adjust the time.
- Minute Minder: Can be set when the oven is off. Adjust with +/- buttons and confirm with the Time & Duration Setting/Menu button.
- Keypad Lock (Child Lock): Activated by pressing +/- buttons simultaneously until the lock symbol appears. Deactivated by pressing them again.
- Settings Menu: Accessed by pressing the Time & Duration Setting/Menu button for a few seconds. Allows activation/deactivation of key beeps, standby display mode (ON: display off after 90 seconds; OFF: reduced brightness after 90 seconds), and demo setting.
- Turntable Stop: Allows placing large dishes on the entire oven surface by stopping the turntable rotation. Activated/deactivated by pressing the +/- buttons simultaneously.
Cooking Process:
- Starting a Microwave Cooking Process: Turn the function selector to choose the desired power. The display flashes, showing a pre-set cooking time. Confirm with the Start/Cancel button to begin.
- Changing End Time of Cooking: During a cooking process, press the Time & Duration Setting/Menu button to access the end-of-cooking setting, then adjust with +/- buttons and confirm.
- Smart Assist Function: For traditional cooking modes, this function recommends a cooking time that can be modified. It is deactivated by default and can be activated in the settings menu.
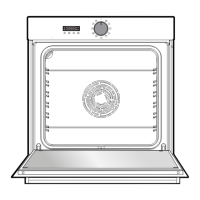
Accessories:
- Grill Rack: Anti-tilt, used for toasting, browning, or grilling. Not to be used with other metal containers in microwave or combination modes.
- Multi-purpose Drip Tray (45 mm): Can be half-filled with water for bain-marie cooking with fan heat or used as a cooking dish. Must be centred in the side racks to ensure proper airflow.
- Grill Rack + Drip Tray: Used together for roasting and collecting cooking juices.
- Shelf Runners: Two shelf supports allow the grill rack to be used at 3 different heights.
- Turntable Plate: Ensures even cooking. Rotates in both directions. Can be stopped for larger dishes.
Maintenance Features
- Regular Cleaning: Recommended to clean the oven regularly, both inside and out, to remove food deposits. Use a damp, soapy sponge.
- Cleaning the Cavity: For odours or stubborn dirt, boil water with lemon juice or vinegar in a cup for 2 minutes, then clean the walls with a little washing-up liquid.
- Door and Door Seal: If damaged, the oven should not be used until repaired by a competent person.
- Cleaning Products: Do not use abrasive cleaning products, abrasive sponges, or hard metal scrapers on the glass door, as this may scratch the surface and cause the glass to shatter.
- Steam Cleaner: Do not use a steam cleaner.
Troubleshooting:
- Oven not heating up: Check electrical connection and fuse. Increase selected temperature.
- Oven lamp not working: Contact service department. Check electrical connection.
- Cooling fan continues to run: Normal for up to 1 hour after cooking to lower temperature. If it runs longer, contact service.
After-Sales Service:
- All work must be carried out by a qualified professional.
- When calling for service, provide the complete references of your device (commercial reference, service reference, serial number) found on the nameplate.
- Insist on the use of genuine, certified spare parts.