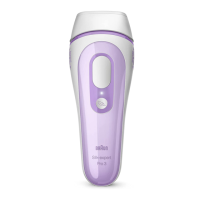
The device is a Gillette Venus Silk-expert Intense Pulsed Light (IPL) hair removal system, designed for comfortable home use. It utilizes professional light technology to help break the cycle of hair growth. Light energy is transferred through the skin's surface and absorbed by melanin in the hair shaft. This absorbed energy converts to heat below the skin's surface, disabling the hair follicle. Treated hairs are expected to fall out naturally within 1-2 weeks.
Function Description
The Silk-expert device is intended for the permanent reduction of unwanted, visible hair for a single user. It is equipped with a treatment window (1), SensoAdapt™ skin tone sensors (2), LED Power bars (3), a light intensity button with indicator light (4), and a treatment button (5). The device also includes a power socket (6), power supply (7), mains cord (8), a removable front with reflector (9), a glass filter (10), and a serial number (11).
The SensoAdapt™ skin tone sensors are a key safety and functionality feature. They measure the color of your skin and automatically set the appropriate output power level. If the skin tone sensors determine your skin is too dark for safe use, the device will prevent operation. This is indicated by RED lights on the Power Bar. For valid skin tones, the Power Bars will illuminate WHITE. The device is designed for use on light, medium, and dark skin tones up to and including skin tone V. It is most effective on naturally black or brown hair and may be less effective on white, grey, blonde, or red hair.
Usage Features
Before using the device, it is crucial to prepare the treatment area by removing all visible hair on the skin using your preferred hair removal method. Ensure no hair remains above the skin surface to prevent damage to the removable front and discomfort. All cosmetics, lotions, and creams should be removed, and the area cleansed and patted dry.
A test patch is recommended before the first treatment on each new body area. This involves applying two flashes to a 3 cm x 2 cm area. After waiting 24 hours to check for adverse reactions, the surrounding area can be treated. The patch-tested area should not be re-treated for at least one week.
To operate, plug the mains cord (8) into an electrical outlet and the power supply (7) into the power socket (6). The LED power bars (3) will light up, and a fan will start, indicating the device is in READY mode. For treatment, the treatment window (1) must be pressed firmly against the skin, ensuring both skin tone sensors (2) are in contact. The device will not operate if only one sensor is in contact. Once a valid skin tone is measured, the pre-set output power is displayed on the LED Power Bars (3).
The device offers two treatment modes:
- Gliding mode: Recommended for fast and efficient treatments on large skin surface areas like legs, arms, chest, and back. In this mode, you press and hold the treatment button (5) while slowly and continuously moving the device across the skin, ensuring full skin contact for continuous flashes.
- Precision mode: Recommended for sensitive, small, or hard-to-reach areas such as knees, shins, ankles, bikini line, underarms, and the face for females. In this mode, you press and instantly release the treatment button (5) for a single flash, then lift the device and place it on the next adjacent spot. Wait for the power bars to show white LEDs before flashing again.
To avoid missed areas, place the treatment window directly next to the previously treated spot without leaving any gaps. If intense pain is felt, treatment should be stopped immediately, and a physician consulted.
The device also features adjustable light intensity. After plugging in, it operates at full light intensity (Normal setting, white indicator light). Pressing the light intensity button (4) once activates the Gentle setting (blue light), and pressing it a second time activates the Extra Gentle setting (flashing blue light). These settings are suitable for sensitive areas and first-time users, though they may require more treatments to achieve desired effects. To return to full power, press the button again.
The device recharges between flashes, taking 1-2 seconds. It is important to ensure the entire area receives treatment but avoid treating an area twice (overlapping flashes).
After 10 minutes of inactivity, the device enters standby mode (indicated by one blinking light on the power indicator bars). Pressing any key or removing/replacing the power cord will return it to READY mode. If not operated for 60 minutes, it enters sleep mode (low power state) with the Power bar LEDs off. Pressing any button or removing/replacing the mains cord will return it to READY mode.
For optimal results, the Silk-expert should be used weekly for 12 weeks to treat all hair follicles. After this initial phase, monthly treatments or treatments as required are recommended to maintain results.
Maintenance Features
After each treatment, the device should be switched off by unplugging the power supply from the device and the electrical outlet. The handset, skin tone sensors (2), and treatment window (1) should be inspected for damage and wiped with a dry, lint-free cloth. Any marks or black spots should be cleaned off immediately.
It is crucial NEVER to use water or other cleaning fluids, as these can damage the device and pose a safety hazard. The glass filter (10) can become hot during use, so it should not be touched or cleaned for at least 5 minutes after use to allow it to cool down.
To maintain maximum performance, the removable front and reflector (9) must be kept free from dirt, hair, or other debris. The front section (9) is removable for cleaning with a slightly damp cloth. Ensure it is completely dry before re-fitting it to the device. To remove, grip the sides of the front section (9) and pull it away. It only fits one way, so do not force it during replacement.
The device should be stored in a cool, dry place, ensuring the treatment window and skin tone sensors are protected from damage. Regular checks for visible signs of damage, including cords, are important. If damage or cracks are observed, stop using the device.
The power supply unit is universal, allowing for travel with the device, provided a suitable adaptor for the mains power cable plug is used.