13
Doc. HD40-0007-02 En-Eu L-4
Power Supply
WARNING: The Z1 must only be used
with the Z1 Power Supply (or the optional Z1
PowerShell with Breas Battery). DO NOT use any
other power source with the Z1.
CAUTION: Make sure the AC power cord
ISNOT plugged into an AC power outlet before
continuing to the next step.
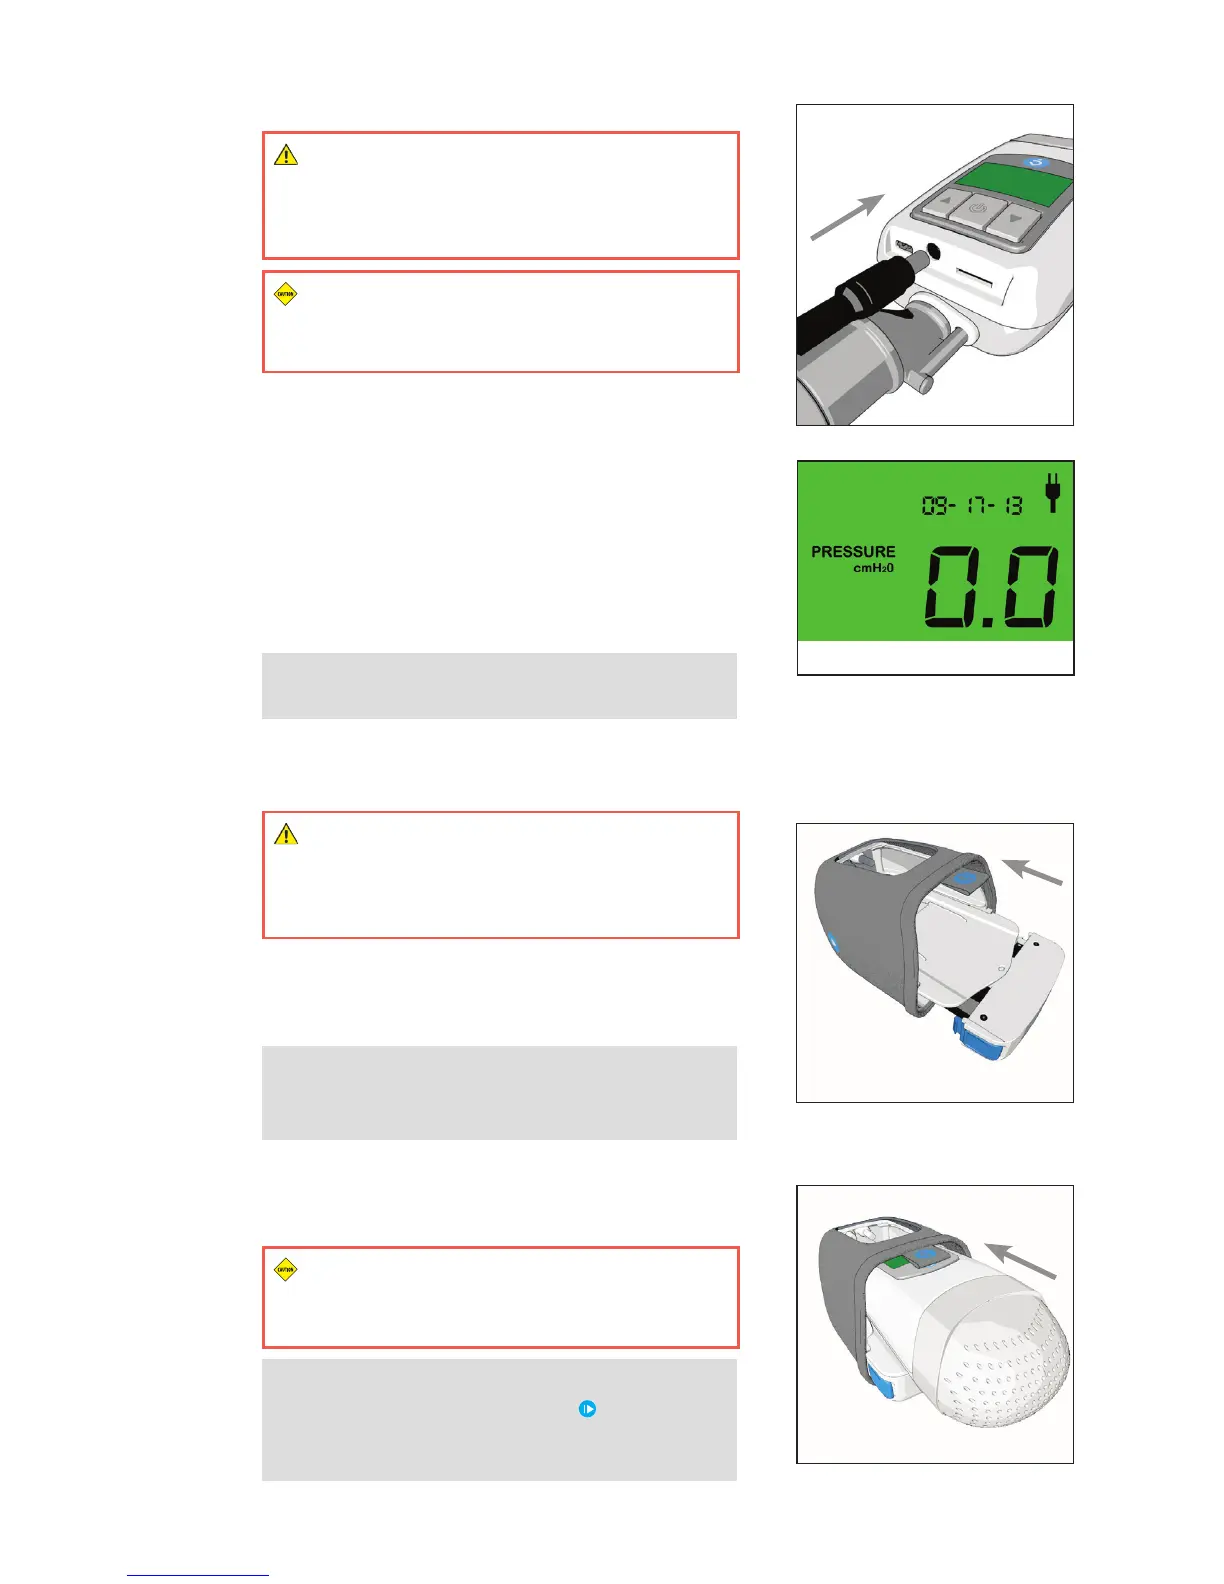
1. Plug the AC power cord into the AC Adapter.
2. Plug the AC power cord into a wall outlet.
3. Plug the AC Adapter into the Z1. (Figure 4)
4. The Z1 will power up and cycle through a series of
startup displays.
5. After about 10 seconds, the Z1 will enter standby
mode. The display will read 0.0. (Figure 5)
NOTE: The Z1 display will be active whenever
the device is receiving power.
PowerShell and Battery
(Available Separately or as Part of Z1 Unplugged)
WARNING: The Z1 must only be used with
the optional Z1 PowerShell with Breas Battery
(or the Z1 Power Supply). DO NOT use any other
power source with the Z1.
1. Slide the Battery with the attached Shuttle into the
lower bay of the PowerShell until the Shuttle clicks
into place. (Figure 6)
NOTE: The Battery can be removed from the
PowerShell by pressing the two blue buttons on
the Battery Shuttle and sliding the Battery out.
2. Slide the Z1 all the way into the upper bay of the
PowerShell until you hear a “click” sound, indicating
the Z1 has locked into place. (Figure 7)
CAUTION: Insert the Z1 carefully ensuring
the power barrel connector slides into the power
input on the Z1.
NOTE: The Z1 can be removed from the
PowerShell by pressing the two [ ] symbols on
the sides of the PowerShell and sliding the Z1
out.
Figure 4
Figure 5
Figure 6
Figure 7
 Loading...