Brent 1082/882 — Maintenance
4-11
Auger System (continued)
Auger Flow Door Cylinder Replacement
(continued)
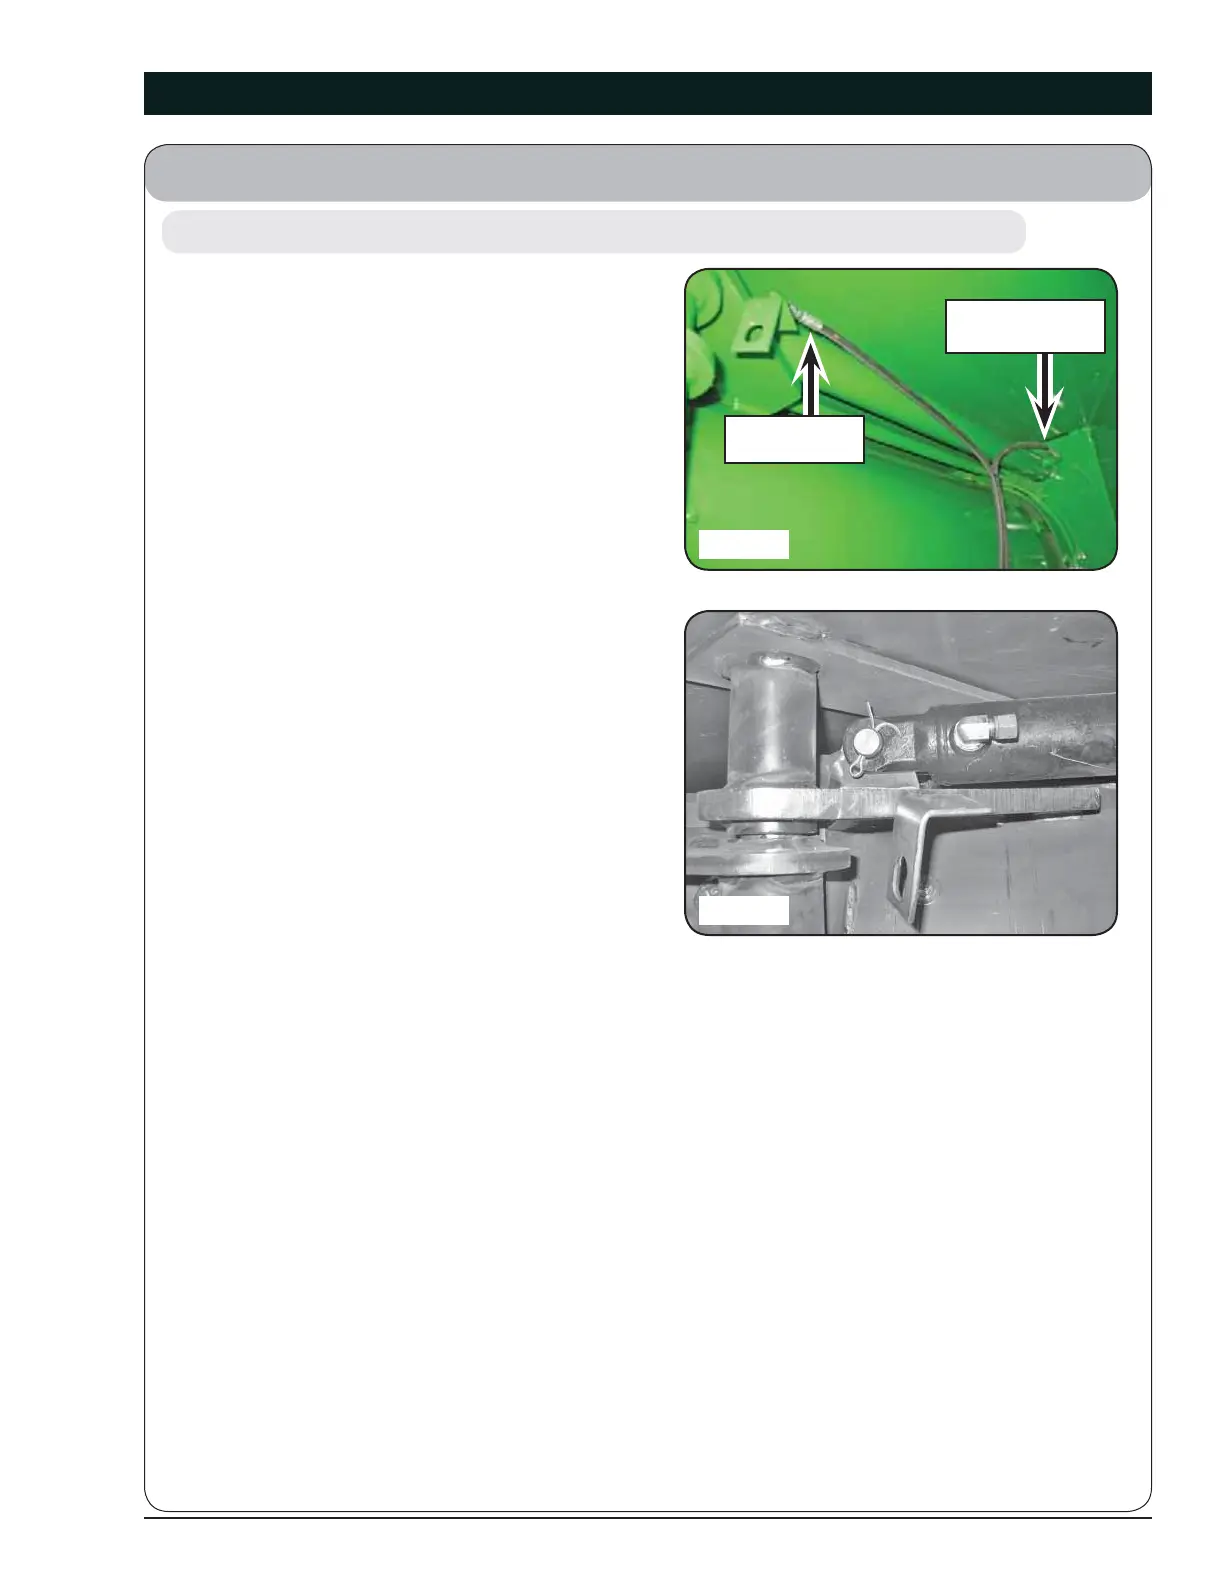
6. Label the hydraulic hoses to indicate upper
and lower. Disconnect them from the cylinder,
along with the lower hydraulic fi tting (Fig. 4-11).
7. Remove the cotter pins from the upper cylinder
pin and remove pin (Fig. 4-12).
8. Slide the fl ow door cylinder through the hole in the junction box until the upper cylinder clevis clears
the lug, then raise the top of the cylinder above the auger fold bushing and remove the cylinder.
9. Replace with the new cylinder and insert the upper cylinder pin. Remove the cylinder port plugs.
Manually extend the cylinder until the lower clevis lines up with the door lug and assemble the pin
and cotter pins. Assemble hydraulic fi ttings and attach hoses.
10. Replace rubber gasket and gasket plate with 3/8-16UNC x 1” fl ange screws, shut and secure the
screen service access panel.
11. Remove all tools and extra hardware from the grain cart. Make sure all personnel are outside of the
hopper. After the hydraulic components have been tightened, purge air from system as follows:
A. Pressurize the system and maintain system at full pressure for at least 5 seconds after cylinder
rods stop moving. Check that all cylinders have fully extended or retracted.
B. Check oil reservoir in hydraulic power source and re-fi ll as needed.
C. Pressurize system again to reverse the motion of step A. Maintain pressure on system for at
least 5 seconds after cylinder rods stop moving. Check that cylinders have fully extended or
retracted.
D. Check for hydraulic leaks using cardboard or wood. Tighten connections according to direc-
tions in the Torque Specifi cations in your Operator’s Manual.
E. Repeat steps A, B, C and D three or four times.
Remove
Upper Hose
Remove Lower
Hose & Fitting
(April 2015)
Fig. 4-11
Fig. 4-12
 Loading...