13
Dis1=Dis
Dis2= Dis from O point to the outside of the flange
disk- ‖
Dia1=Dia
Dia2=Dia-2 ‖
ALU4-Click the weight inside and stick the
weight outside(outside position is similar to
ALU2)
Dis1=Dis
Dis2=Dis + ‖
Dia1=Dia
Dia2=Dia-1‖
6.7 ALU* SELF DEFINITION METHOD AND
WEIGHT SPLIT FUNCTION ALU*
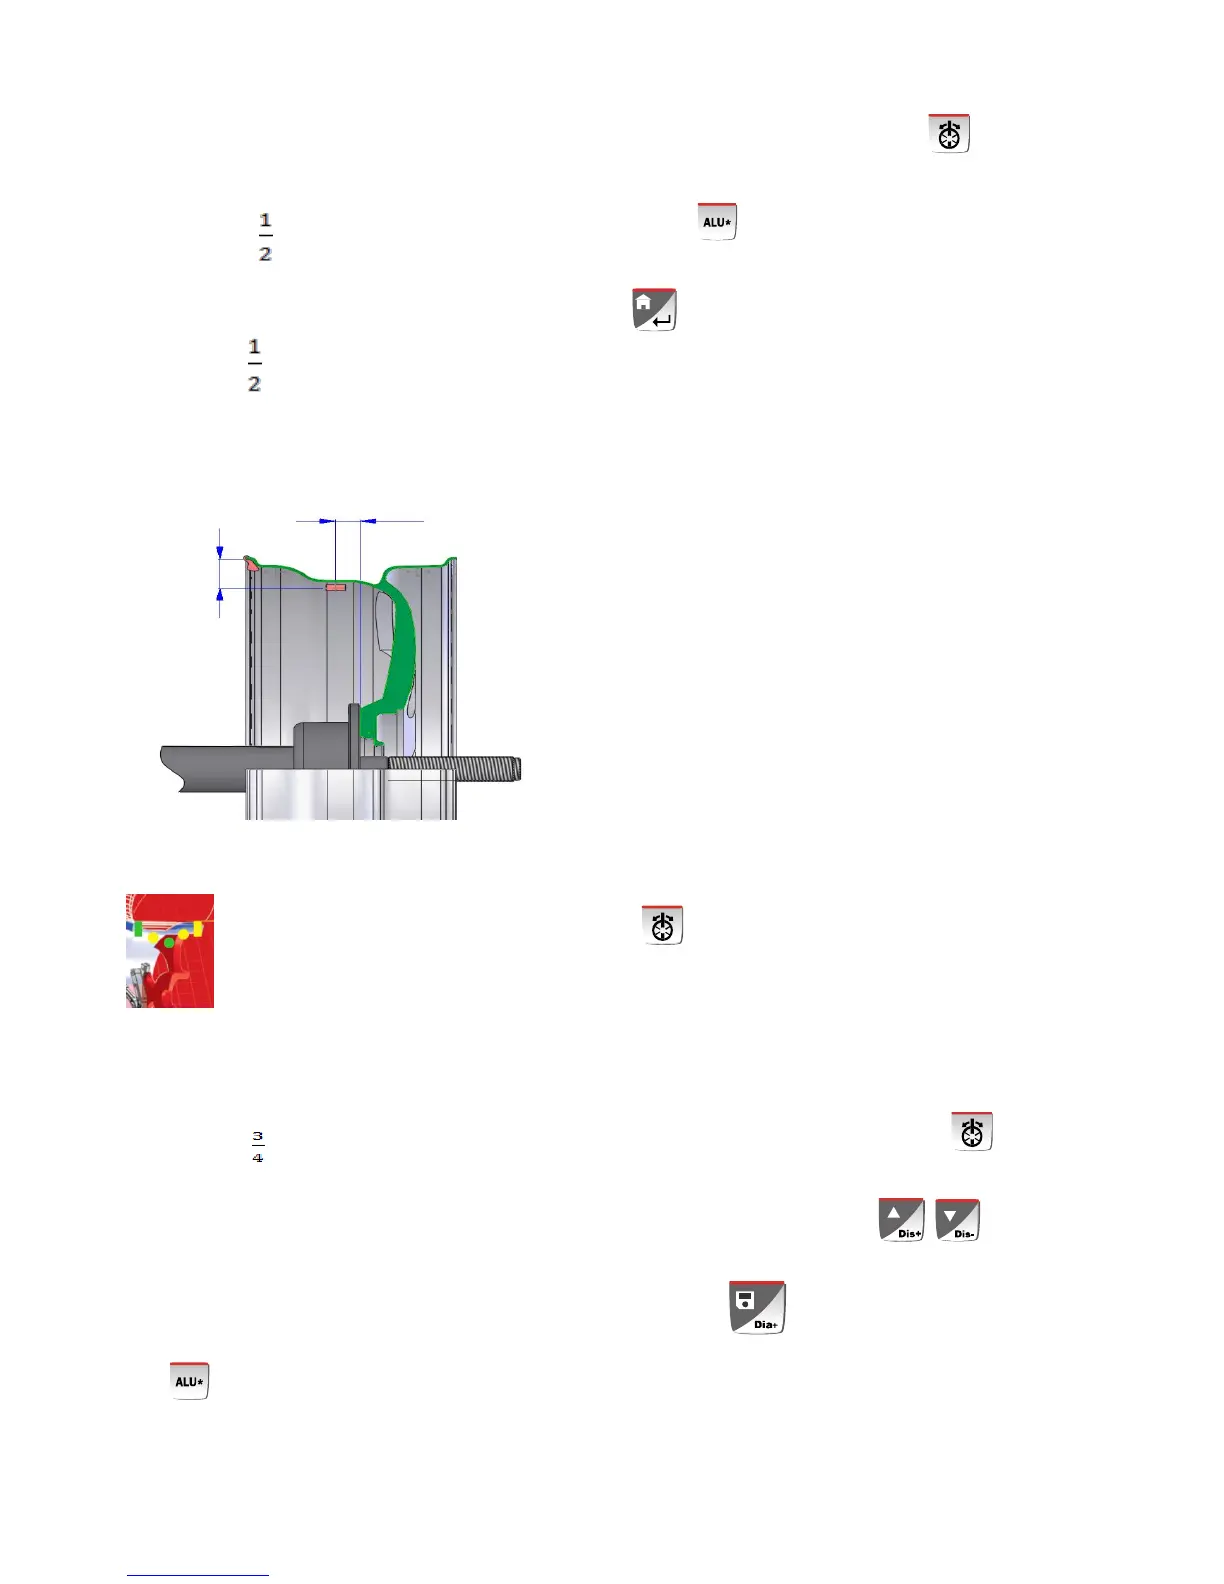
When the customer select the self definition ALU
modes , first use the scale to measure the inside
position of the self-definition weight and then hen press
key to confirm. At this moment, the display will
display the dimension at the D1 position. And then use
the scale to measure the inside position of the
self-definition weight. When we hear the sound of tick,
Meanwhile, the display will display the dimension at the
D2 position. On this condition, we complete the
measurement. Press start key to start up the machine.
After the machine stops rotating, the display displays
the inside and outside unbalance value. Rotate the
wheel until the entire inside position indication lamps
light up. At this moment, the D1 lamp will light. Step the
brake to stop the tire. Pull out the scale and the Dis
value will reduce when the length of the scale enlarged.
When pull to the zero position, press the back end of
the scale and the seal will mark a weight position. In a
similar way, when the entire outer indication lamp light,
mark a weight stick position and stick the
corresponding weight and rotate the wheel to test and
the self-definition ALU mode complete.
ALU SELF-DEFINATION BALANCE MODE :
You can hide the weight behind the spoke. Thisis
only applied to the outside weight.
The detailed operation step is :
6.7.1、After complete the self-definition ALU mode,
first stick the weight inside and select key.
The display will display ―SP‖ –―5‖. According to the
actual spoke quantity, press to adjust to
the actual quantity of the spoke to clip the weight and
then press to confirm.
2 Position any bar of the spoke to the 12clock and hold
on and press