Brillcam Inc. Copyright 2020-2021 Page 33 , Total 83
2.6 Mobile Monitoring
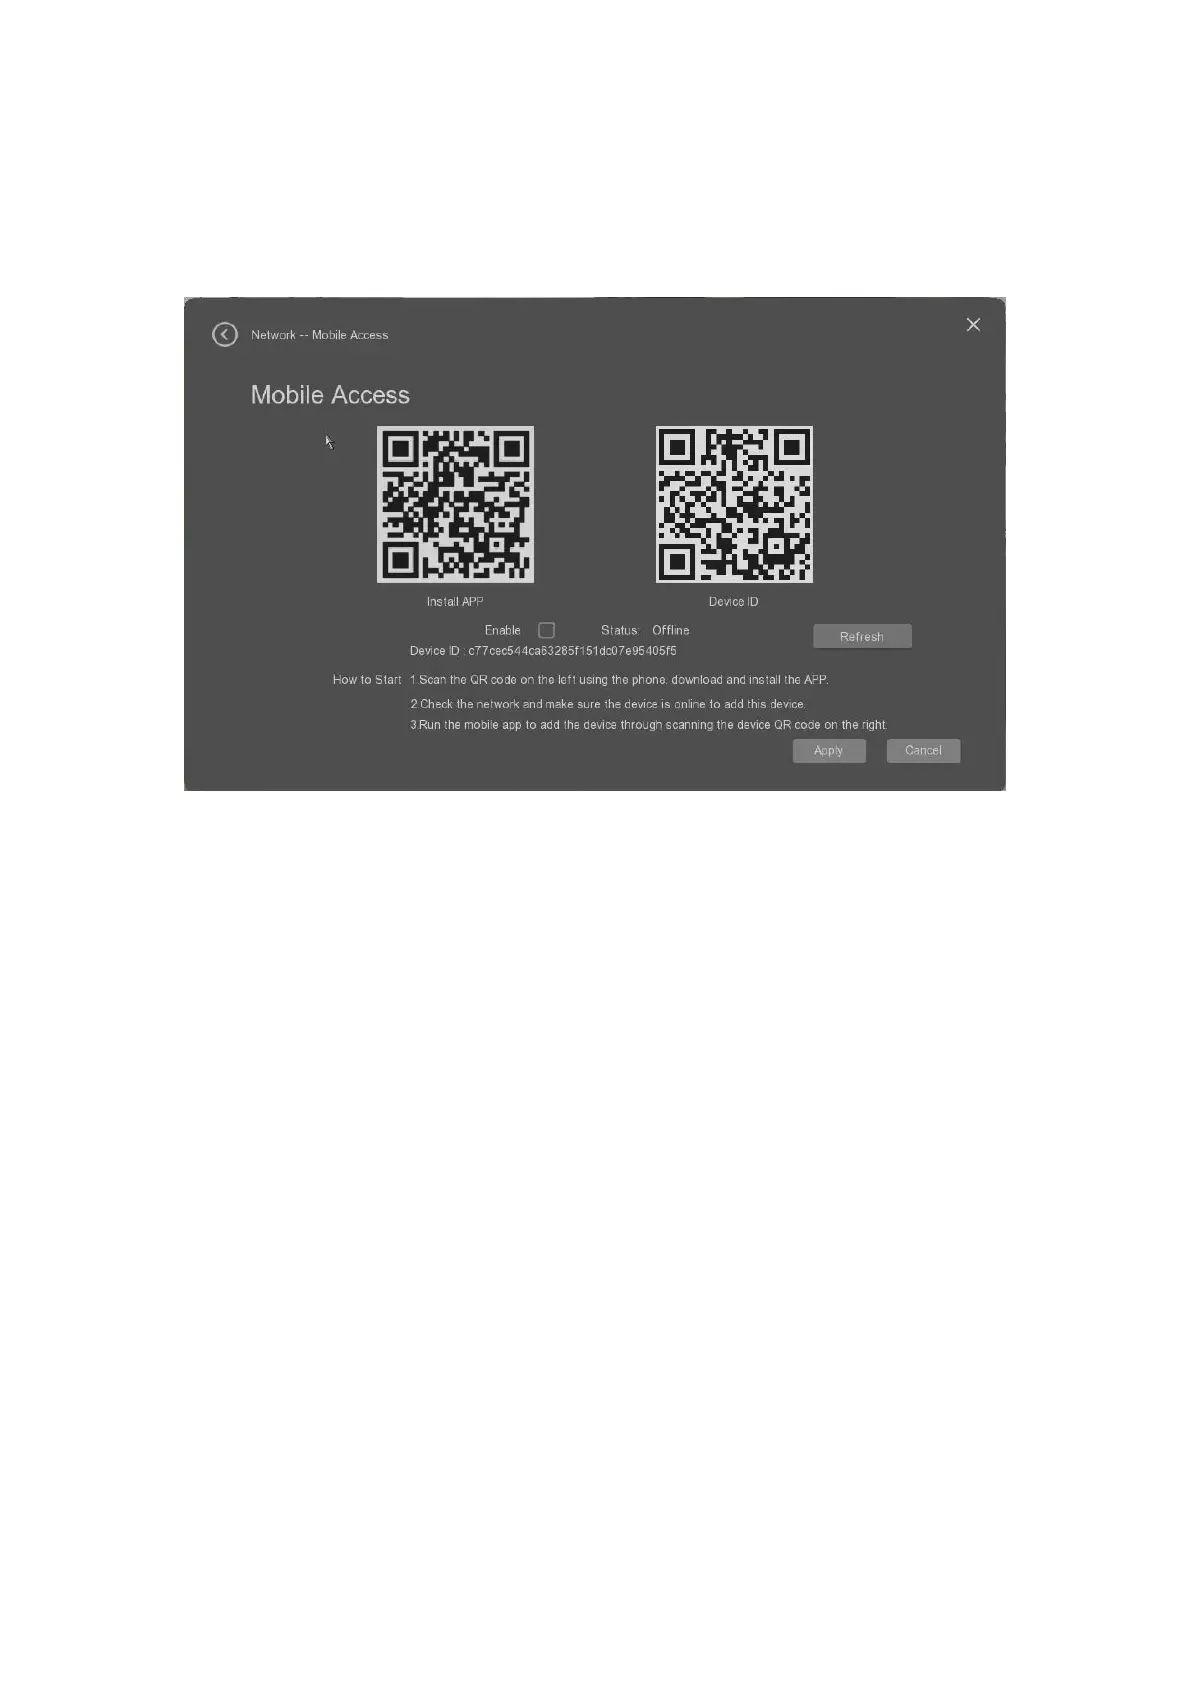
In the page “Mobile monitoring”, the user can download and install the APP on the Android and IOS phone
to start the remote mobile monitoring for the NVR.
After set the NVR’s network connection to make sure that the NVR is connected to the Internet successfully,
then the user can start the mobile monitoring through this page.
• Install APP: it can be scanned by the mobile to download and install the Android APP or IOS APP;
• Device ID: it is used for the mobile to add the NVR into the mobile APP by scanning this QR code.
Please check the detailed information from the APP user guide.
• Enable: it allows the user to enable or disable the mobile accessing ability.
• Stauts: it shows the NVR’s internet connection status. If it’s offline, it means the NVR is not connected
to Internet successfully.
• Refresh: it allows the user to refresh the NVR Internet connection status.
Apply: it allows the user to save the settings.
Cancel:: it allows the user to give up the settings.
Please be noted that the mobile monitoring needs the NVR to connect to Internet. The user can set the
NVR’s WAN network as DHCP or others to set the NVR to connect to the router to the Internet.
2.7 Splits windows settings
The user can select the different showing methods from the different windows splits for preview as below.
• 1 Split: the user can select which channle to show as full screen;
• Split: the user can select 4 channels to show simultaneously from the channel 1-4, 5-8, 9-12 or 13-16;
• 6 Split: the user can select 6 channels to show simultaneously from the channel 1-6, 7-12, 13-18;
• 8 Split: the user can select 8 channels to show simultaneously from the channel 1-8, 9-16;
• 9 Split: the user can select 9 channels to show simultaneously from the channel 1-9, 10-18;


 To Next Page