Do you have a question about the Brinkmann ZONE and is the answer not in the manual?
Instructions for the installer to leave with the grill owner for future reference.
Critical procedure outlining steps to take immediately if a gas smell is detected.
Safety guidelines regarding the storage of flammable liquids and LP cylinders near the grill.
Prohibits natural gas, charcoal, and specifies safe handling of flavoring chips.
Mandates leak testing all connections before first use and after refills.
Covers safe operation, including child safety, unattended use, and avoiding hot surfaces.
Specifies requirements for outdoor use, ventilation, and safe clearances from structures.
Details adherence to local and national codes for grill installation.
Defines the required type of LP cylinder, including capacity and valve type.
Lists essential features for LP cylinders, including DOT/CSA standards and OPD.
Provides critical warnings on handling, securing, and storing LP gas cylinders safely.
Outlines safe procedures for filling LP gas cylinders, emphasizing qualified dealers and 80% capacity.
Step-by-step guide for correctly installing the LP gas cylinder onto the grill.
Describes the Type 1 connection, thermal device, and flow limiting device of the hose/regulator.
Instructions on how to reset the regulator's flow limiting device.
Emphasizes the necessity of leak testing all gas connections and hoses before use.
Mandates the use of the manufacturer-supplied hose and regulator assembly.
Detailed steps for securely connecting the hose and regulator to the LP gas cylinder.
Critical safety rules for conducting leak tests, prohibiting smoking and open flames.
Specifies when leak tests should be performed, including after assembly and refills.
A comprehensive guide with steps and a diagram to identify gas leaks using soapy water.
Crucial checks before initial operation, including assembly, hose inspection, and grounding.
Basic steps for safely lighting the grill, emphasizing opening the lid and correct valve operation.
Detailed steps for igniting the primary burners using the igniter or match.
Alternative method for lighting main burners using a match and matchlighter.
Instructions for safely igniting the side burner using its igniter.
Procedure for lighting the side burner using a match if the igniter fails.
Steps for properly shutting down the grill, starting with the cylinder valve.
Instructions for the initial break-in period and preheating the grill for optimal cooking.
Guidance on managing flare-ups, including causes, effects, and safety precautions.
Tips for reducing flare-ups and explanations of indirect cooking.
Describes the uses for the side burner and how to adjust its heat.
Instructions on how to operate the integrated cutting board light.
Important warnings for side burner use, including pot size, weight limits, and avoiding deep frying.
Provides tips on cleanliness, hand washing, utensil use, and grilling temperatures.
Guidance on cleaning, protecting the grill from rust, and general upkeep.
Advice on keeping the grill clear of debris, tightening hardware, and general cleaning.
Instructions for inspecting, cleaning, and maintaining the grill burners.
Specific instructions for cleaning cooking grills and heat distribution plates.
Safety precautions and procedures for moving and storing the grill.
Steps to take before storing the grill, including cleaning and protecting components.
Addresses issues like burners not lighting, yellow flames, and flame blowouts.
Troubleshoots problems related to grill temperature and operational performance.
Diagnoses and provides solutions for issues with the rotisserie function.
Answers common questions about why a grill may not light or have flame issues.
Detailed guide on resetting the regulator's flow limiting device.
Recommendations for cleaning the interior parts of the grill.
Details on cleaning stainless steel, cast-iron, and heat distribution plates.
Addresses rust, lid discoloration, natural gas conversion, and tank fitting issues.
Explains regulator humming sounds and when to seek assistance.
Lists the specific batteries, screwdriver, and wrench provided in the parts bag.
Recommends two people for assembly and lists necessary tools like screwdrivers and wrenches.
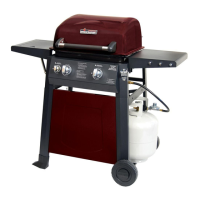
A comprehensive list of all numbered grill components for easy identification.
Notes the grill's design for conversion between LP and natural gas with a kit.
Instructions for unfolding the main cart structure as the first assembly step.
Guidance on securely attaching the LP tank holder to the cart frame.
Steps to attach the locking casters to the cart using the hex nut wrench.
Instructions for attaching the handles to the cabinet doors.
Procedure for placing and securing the main grill body onto the assembled cart.
Steps to attach the front panel to the left side table using pre-attached bolts.
Instructions for attaching the front panels to the side burner assembly.
Details on installing the side burner valve assembly, knob, and igniter lead.
Guidance on placing the side burner grate and inserting the grease cup.
Steps for placing heat distribution plates, cooking grates, and the warming rack.
Instructions for mounting the rotisserie motor and connecting its lead wire.
Guide for placing D batteries into the rotisserie motor's battery compartment.
Instructions for connecting the rotisserie motor wire to the battery compartment wire.
Steps for installing D batteries into the cutting board light's battery compartment.
Instructions for inserting the AA battery into the igniter for proper function.
A diagram showing the assembled grill with labels for key features like zones and rotisserie.
Steps 1-6 cover preparing the spit rod, skewering food, and checking balance.
Instructions for turning on the rotisserie motor to start cooking.
Details warranty periods for burners, stainless parts, and other components.
Outlines conditions that void the warranty, such as misuse or lack of maintenance.