3.0 COMPONENTS
Upon receiving units, inspect for damage and ensure appliances match your order. In the event of
damage, or incorrect delivery, notify supplier immediately. Brivis accepts no responsibility for installation
of damaged or incorrect units.
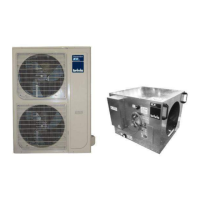
3.1 Icebox Unit
Remove packaging from unit and any protective foam packing from coils and pipes. Icebox units are
shipped with a holding charge of dry nitrogen. Check to confirm the holding charge. For lifting details
refer to the General Arrangement drawings.
3.2 Starting Collars
Insert starting collar (pop) into the hole in pop plate, ensuring pop flange is placed over the inner supply
air wall of the cabinet. Spread the pop flange to fit tight in the cabinet’s hole with the notch side of the
collar over lapping the other. Secure the pops with the rivets supplied.
(Supplied)
HEATER FLUE
COMMUNICATION
CABLE ACCESS
HEATER
Diagram 5: Icebox Cooling Coil
Diagram 6: Icebox Starting Collar Assembly
Note: Brivis Inverter ICE is not designed for installation on a marine craft, houseboat, or any similar
environment.