8. ASSEMBLY
KE-430HX/KE-430HS, BE-438HX/BE-438HS
129
Apply grease to all sliding parts during assembly.
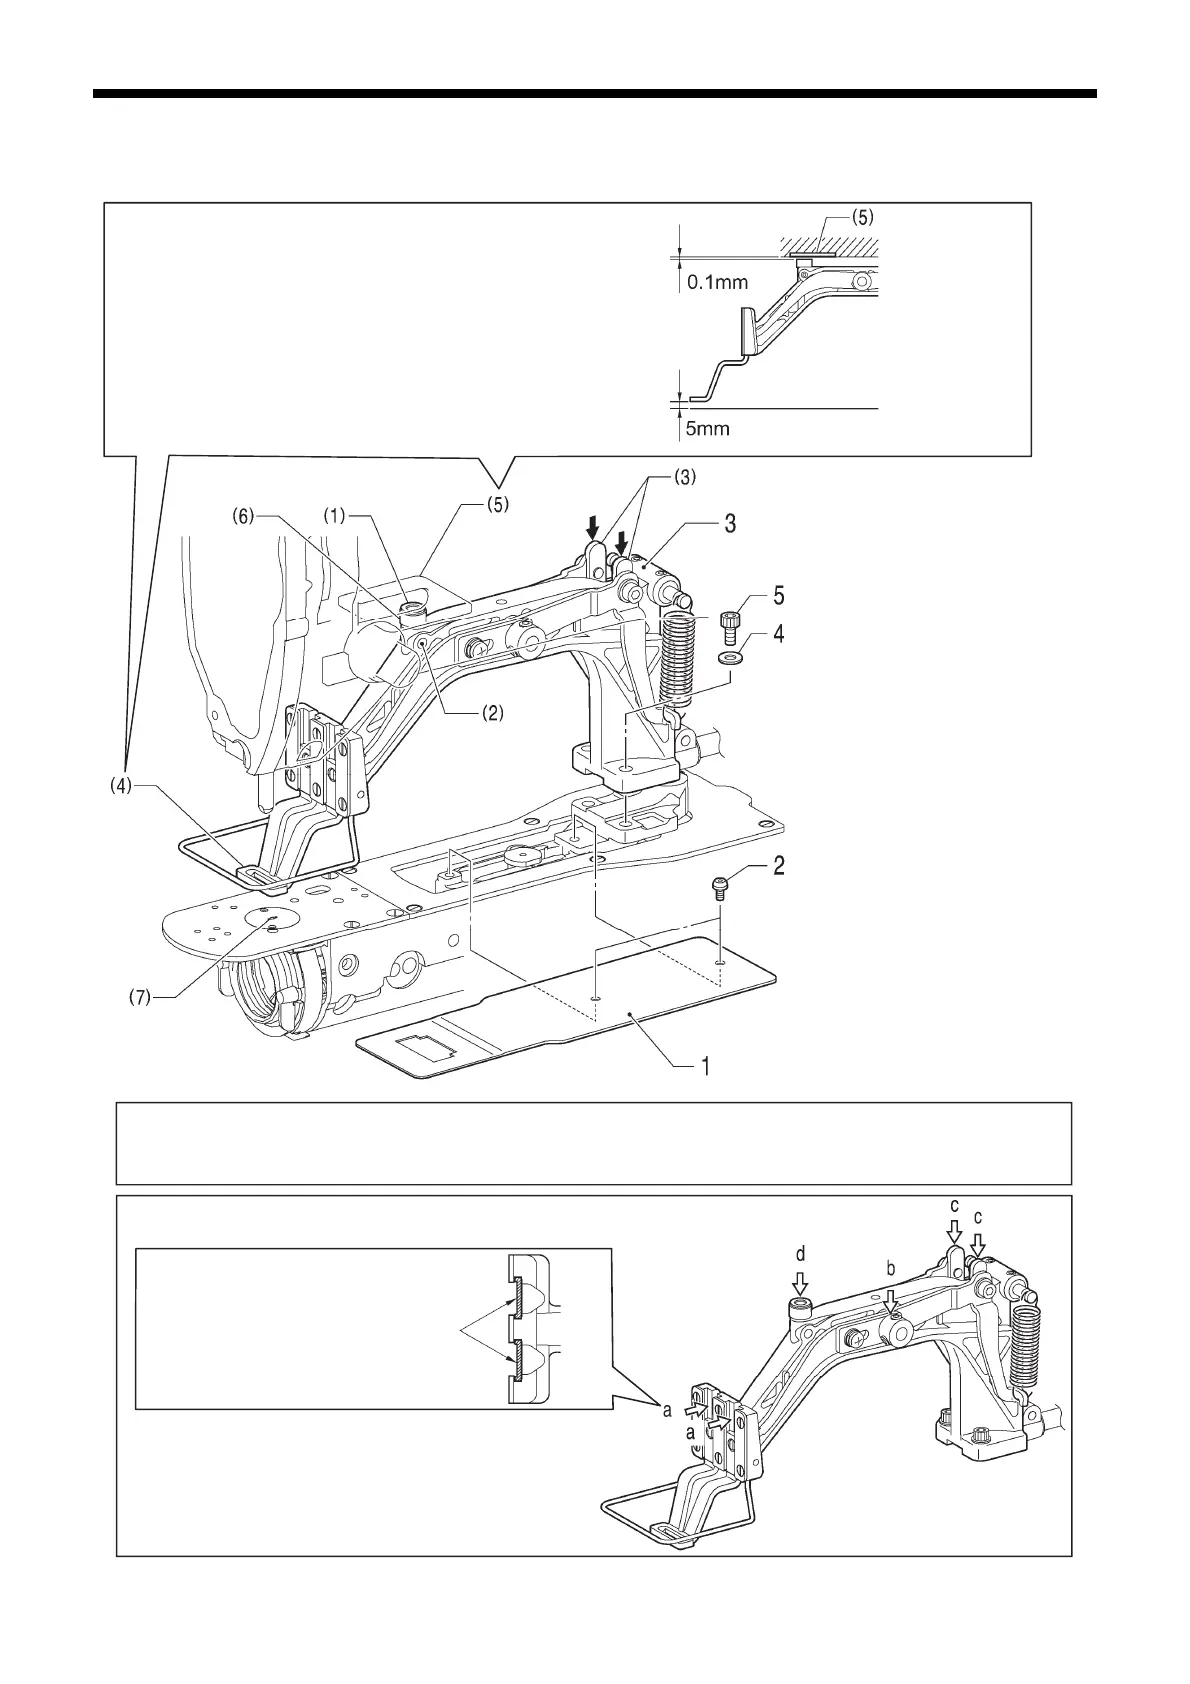
8-15. Work clamp arm mechanism (KE-430HX/HS)
After installing, carry out test feeding and check that the needle hole (7) is not inside the work clamp (4) and the frame
of the feed plate 1. If the needle hole (7) is inside the frame, adjust the position of the work clamp arm assembly 3 and
the feed plate 1.
1. Feed plate
2. Screws [2 pcs]
3. Work clamp arm assembly
4. Plain washers [2 pcs]
5. Bolts [2 pcs]
(1) Slider
(2) Set screw
(3) Work clamp arm lever plate
(4) Work clamp
(5) Work clamp arm support plate
(6) Support shaft
(7) Needle hole
2885B
a. Sliding portion of the work clamp
(Apply small amount of grease.)
b. Sliding portion of the work clamp arm lever shaft
and the work clamp arm levers R and L
c. Round portion of the work clamp arm lever plate
d. Slider of work clamp support shaft
Push the work clamp arm lever plate (3) in the direction
of the arrow to raise the work clamp (4) by about 5 mm,
set so that there is a clearance of 0.1 mm between the
underside of the work clamp arm support plate (5) and
the slider (1), and then secure the slider (1) of the work
clamp support shaft (6) with the set screw (2).
It is recommended that you
use commercially-available
JXTG Nippon Oil & Energ
POWERNOC WB 2 as the
grease to be applied to the
sliding part of the work
clamp.
Top of the needle plate
4042B
4043B
Grease
2887B
 Loading...