21
STEP
1
STEP
2
STEP
3
STEP
4
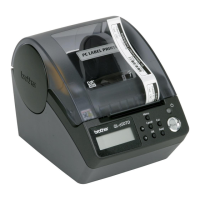
Before using the
printer
Introduction
For WindowsFor Macintosh
Maintenance and
Troubleshooting
Using only this printer
(No PC)
Connecting to your PC
Menu Selection mode
The LCD displays in this mode when editing the template
and setting or changing the function.
Menu 1/12
Label Settings
Menu 1/12
Label Settings
Menu 2/12
Date/Time Incr
Menu 3/12
Preview
Menu 4/12
Copies
Menu 5/12
Numbering
Menu 6/12
List Print
Menu 7/12
Set Date/Time
Menu 8/12
DaylightSavings
Menu 9/12
Auto Cut
Menu 10/12
Language
Menu 11/12
Unit
Menu 12/12
LCD Contrast
Message [P07]
Received
Date Fmt [P07]
2005/7/20
Time Fmt [P07]
12:34
Font [P07]
Helsinki
Date [P07]
(+);Years :001
Date [P07]
(-);Years :001
Date [P07]
Set;2005/07/20
Rec
2/3"x3-7/16"
OK to Print?
1
Printing...
Printing...
Printing...
Initial Value
001
Count Number
1
OK to Print
All Templates?
2005/07/20
12:34
DaylightSavings
OFF
Auto Cut
ON
Language
English - US
Unit
Inch
LCD Contrast
0
OK
Cancel
OK
Cancel
OK
Cancel
OK
OK
Cancel
OK
Cancel
OK
Cancel
OK
Cancel
OK
Cancel
OK
Cancel
OK
Cancel
OK
Cancel
OK
Cancel
OK
Cancel
OK
Cancel
OK
Cancel
OK
Cancel
OK
to Time Display mode
After completing the setup, press
to Time Display mode
After previewing, it goes
to Time Display mode
OK
to Time Display mode
to Time Display mode
After printing, it goes
After printing, it goes
OK
to Time Display mode
After printing, it goes
OK
to Time Display mode
After completing the setup, press
OK
to Time Display mode
After completing the setup, press
After completing the setup,
press to Time Display
mode
OK
To [Menu 1]
After completing the setup, press
OK
to Time Display mode
After completing the setup, press
OK
to Time Display mode
After completing the setup, press
OK
to Time Display mode
After completing the setup, press
OK
to Time Display mode
After completing the setup, press
OK
to Time Display mode
After completing the setup, press
OK
 Loading...