sss
™
1143 page 7
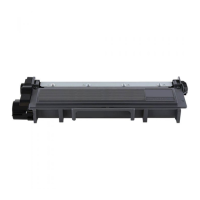
12. Remove the two screws securing the doctor blade as shown in
Figure 12a.
Figure 12a
Doctor Blade
Figure 12b
Cartridge Screw
Doctor Blade Screw
Note: The doctor blade screws are different than the
cartridge screws as shown in Figure 12b. Ensure each
type of screw is returned to the correct location.
13. Using a slotted screwdriver, pry the doctor blade from the cartridge
as shown in Figures 13a and 13b.
Figure 13b
Doctor
Blade
Tape
Slotted
Screwdriver
Figure 13a
Doctor
Blade
Slotted
Screwdriver
Note: Use and angle blade knife to cut the tape.
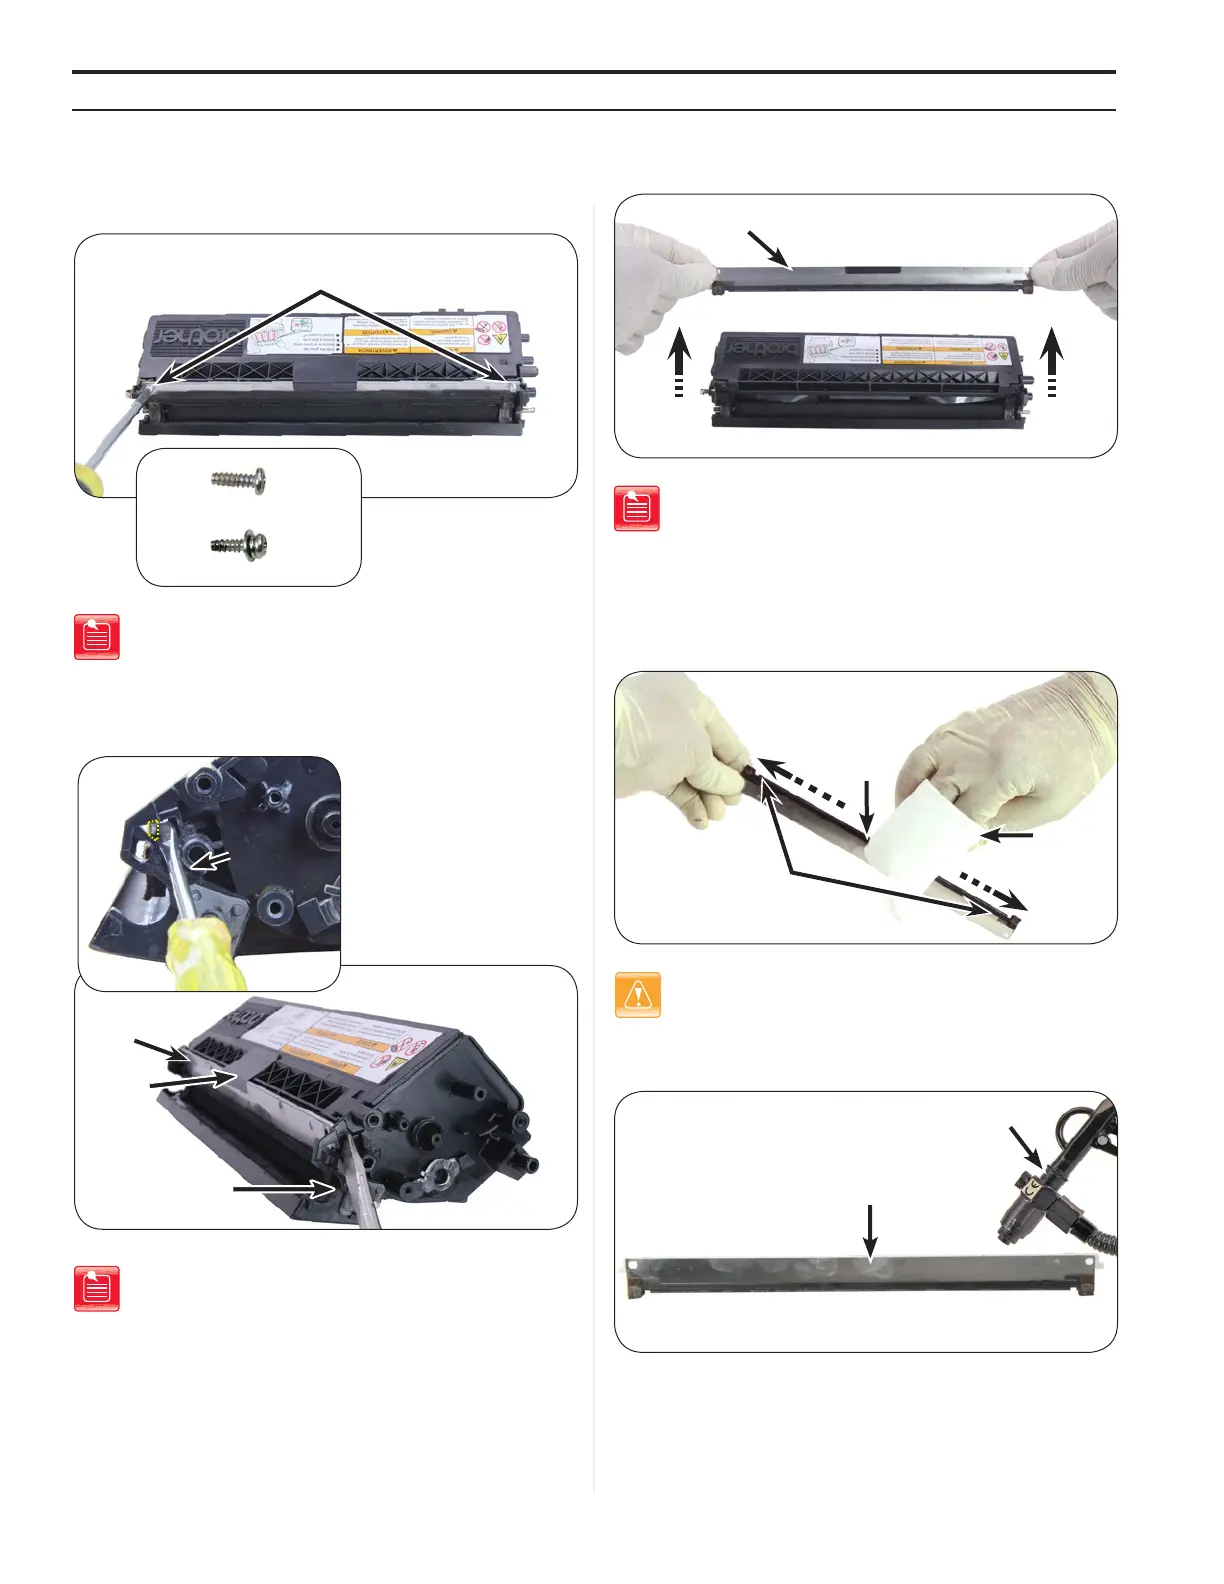
14. Lift to remove the doctor blade from the cartridge (Figure 14).
Figure 14
Doctor Blade
Note: Use dry, filtered, ionized, compressed air to loosen any
excess toner or additive.
15. Using a lint-free cloth dampened with 91- 99% isopropyl alcohol,
gently clean the black material on the doctor blade using back and
forth strokes from end-to-end as shown in Figure 15. Using another
lint-free cloth dampened with de-ionized water, gently wipe the black
material on the doctor blade to remove any excess isopropyl alcohol.
Figure 15
Lint-Free
Cloth
Doctor
Blade
Black Material
Caution: Be careful when cleaning the doctor blade. The
blade is thin and is easily bent or damaged.
16. Use dry, filtered, ionized, compressed air to dry the doctor blade
(Figure 16).
Figure 16
Doctor
Blade
Air Gun
Disassembling The CarTriDge
 Loading...