sss
™
1143 page 9
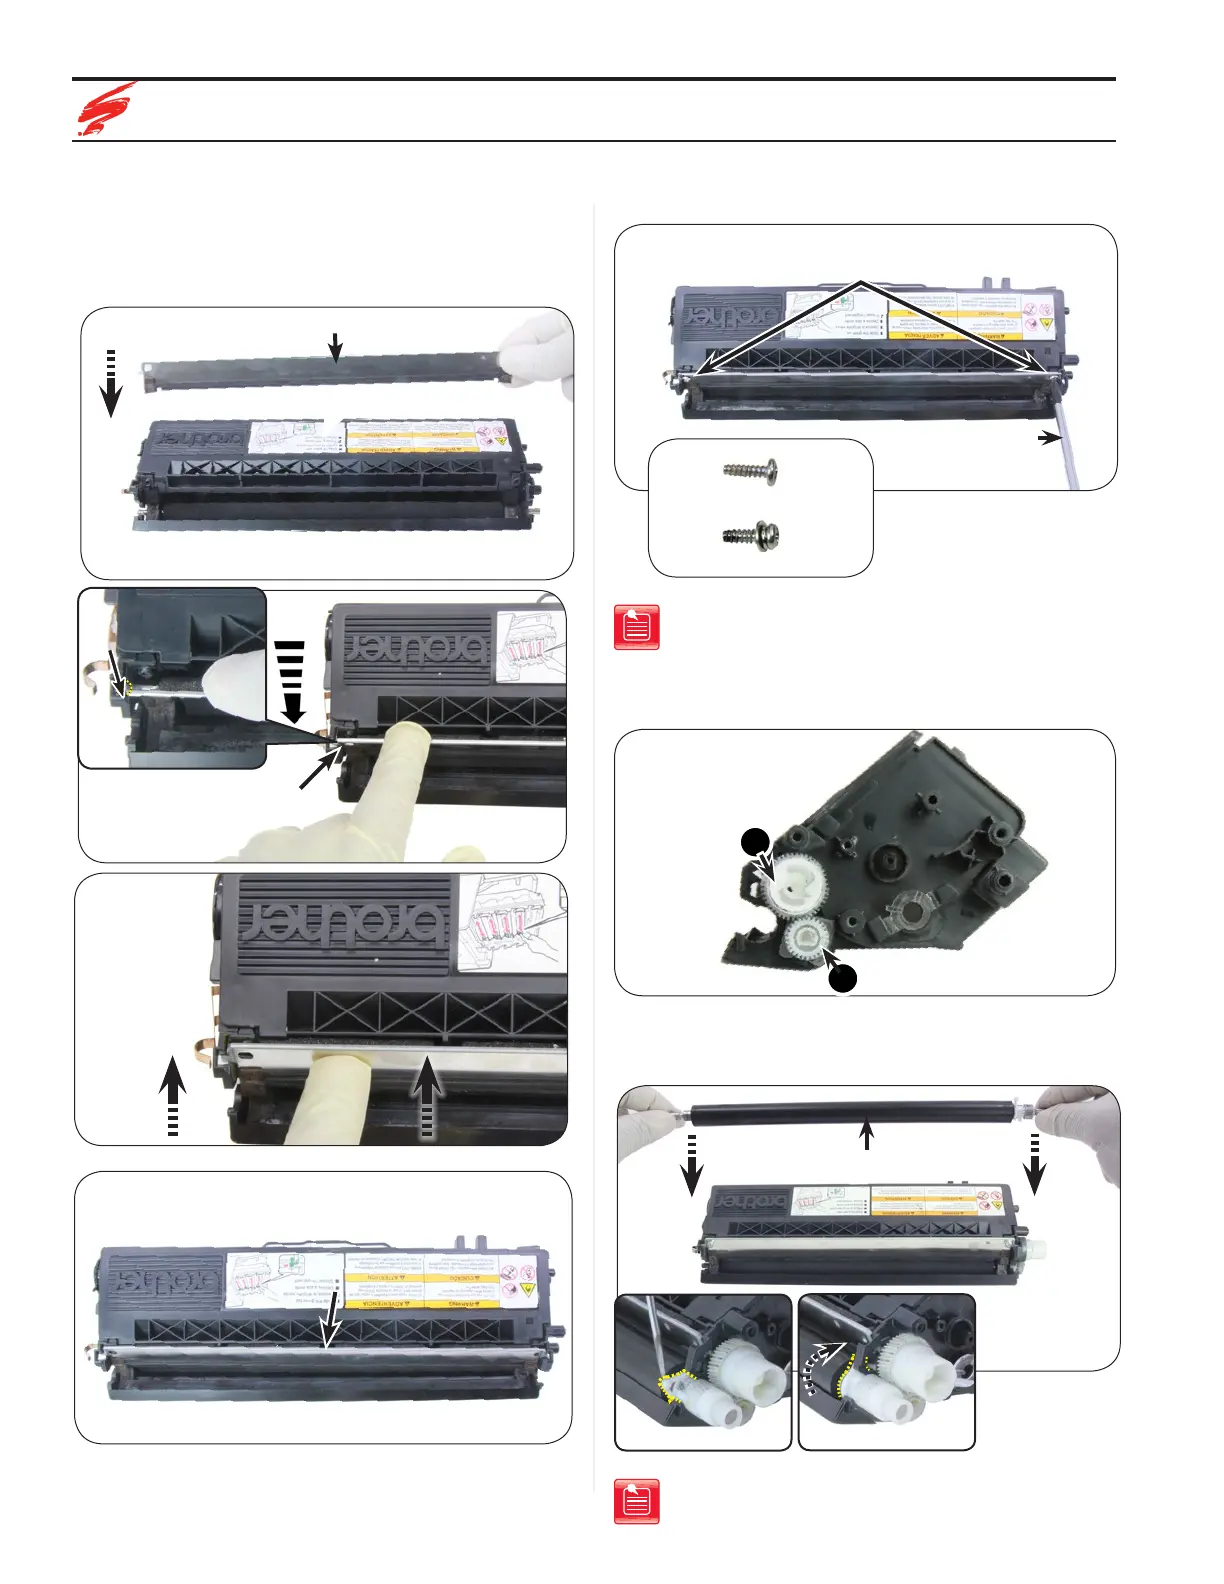
1. Reinstall doctor blade. Place the doctor blade into the cartridge
(Figure 22a) and ensure blade is seated by gently pressing
downward (Figures 22b and 22c). Press blade back against cartridge
to lock blade tabs securely into cartridge as shown in Figure 22d.
Securely locked doctor blade should appear as seen in Figure 22e.
Figure 22c
Doctor Blade
Figure 22d
Doctor Blade
Figure 22a
Doctor Blade
Figure 22b
Tab
Figure 22e
Doctor Blade
2. Install the two screws to secure the doctor blade into the cartridge
(Figures 23a and 23b.
Figure 23a
Doctor Blade
Phillips Screwdriver
Figure 23b
Cartridge Screw
Doctor Blade Screw
Note: Doctor blade screws are different than the cartridge
screws (Figure 23b).
3. Install the toner adder roller gear and then the drive gear as shown in
Figure 24.
Figure 24
Drive Gear
Toner Adder Roller Gear
1
2
4. Holding the ends of the developer roller place the developer roller
into the cartridge. Rotate the developer roller stabilizer to the locked
position as shown in Figures 25a, 25b and 25c.
Figure 25a
Developer Roller
Figure 25b
Figure 25c
Note: Align the developer roller end felts with the doctor blade
end felts before installing the developer roller.
assembling The CarTriDge
 Loading...