RAIL & APRON ASSEMBLY
FIGURE ONE
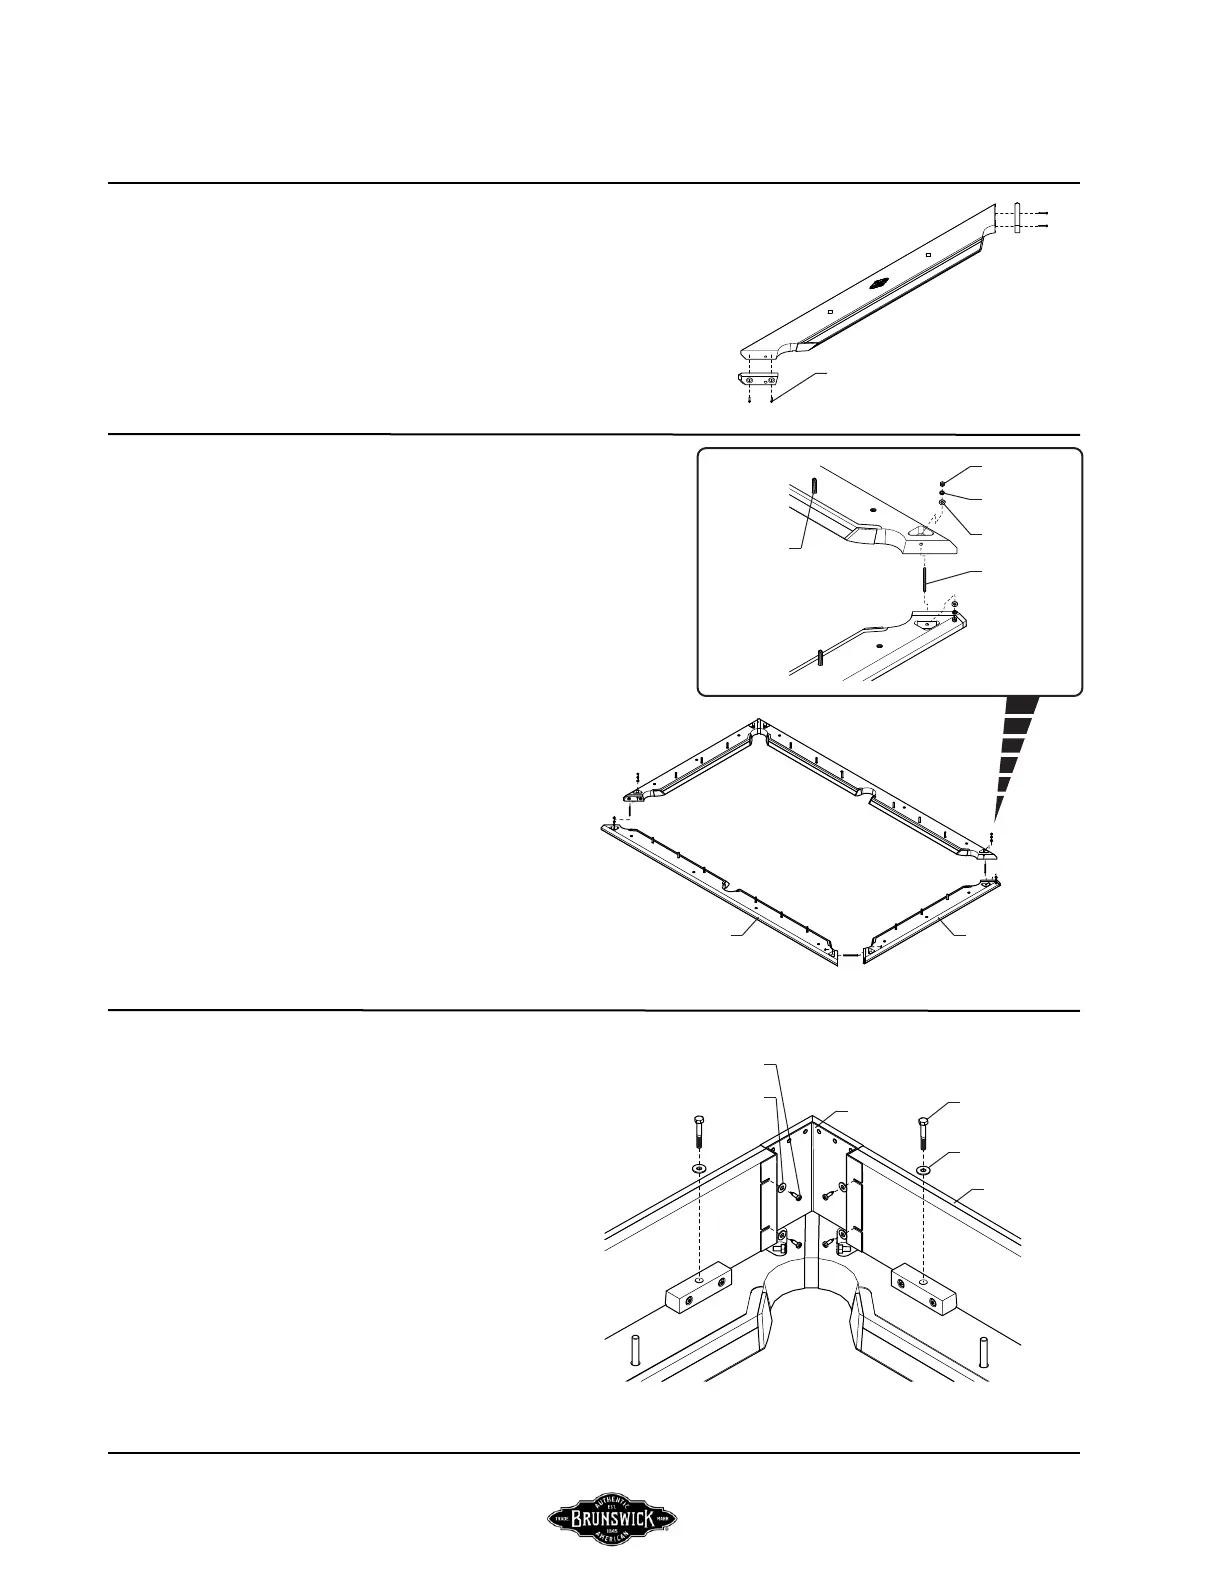
Step #1: Prior to assembly of all rails, the rail spacers will
need to be attached to the end of both the head and
foot rail. The spacers will need to be aligned ush with
the top surface and back edge, then pilot drilled with
a 3/32” drill bit at least 3/4” deep into the wood. The
spacers can then be attached with the screws provided.
FIGURE ONE
FIGURE TWO
Step #2: Position rails upside down on a protected surface in
their respective location.
Step #3: Insert a 1/4 x 4-1/4” threaded stud into the bored
hole in the end of the side rail. Within the pocket cut into
the bottom surface of the rail, add a 1/4 washer, 1/4 external
tooth lock washer and thread a 1/4-20 hex nut onto the
stud.
Step #4: Move the end rails into position, making sure the
threaded studs go into the bored holes and through to the
cut pocket. Within the pocket cut into the bottom surface
of the rail, add a 1/4 washer, 1/4 external tooth lock washer
and thread a 1/4-20 hex nut onto the stud.
Step #5: Assure that corner is square and bottoms of rails
are ush. Securely tighten nut on each end of the stud
while holding the joint to prevent twisting. Repeat for all
four connections
Step #6: Thread a 3/8-16 x 2-3/4” threaded stud into each
of the eighteen locations shown. Thread stud until contact
with wood is made then back out 1/4 turn.
FIGURE TWO
FIGURE THREE
Step #7: Loosely attach the side and end aprons to the
bottom side of the rails using 1/4-20 x 1-3/4” hex head cap
screws and 1/4 washers.
Step #9: Securely tighten all remaining hardware.
FIGURE THREE
CANTON
PAGE 12 BRUNSWICK INSTALLATION MANUAL
6-20 x 1-1/4”
PHILLIPS HEAD SCREW
Side Rail
End Rail
1/4 Washer
1/4-20 x 4-1/4”
Threaded Stud
1/4-20 x 2-3/4”
Threaded Stud
1/4 External
Tooth Washer
1 / 4 - 2 0
Hex Nut
Side Apron
1/4-20 x 1-3/4”
Hex Head Cap Screw
1/4 Washer
Corner
Bracket
#8 x 5/8”
Pan Head Screw
#8 Flat Washer
Step #8: Align each apron corner with the corner bracket.
While holding each joint tight, securely fasten corner with
#8 x 5/8” pan head screws and #8 at washers.