I
the six
adjusting nuts are tighteDed equally
10 €Dsuro cveD
pr€ssure,
otherwise the
plates
will
slide
uDeveDly aod clutch
drag
will result. After the ådjustmetrt is
completed,
depr€ss
the
clutch
lever
and spin the clutch
by
operating
the
kickst4rter,
when the outer
plate
should
be
se€n to
tevolve
parallel
with the
other
plates.
If flot, adjust individual
r sDrinss until.the Dlates are true.
)
rtr:&frmy
Cfdl#(it*g.r modelsJ. The chajn
is
adjusted
by slackening the
two large nuts under the
gearbox,
one
on the left hand end
of
the
adjuster and one on
the
right-
hand side
(see
r,
Fig,
1l),
and screwing up the adjuster
nut E This draws
the
gearbox
rearwards, tightening the
chain. Donl forgel to tighten.ngil.P *ien.correct
lension is obtained, \r
hich should ,ilfow
half-an-inqh upt,r--
and down movement at the tisltest
polii6fT-e-iIåif,.
'- """
Ttr66-iE-at
after tighrening chiin. reår chain will
need
adjusting.
tul
'
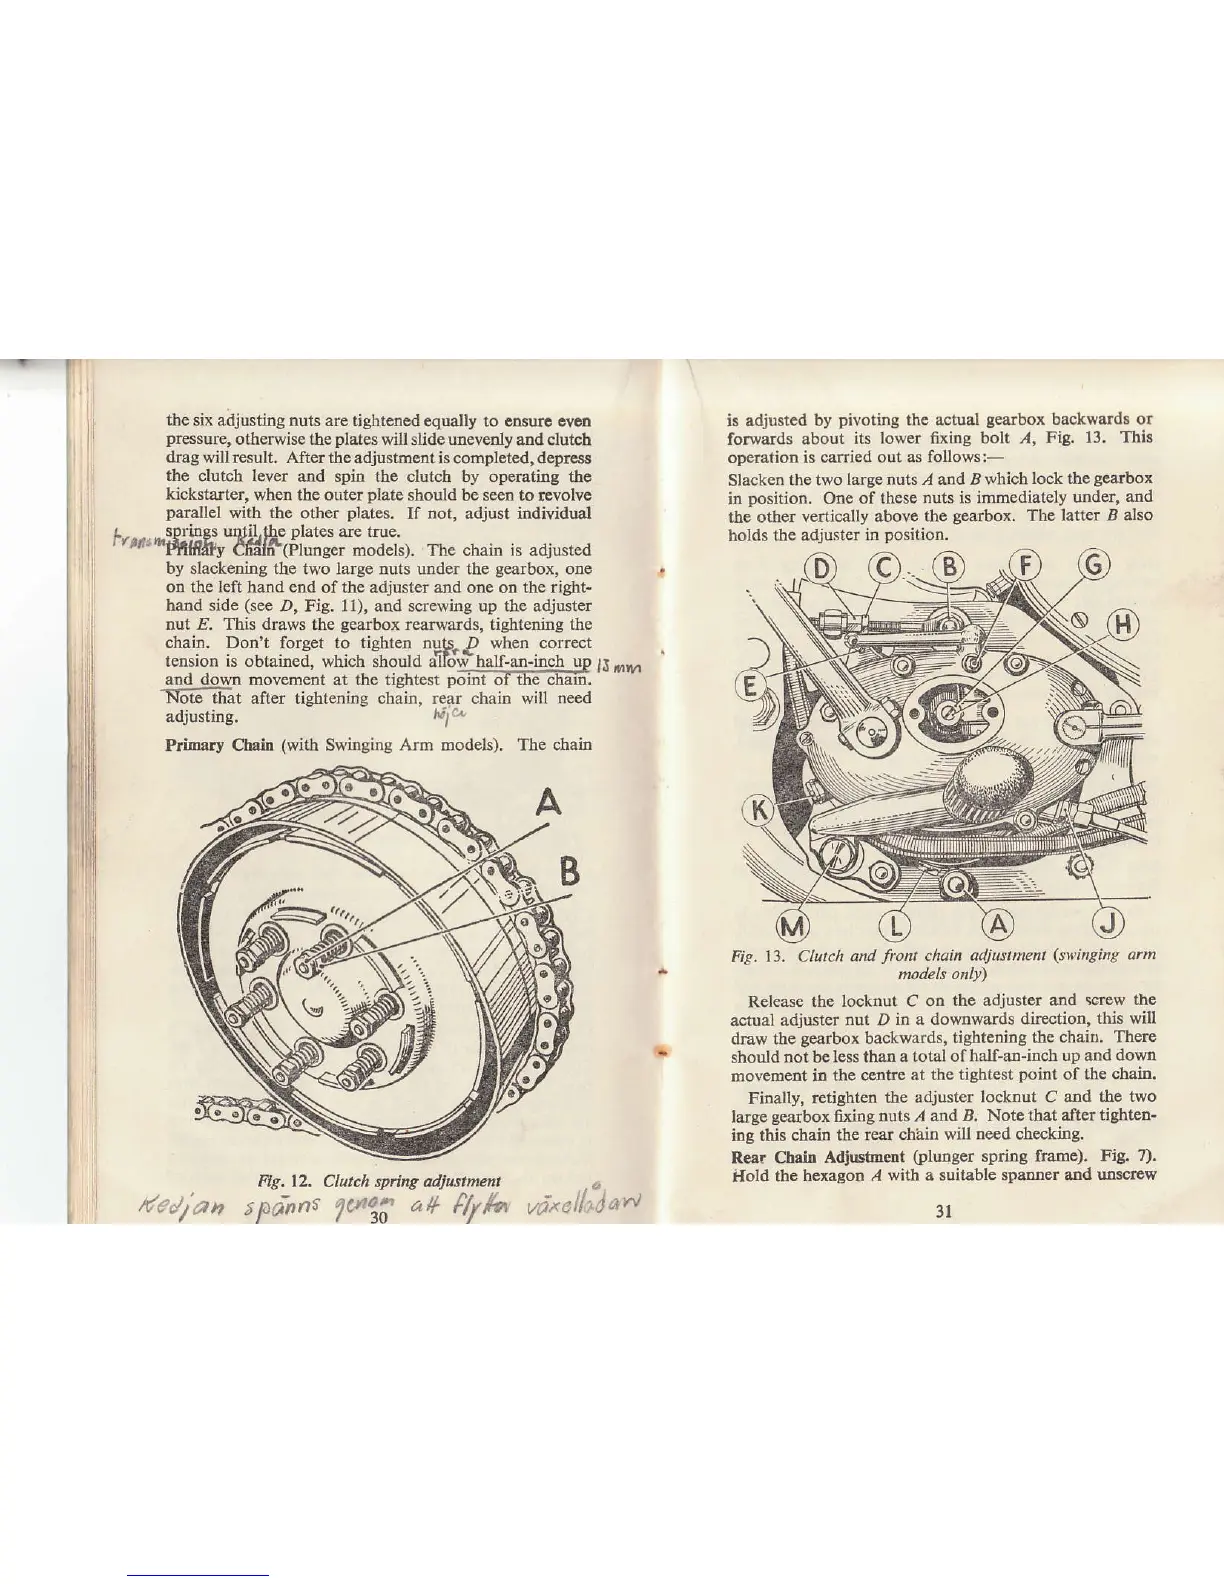
Flg.12.
Clutch spdng adJustment
E:o1'aa
tFrnnr
1cdttr
a*
l/y{ø
nixcil:isr't
is adjusted
by
pivoting
the actual
gearbox
backwards or
forwards about
its lower fixing bolt ,4,
Fig. 13.
This
operation
is carried out as follows:-
Slacken
the two
large nuts ,4 and ,B which
lock the
gearbox
in
position.
One
of these nuts is immediately
under,
and
the other
vertically above the
gea.rbox.
The
latter t also
holds
ihe adjuster in
position.
Fig.
13. Clutch and
front
ehain adjustment
(swinging
arm
models only)
Release
the locknul C
on the adjuster and
screw the
actual adjuster
nut D
in a downwards dircotion,
this will
draw the
gearbox
backwards,
tightening the
chaio. There
shoutd
not be less than
a total of half-an-inch
up and dowtr
movement
in the centle
at the tightest
point
of the chain'
Finally,
retighten the
adjuster locknut C and
the two
large
gearbox
fixing truts ,4
and
-&.
Note
that aJter tight€n-
ing this chain
the rea. ch?lin
will need checkiDg.
Rea. Chaitr
Adiustment
(plunget
spring frame).
Fig. 7).
ilold tbe
hexagon I
with a suitable spaDner and
uoscrew
PriEary
Chain
(with
Swinging Arm modeis), The
chain