Page 20
LIGHTING INSTRUCTIONS
1. STOP! Read safety information on previous page.19
2. Make sure the manual shutoff valve is fully closed. If equipped with thermostat set to lowest
setting.
3. Turn off all electrical power to appliance.
4. Open access panel door located at bottom front of appliance.
5. Turn control knob clockwise to full “OFF” position.
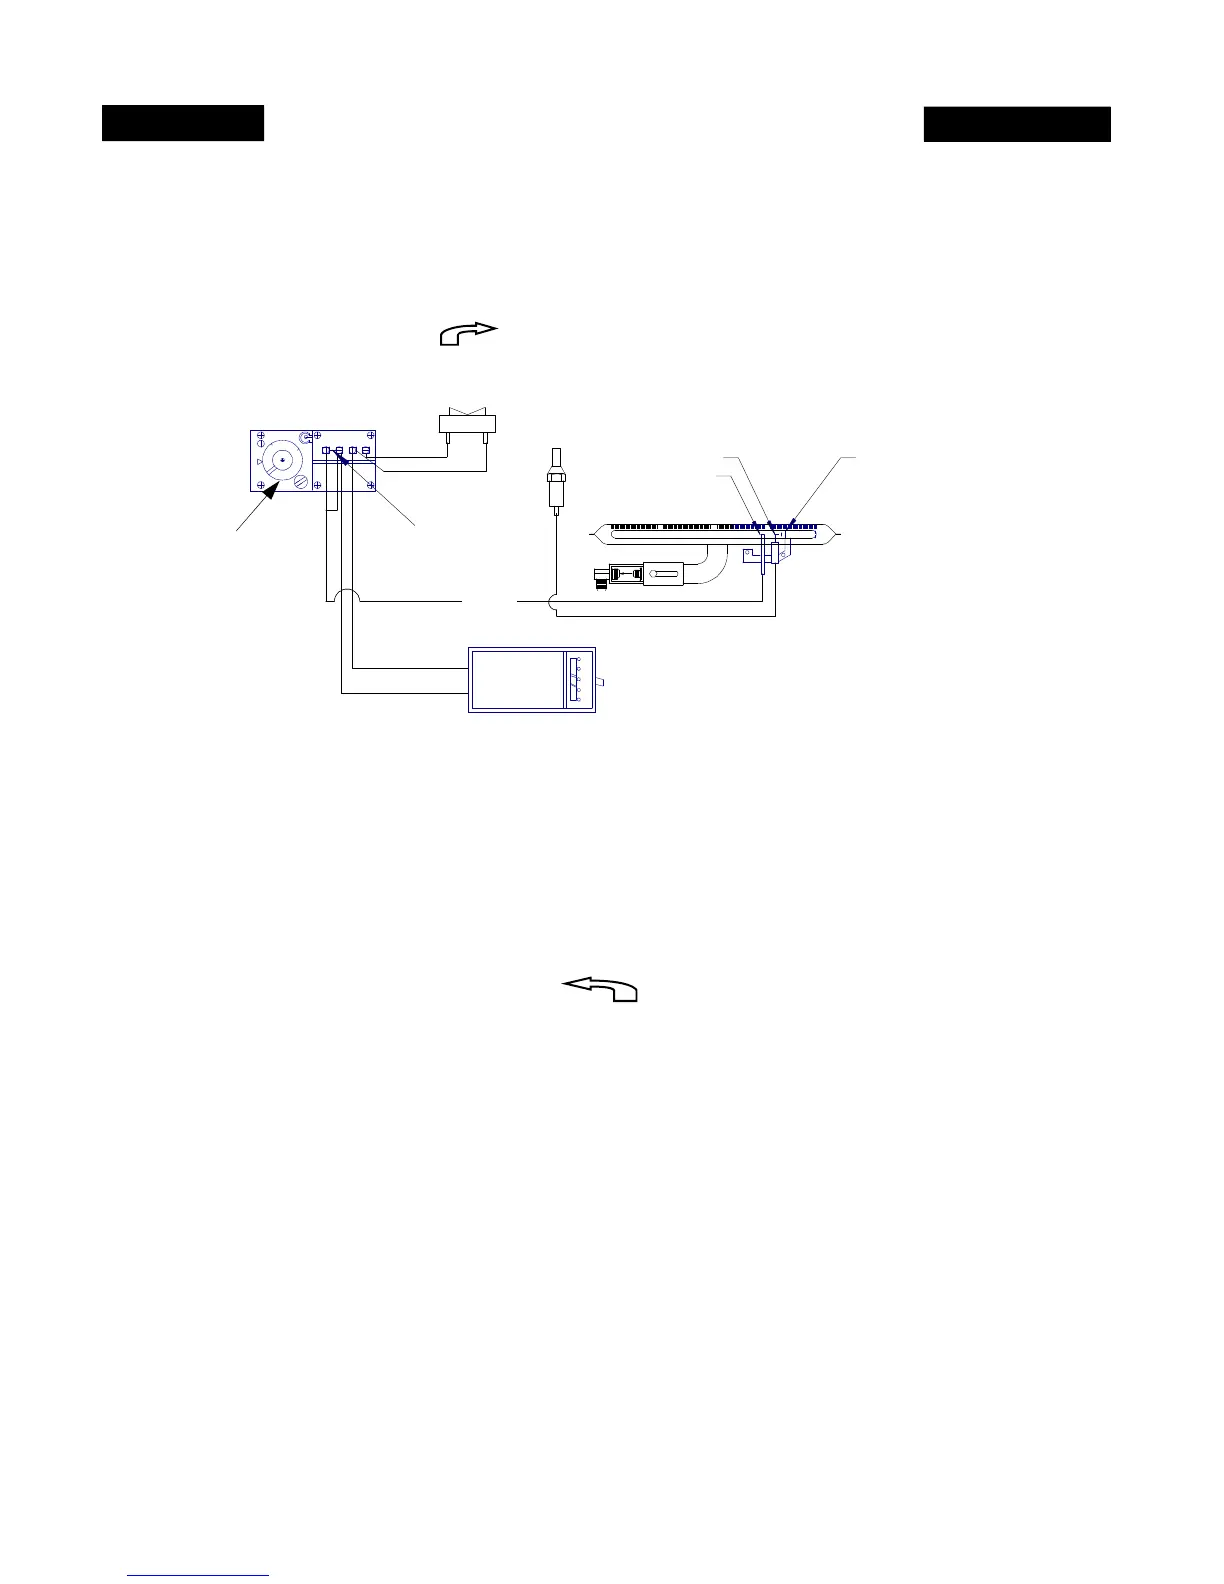
When hooking up a Wall Thermostat to valve, remove Jumper Bar. Do not remove existing wires,
simply add wire from Wall Thermostat to screws (one wire to each screw).
6. Wait five (5) minutes to clear out any gas. Then smell for gas, including near floor. If you
smell gas, STOP! Follow “B” in safety informationon previous page.If you don’t smell
gas, go to next step.
7. Find Pilot: The pilot is located in front of rear log and burner on right hand side of
appliance. Fully open manual shutoff valve.
8. Push ON/OFF toggle switch to “OFF” (rocker switch).
9. Turn gas control knob counterclockwise to “PILOT” position. Press in gas control
knob for fifteen (15) seconds.
10. With control knob pressed in, push down (in) and release igniter button (igniter button is
located on left hand side of front of appliance). This will light pilot. If needed, keep
repeating this step until pilot lights.
11. Keep control knob pressed in for (1) one minute after lighting pilot. After (1) minute, release
gas control knob and it will pop back out. Pilot should remain lit. If pilot goes out, repeat steps 1
through 9.
• If the knob does not pop out when released, stop and immediately call your service technician or
gas supplier.
PILOT BURNER
IGNITOR ELECTRODE
THERMOGENERATOR
PILOT
9080706050
ON
OFF
BEFORE INSTALLING THERMOSTAT
REMOVE METAL CONNECTOR
PIEZO
ROCKER SWITCH
BURNER
PILOT ASS'Y
THERMOSTAT
ITT VALVE
THERMO GEN
AUX
P
R
E
S
S
T
O
R
E
S
E
T
OFF
P
I
L
O
T
O
N
ITT
GENERAL
CONTROLS
PILOT
ADJ
THERMOPILE
CONTROL KNOB