6
Maintenance
Logalux SM300/1 - SM400/1 - Technical specifications are subject to change without prior notice.
27
6.4 Placing solar tank back in operation
after cleaning
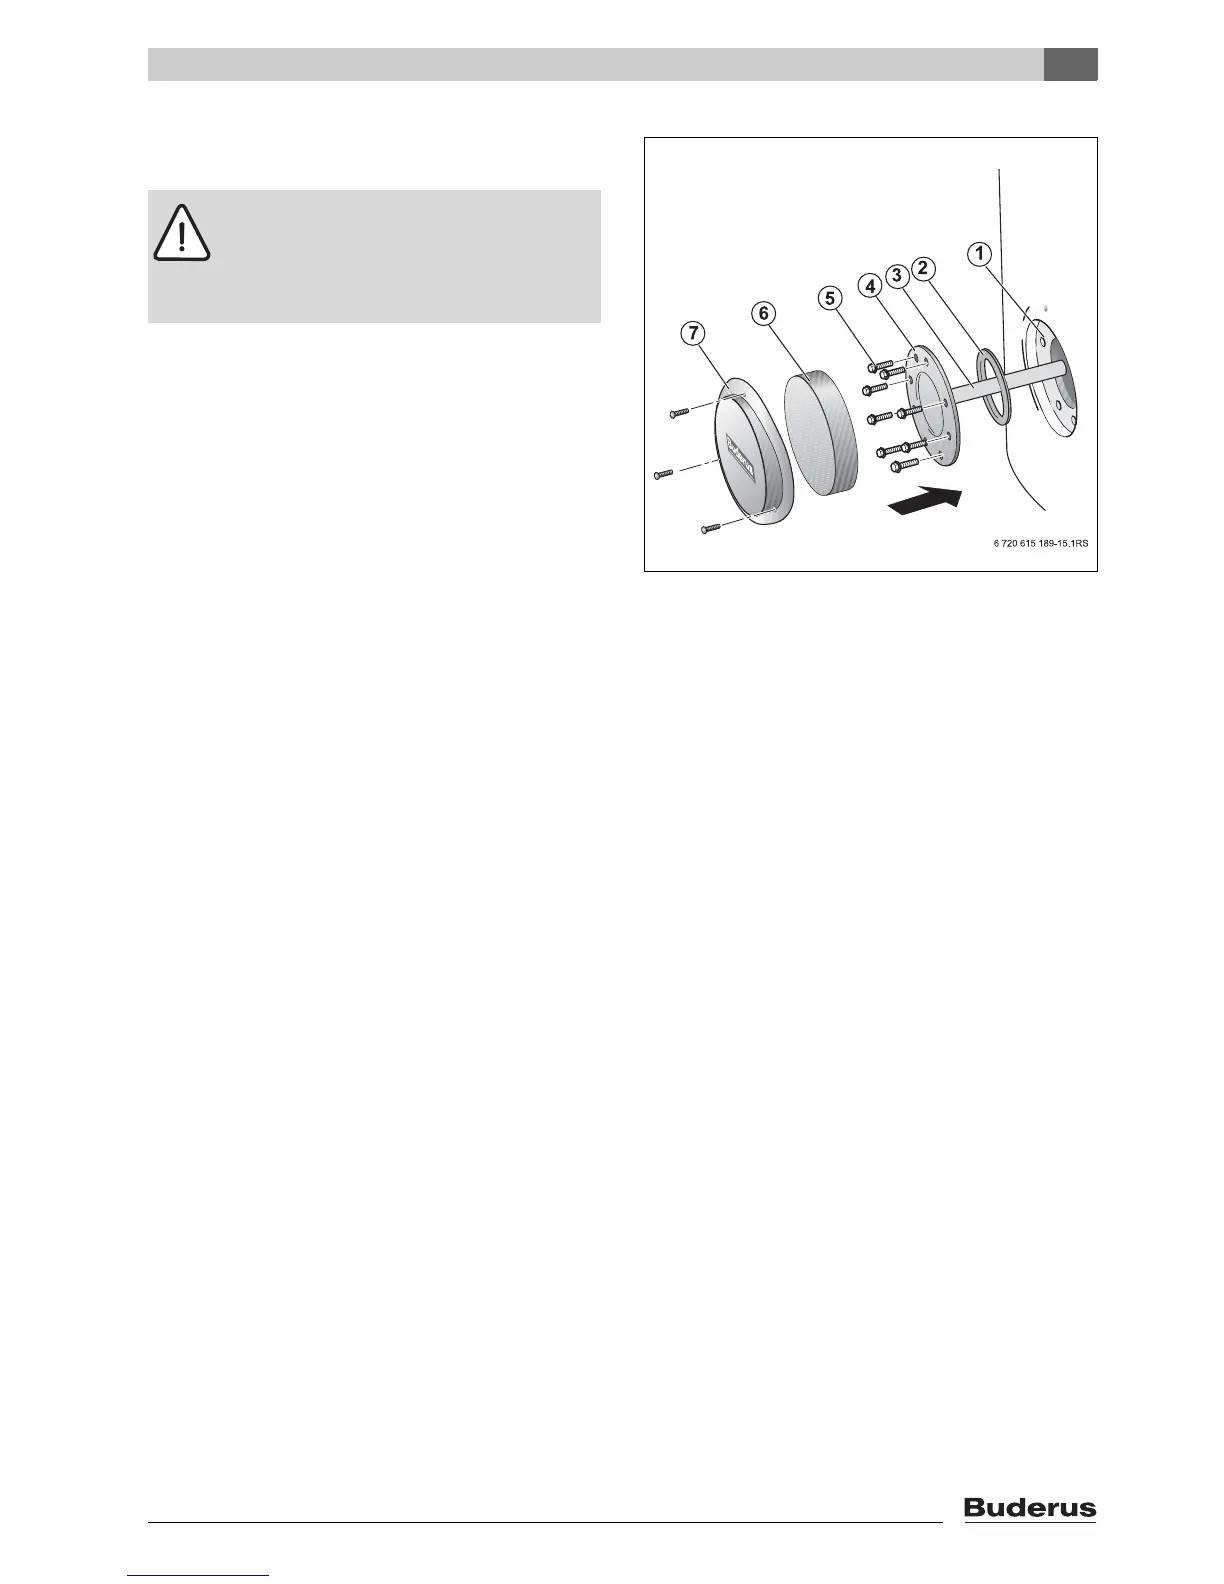
V Install new gasket with clean-out cover.
V Tighten 6 bolts by hand.
V Further tighten the bolts with a wrench. Tighten evenly.
Torque bolts evenly to about 25 - 30 Nm (18 - 22 lb-ft).
V Fill the solar water heater and start up the system.
V Check all connections and clean-out cover for leaks.
V Install insulation piece and clean-out cover.
V Put insulation piece and top cover back on the top of
the tank. (Æ Fig. 1, page 5).
Fig. 23 Installation of inspection cover.
1 Inspection opening
2 Clean-out cover gasket
3 Magnesium anode rod
4 Clean-out cover
5 Hex head bolts
6 Insulation piece
7 Clean-out cover and screws
Caution: Tank damage due to a defective
gasket!
V To avoid leak sites, replace the clean-out
gasket following removal of the clean-out
cover.
 Loading...