CAUTION Make sure the specimen is secured into chuck and the chuck to
the arm so that the specimen will not slip or rotate during cutting.
Improper clamping or chuck selection may cause blade damage.
Positioning the Sample
To position the specimen for cutting, the Position section of the Control
Panel in Figure 5 is used.
1. Press the RETRACT Button on the control panel until the
Support Arm and sample are clear of the Blade.
NOTE If the sample will not clear the blade, temporarily replace
the sample with a dummy of similar cross-section that can
clear the blade until after step 3 in this section.
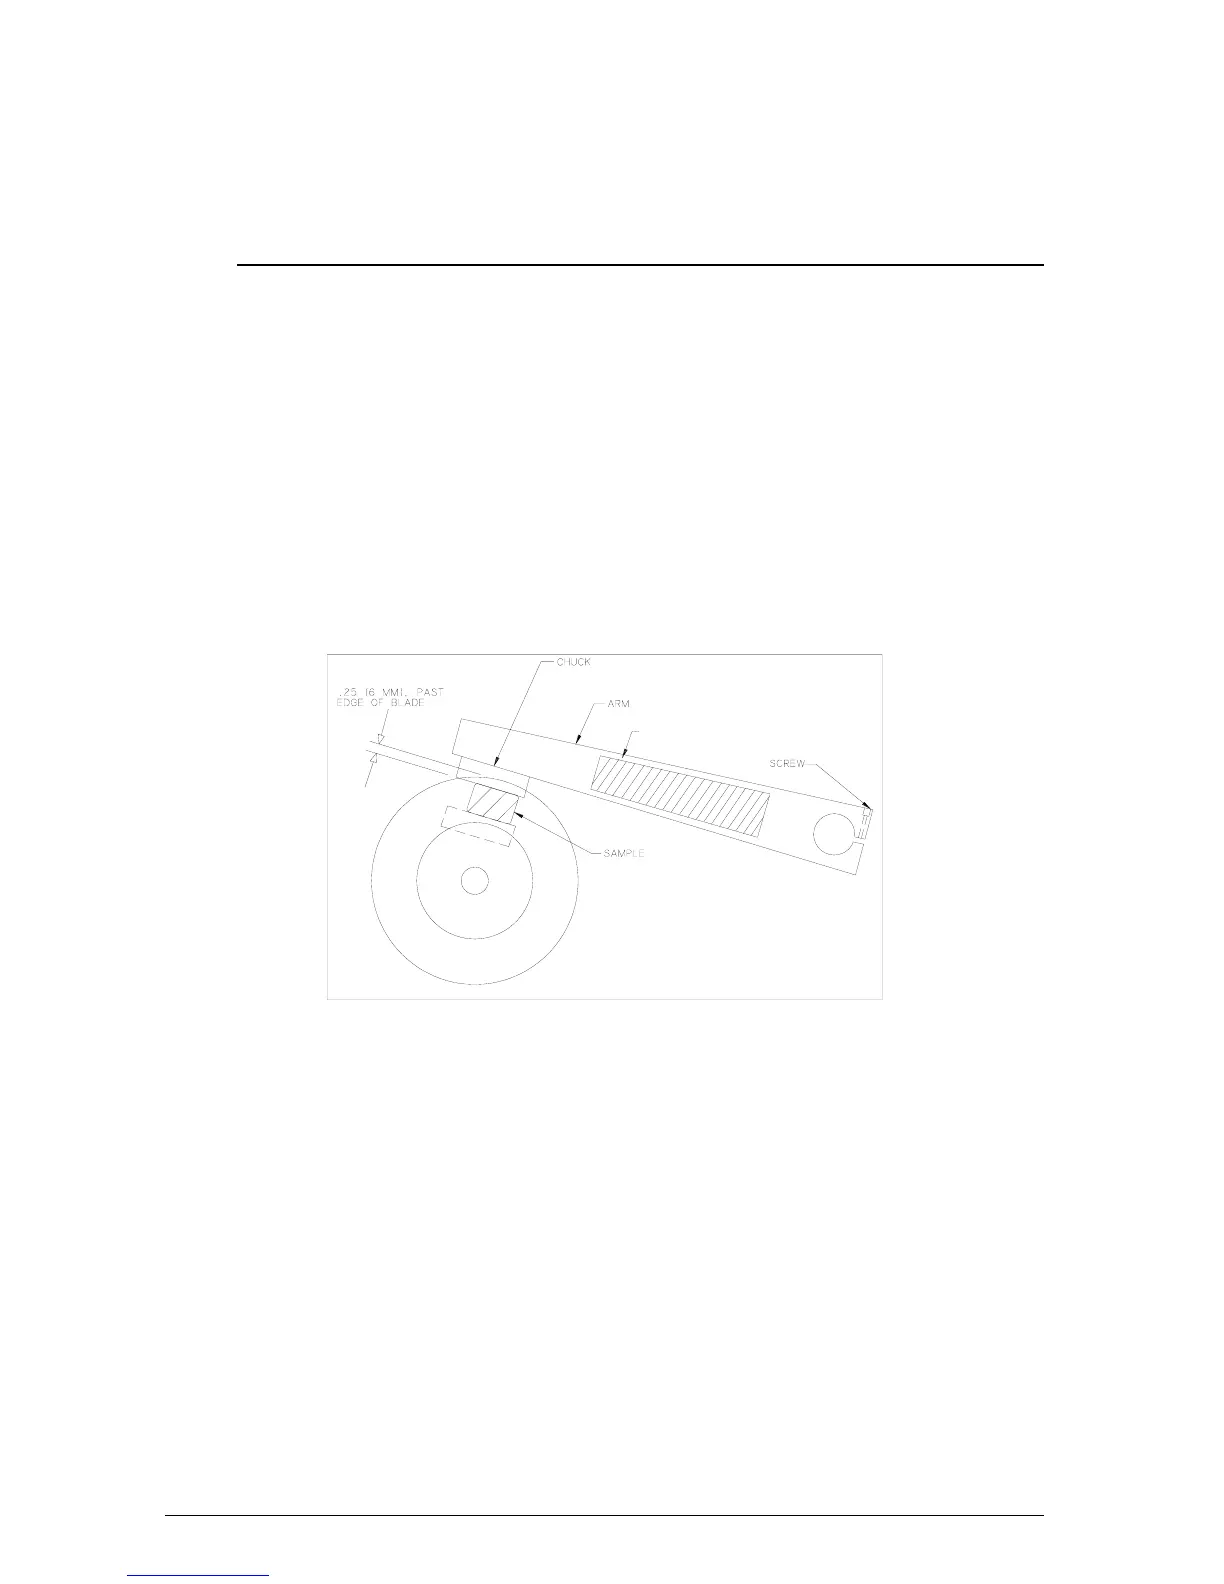
2. Press LOWER Button on the control panel until the Support Arm
and sample are in the position shown in Figure 6A. If the
movement of the sample stops prior to reaching the position
shown, loosen the screw at the rear of the support arm and
adjust the arm as shown. Check to be sure there is enough
clearance so specimen can travel .25 (6 mm) past completion of
the cut to allow for overtravel during the automatic stop cycle.
FORCES APPLIED
NO EXTERNAL
Figure 6A Support Arm Adjustment
3. Raise the Support Arm to a level approximately 1 cm above the
blade.
CAUTION Do not allow the Specimen to contact the Blade while adjusting
the position of the arm. Blade damage may result. Also do not
apply any external force (pushing with fingers) to arm. This will
cause damage to the electronics.
4. Press the ADVANCE Button on the Control Panel moving the
Support Arm until the Specimen is even with the outer surface
of the blade. Press the ZERO DISPLAY Button on the Control
Panel, Figure 3. The MILLIMETER LED Display should now
read zero.
5. Adjust the Position until the desired cut specimen thickness is
measured on the MILLIMETER LED Display. The position has a
25.4mm range and is graduated in 0.005mm increments.
6
MA112480-20 03/06/00