EasyManua.ls Logo

Buehler IsoMet 5000 User Manual

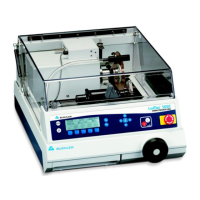
Buehler IsoMet 5000
76 pages
To Next Page IconTo Next Page
Page #1 background imageLoading...
Page #1 background image
MA112780_38.6 9/19/2011
www.buehler.com

Table of Contents

Questions and Answers:

Buehler IsoMet 5000 Specifications

General IconGeneral
BrandBuehler
ModelIsoMet 5000
CategorySaw
LanguageEnglish

Summary

IsoMet 5000 Linear Precision Saw

Warranty

Terms and conditions for product warranty coverage, including duration and exclusions.

Safety Information

Safety Terms

Installation

Electrical Installation

Instructions for connecting the machine to a power source, emphasizing safety precautions.

Blade Installation

Cooling and Lubrication

IsoMet 5000 Controls and Functions

Front Panel Controls

Overview of the buttons, display, and interface elements on the saw's control panel.

IsoMet 5000 Display Screens and Commands

Parameter Fields

Explanation of the various parameters displayed on the LCD screen and how to navigate them.

EMERGENCY STOP

L1 Display Screen

L1 Display Screen Commands

Functionality of the softkey buttons associated with the L1 display screen.

L2 Display Screen

L2 Display Screen Commands

Commands available on the L2 display screen for controlling chuck rotation and start/stop options.

L3 Display Screen

L3 Display Screen Commands

Commands for blade dressing, unit selection (metric/imperial), and language settings.

L4 Display Screen

L4 Display Screen Commands

Commands for memory loading, saving, and DATUM function control.

Specimen Positioning

Hard Home

Procedure to set the blade turret and positioning system to a default home position.

Specimen Loading

Guidelines for selecting and mounting specimens using available chucks.

Positioning a Specimen with an Unknown Thickness (without the Specimen Positioning System Installed)

Positioning a Specimen with a Known Thickness (without the Specimen Positioning System Installed)

Positioning a Specimen with the Specimen Positioning System Installed

Operation

Cutting a Specimen and Serial Sectioning

Basic procedure for initiating a single cut or serial sectioning of a specimen.

Single Cut without the Specimen Positioning System

Single Cut with the Specimen Positioning System with the DATUM OFF Function

Single Cut with the Specimen Positioning System with the DATUM ON Function

Multiple Cuts Using the Specimen Positioning System with the DATUM OFF Function

Multiple Cuts Using the Specimen Positioning System with the DATUM ON Function

Manual Cutting

SMART CUT: Checking and Adjusting the Feed Rate

Blade Dressing

Dressing the Blade

Installing the Specimen Position System

Loading and Saving Methods

To Save a Method

Warning Messages

Maintenance

Automatic Blade Dressing

Trouble Shooting Chart

Related product manuals